Install within minutes and kick off your Appium testing using real devices directly from eclipse
One of Appium Studio for Eclipse major advantages is that it can be installed in minutes and lets you begin your Appium testing quickly and easily. It is a lightweight plugin that you install on top of your Eclipse Software. Once you are done with the installation you can easily connect to real mobile devices directly from Eclipse and start developing and running your automated tests. These devices are hosted at the SeeTest Digital Assurance lab located in Experitest’s global data centers. You can sign up for 600 minutes of free access to these devices.
Watch the following tutorial to learn how to install Appium Studio for Eclipse and connect to real mobile devices.
1. Installing Appium Studio for Eclipse
1.1. Installation Prerequisites
- Download and install Eclipse in version 4.6 or greater (Neon).
- SeeTest Digital Assurance Lab Account. Available for FREE
1.2. Installation process
You can install Appium Studio for Eclipse in one of two ways:
- Install using the Eclipse Marketplace
- Install from file
1.2.1. Install using the Eclipse Marketplace
- In your Eclipse IDE, go to Help → Eclipse Marketplace.
- Type "Appium Studio" in the search field and click Go.
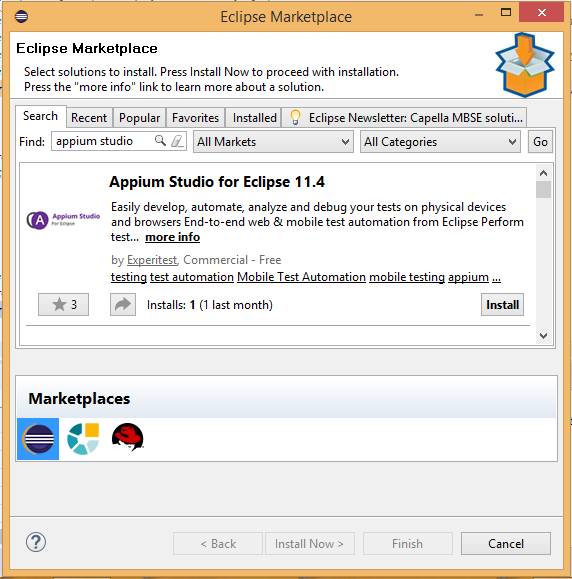
- Click install and approve user agreement.
- Eclipse will reboot before the plugin installation is complete.
1.2.2. Install from file
- Download Appium Studio for Eclipse here.
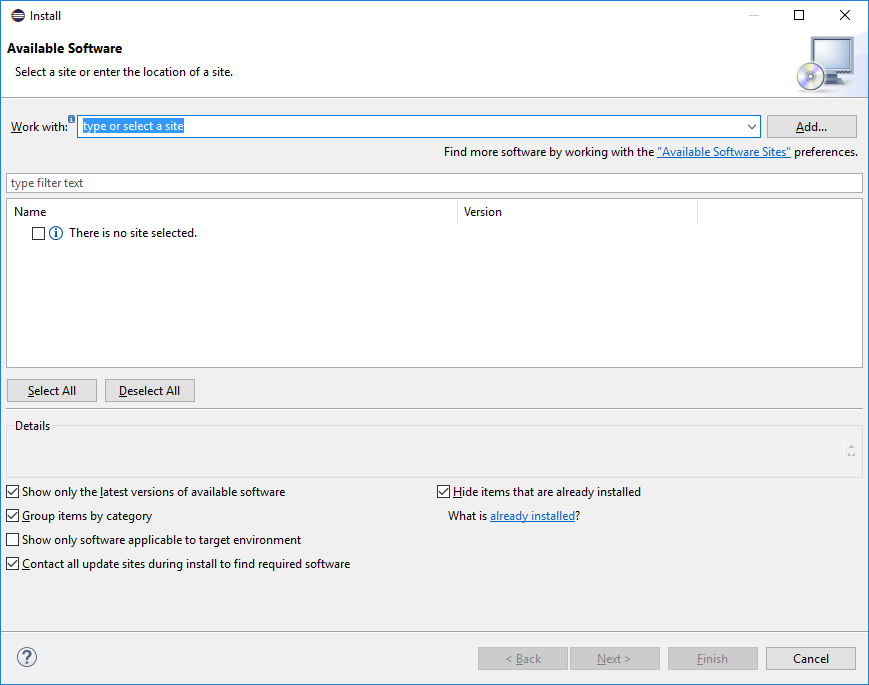
- In Eclipse go to the 'Help' menu and select 'Install New Software...' option.
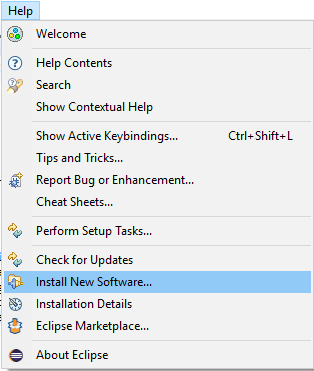
- Click on 'Add'
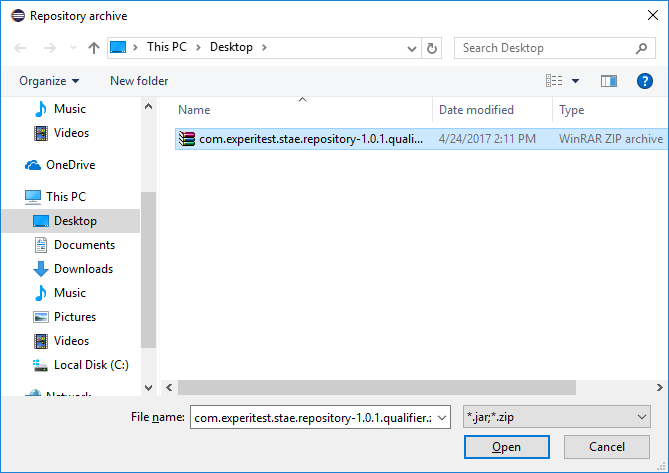
- Click on 'Archive...'
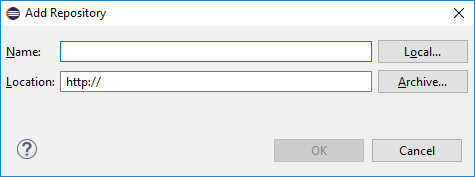
- Select the plugin zip file
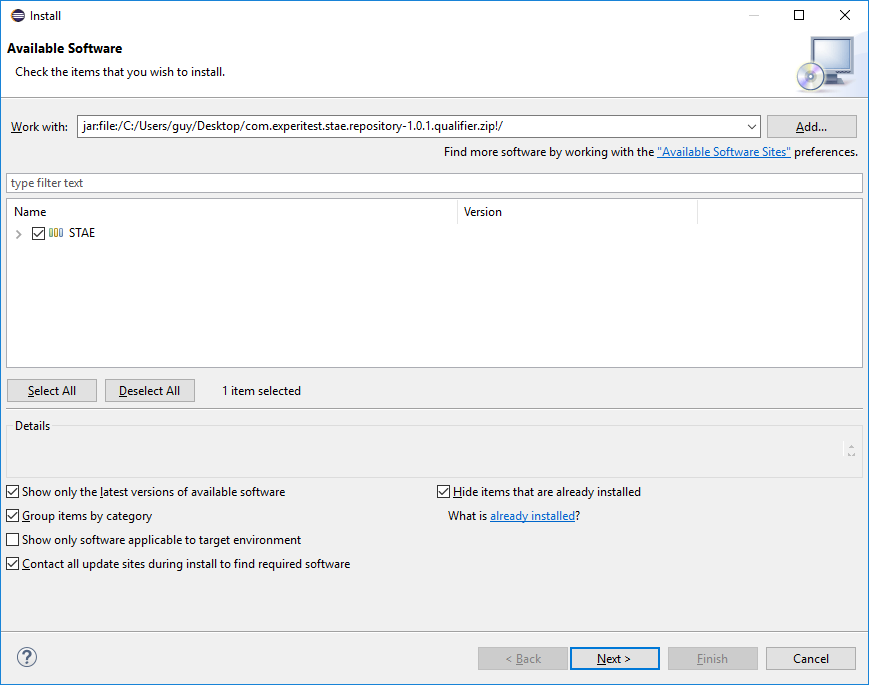
- Select the STAE (SeeTest Automation Eclipse), and click 'Next', accept the terms and Finish.
- Eclipse will reboot before the plugin installation is complete.
2. Connect to remote mobile devices from Appium Studio for Eclipse
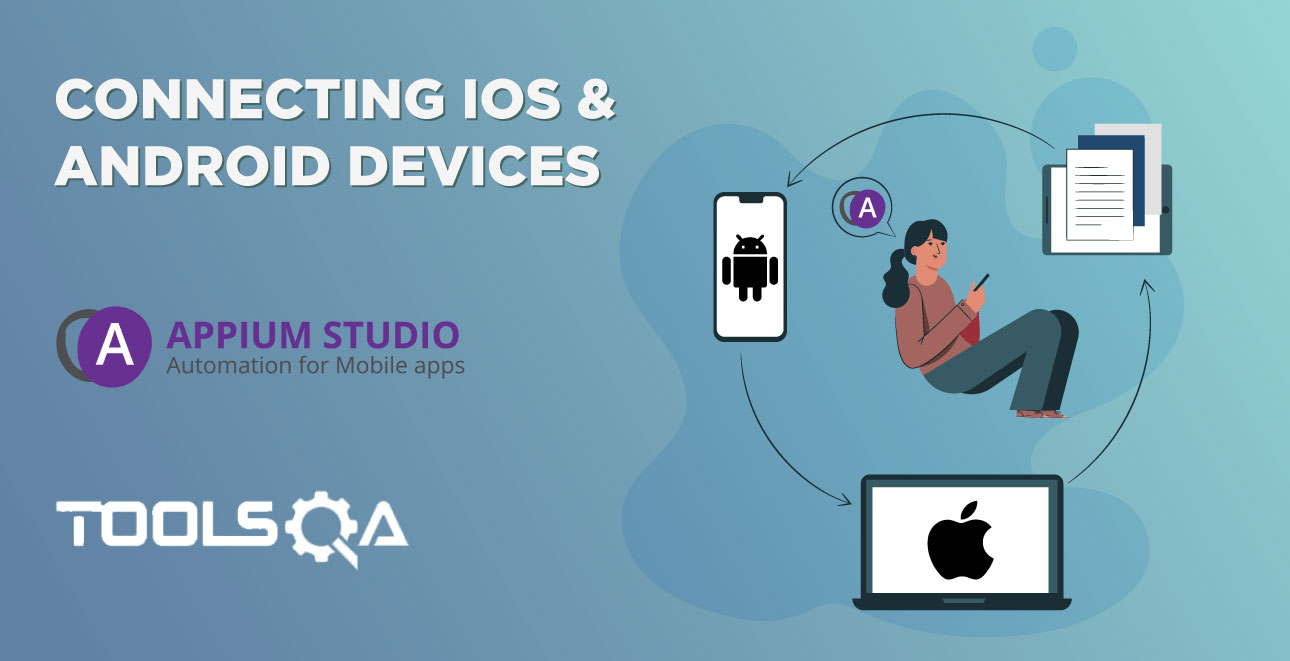
After installing Appium Studio for Eclipse the next step would be to connect it to the SeeTest Digital Assurance lab (by Experitest). The SeeTest lab gives you remote access to hundreds of real iOS and Android devices hosted at the Experitest data centers. Your Free trial will allow you to develop Appium tests against these devices while viewing the device reflection in real time. You can then execute your test on these devices and get quick feedback using the device reflection and a detailed test report. Using these real devices will improve your Appium testing with increased test coverage by gaining access to large range of devices makes, models and OS versions.
2.1. Register to SeeTest Digital Assurance lab
Click here to get your 600-minute FREE trial and gain access to hundreds of real mobile devices hosted at Experitest data centers.
2.2. Generate an access key
In order to work with the SeeTest Lab (cloud) you will need the full cloud URL and an Access Key, to get an Access Key.
The access key represents a combination of username, project name, and password.
Access keys have a limited lifespan, and once a key's expiry date has passed, it can no longer be used for authentication.
Your key is tied to your project and your login password. If you are using multiple projects, each will need to have its own key. If you change your password, your keys will become invalid and you'll need to re-generate them.
Whenever a user is created or a user had changed his password, an access key is generated
- In the Cloud UI, click on user's profile and then click "Get Access Key".
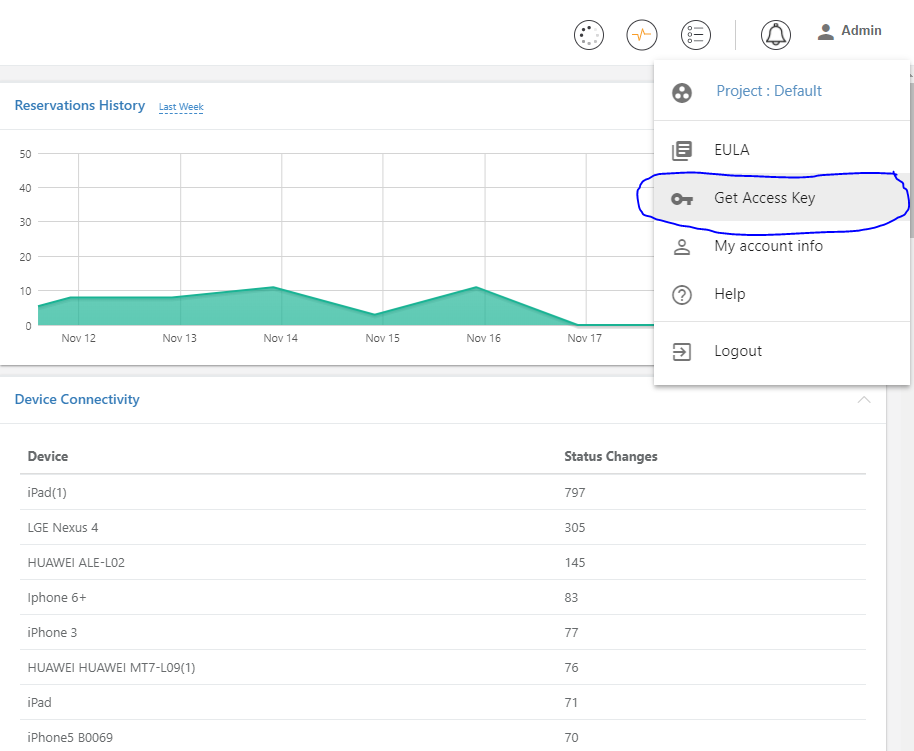
- Access key dialog will open.
- Your new key is now visible in the text box:
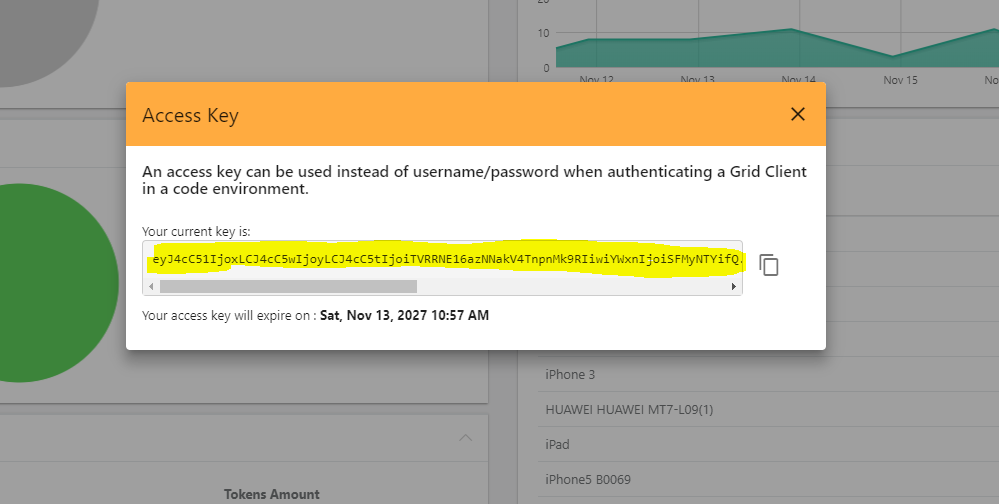
- Make a note of your key text, and click "Close".
To invalidate your keys, simply change your password.
2.3. Configure the connection to the device from Eclipse
- To configure Appium Studio for Eclipse to use a cloud- click on the cloud icon, or in the 'Cloud' menu select 'Cloud Connect'.
- Type in your Access key and the following URL: http://seetest.io
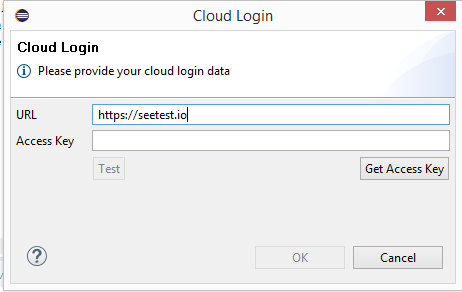
- You are now connected to the cloud.
2.3. Add 'Mobile' to view
- Click on 'Window' --> 'Perspective' --> 'Open perspective' --> 'Other'
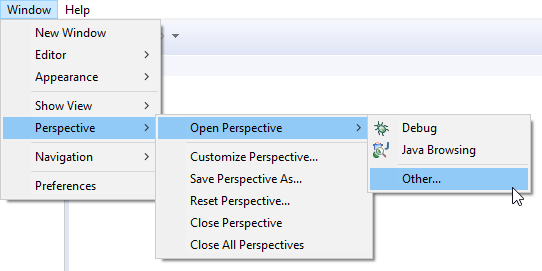
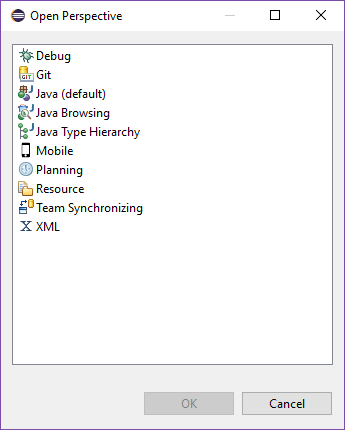
- Choose 'Mobile'
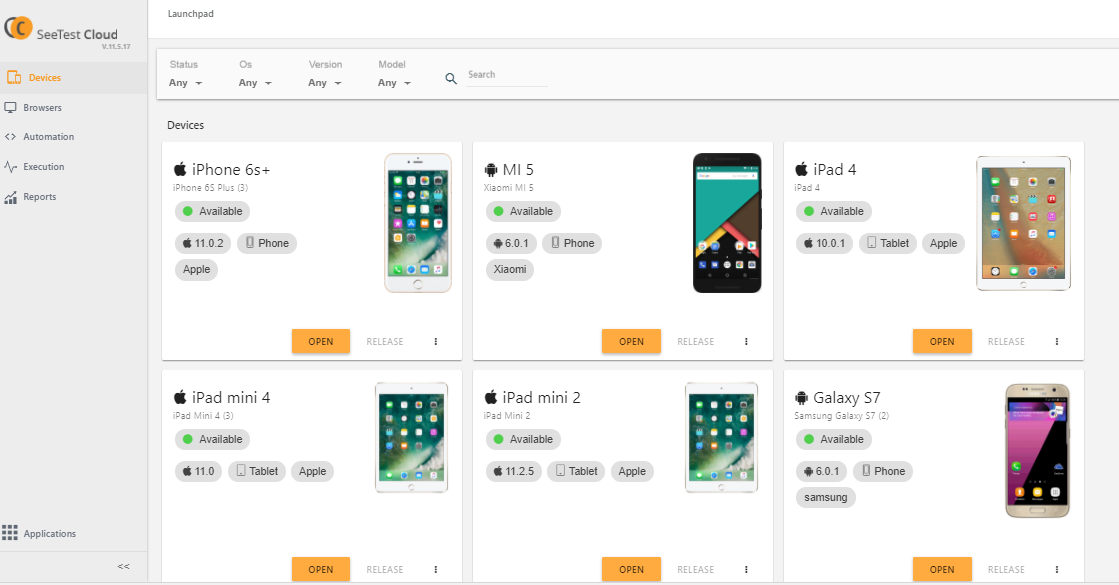
Once connected you should be able to view all the cloud devices in the 'Cloud Devices' view.
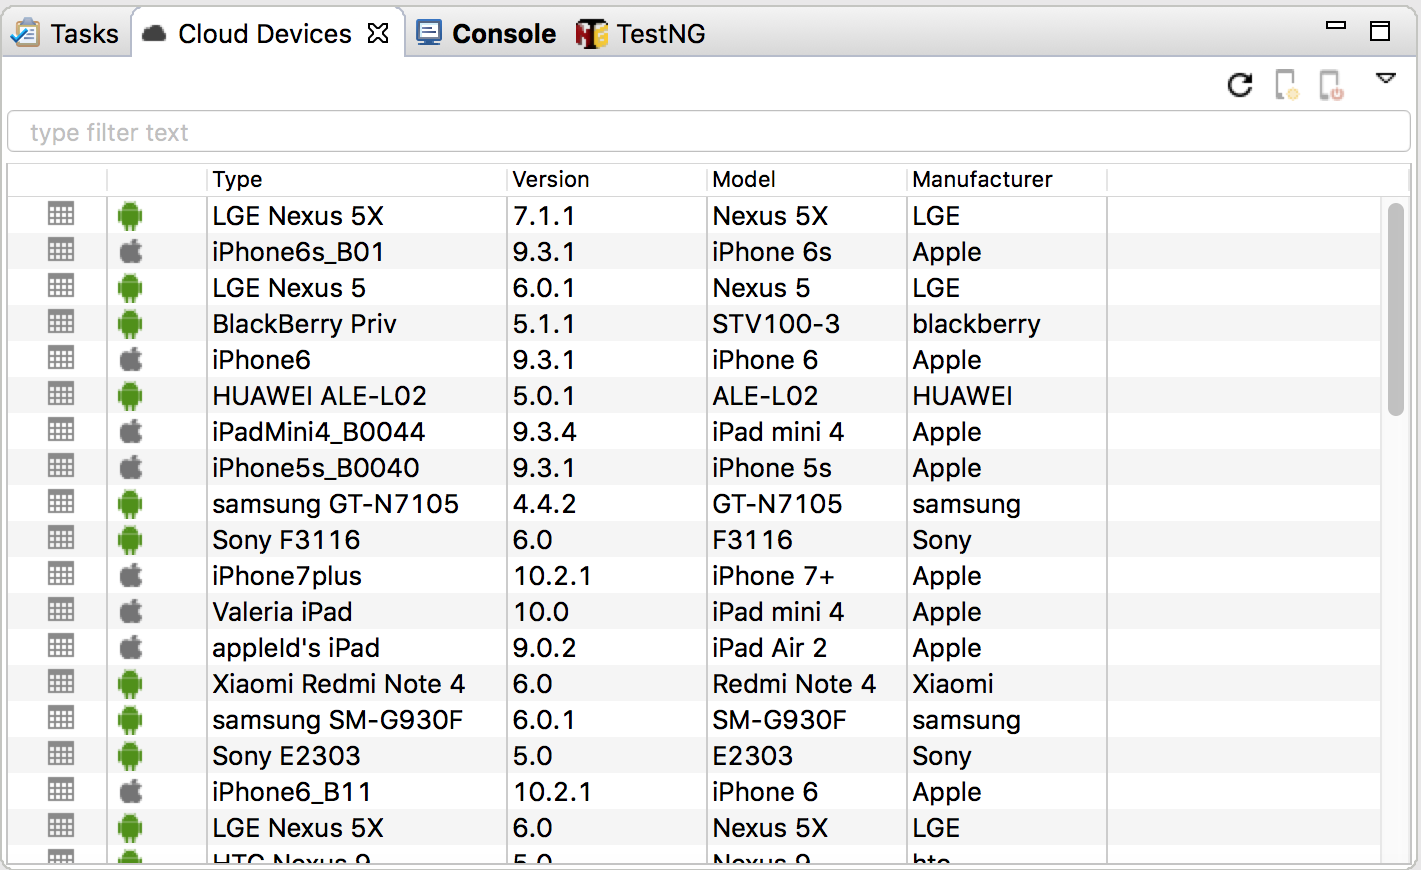
- Choose the device you wish to test on and open it by clicking on the mobile device icon on the right upper corner.