In the API with Postman tutorial, we learnt about the Client and Server Architecture which is the soul of API Testing. In this type of architecture we need a server to get the response. This is a working, online server of an organization. Then why to Mock Server?
Mock Server in Postman
Well, mocking in general dictionary terms means imitating or making a replica of something. So it is pretty easy to decode that here we will replicate the server. We imitate the server in the same way as it would be after being deployed and responding in the same way as it would then. How do we do that? It is simple and straightforward. We need the same response so we need to mock the same APIs as original with the same parameters. Although it would be a replica, we can continue our work and debug without even having a live server. There are plenty of other reasons and tools to work with a mock server. But we are lucky enough that Postman already has an inbuilt feature to deploy a mock server without any external installation. In the coming sections, we will discuss about:
- What is Mock Server?
- Why use Mock Server?
- How to create a mock server in Postman?
What is Mock Server?
A mock server is a server that is not a real server. It is just a fake server that is simulated to work as a real server so that we can test our APIs and check the response or errors. This server is set up in such a way that we get a particular response for a particular request that we desire to see. A mock server behaves like a real server and uses fake APIs, of course, for testing and development purpose. There are a number of reasons for which we require a mock server. Along with the case given above, it is also required in today's testing world. Such requirement is in Agile methodology which is recent and better than waterfall methodology. In this method, testing and development go side by side. For this, a tester needs to have the same requirement as the developer to work simultaneously. For which you need a mock server. In addition to this, few reasons are listed in the next section.
Why we need a mock server?
We need a mock server for a number of reasons. A mock server is required
- To test your own API while developing and before making that API live on the server of your organisation.
- To get feedbacks and bugs quicker.
- For checking the dependencies in your API before it is available to everyone.
- For QA engineers to use this for testing/isolating external dependencies and integration testing.
- By front end developers to use it before actual endpoints are available. This is done while designing the UI so that you don't need to wait for the time till actual endpoints are developed. It saves a lot of time.
- For engineers to develop a prototype of their idea to present it to the investors for funding.
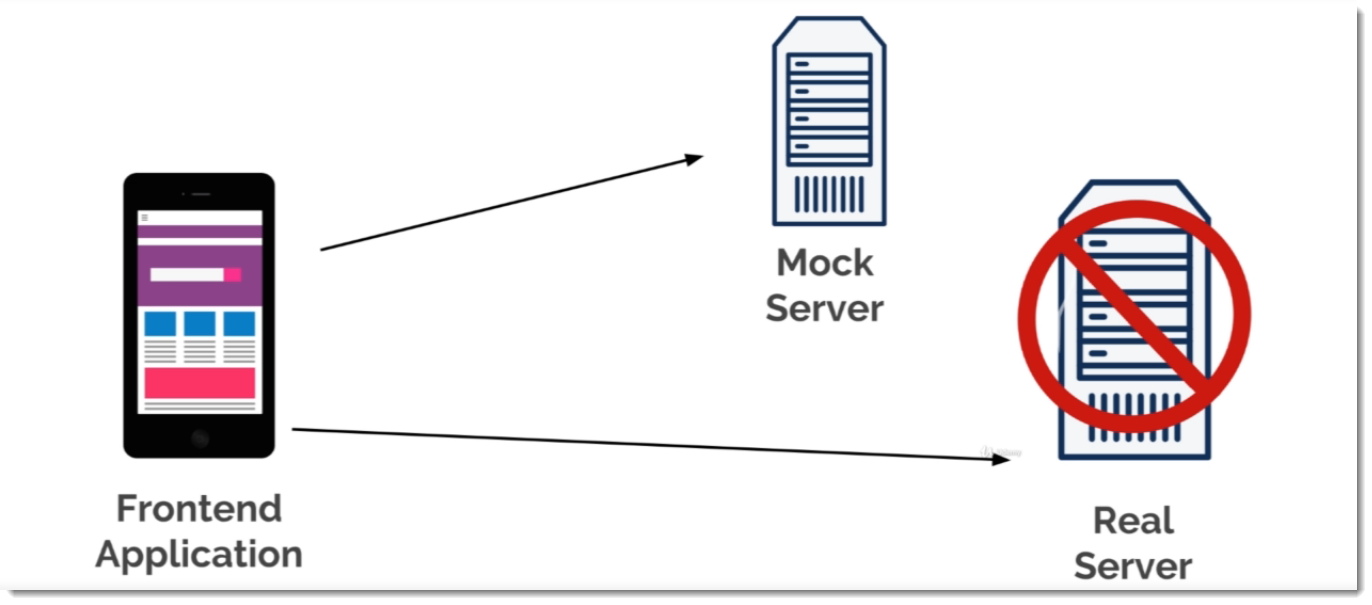
The above image explains the same point mentioned above. A front-end developer needs to develop the UI for which he must know the responses he will get. For the same he cannot wait until the APIs are upon the server, so he uses the mock server in order to achieve the same and save time.
I guess now you must have known that mock server is a pretty important feature for a tester. It is very helpful in both the development and test phases of software. Continuing for the same we will now proceed to create our first mock server.
How to create a mock server in Postman?
In this section, we will create our first mock server in Postman but before that, you must know a few things about the mock server
- The mock server is already integrated inside the postman app and is not required externally.
- The mock server also has CORS (Cross-Origin Resource Sharing) enabled. It means that you won't get any cross-origin errors while using the mock server.
- The mock server is free to use i.e. it is available in free tier of Postman.
Okay so now we will follow these steps to create our first mock server.
1.Click on the New button on the top left corner in the Header section

- Select Mock Server in the Panel
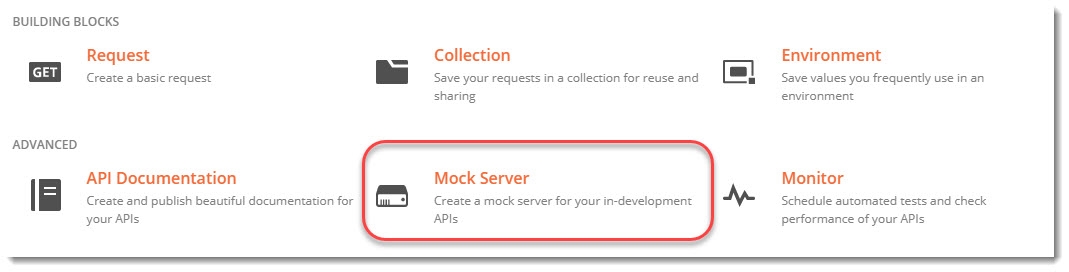
- A new panel will be opened up which will enable us to create requests.
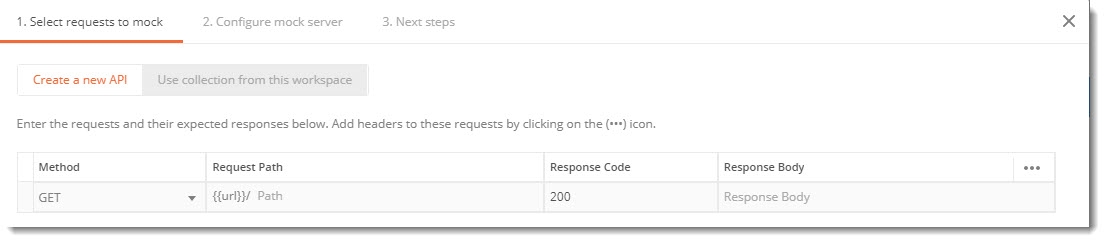
There are different columns in this mock server panel which stands for:
- The first column Method is for the request type methods like GET, Post etc.
- The second Request Path will create the url for your API
- Response code will define the code you wish to get in response (Read more about Response Code)
- Response Body will have the response body that you want to show (Read more about the Response Body)
- Fill up the columns as shown in the image.

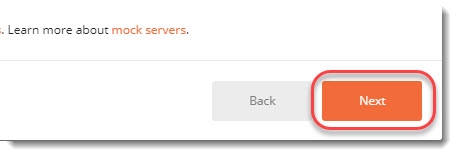
- Click on Next
- Name your Mock Server as per your choice
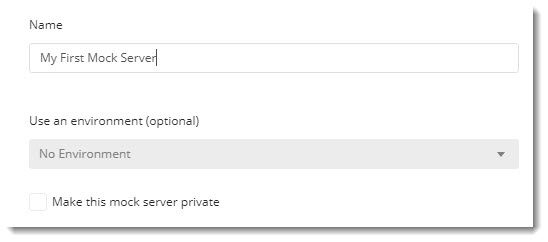
Note: You can make the server private also if you don't want to make your information accessible by everyone but it would require Postman API key in order to access the server. For the beginning, we will keep our server public to reduce complexity.
- Now the next screen will show you the URL through which you can access the server. This is the confirmation screen that your mock server has been created successfully.
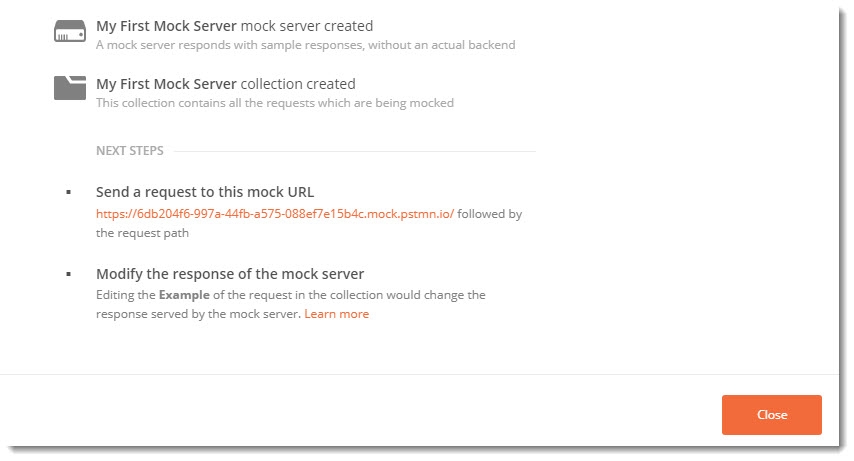
8.Click on Close and close the panel.
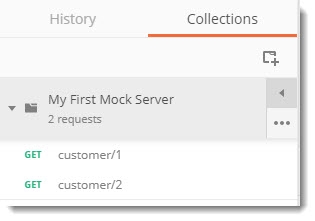
- As soon as you close the panel, you will see that a new collection with the same name has been created with your APIs that you entered.
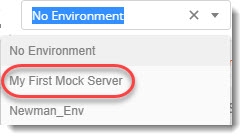
- You can also notice that a new environment has been created as well (Refer Environments in Postman tutorial)
- Select the first request in the collection and hover your mouse over the {{url}} written in the request
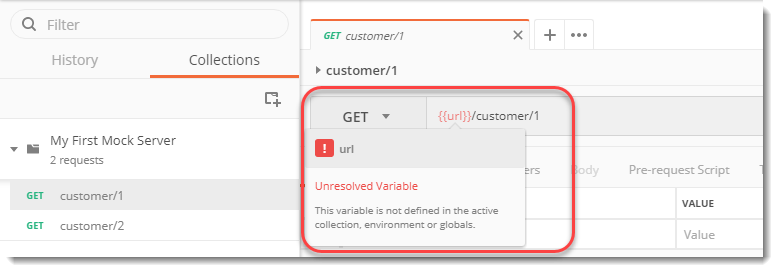
Can you guess why this is an unresolved variable? It's great if you can. Yes, the environment has not been selected. This is why the environment has been automatically created. Change the environment to the one created and hover again.
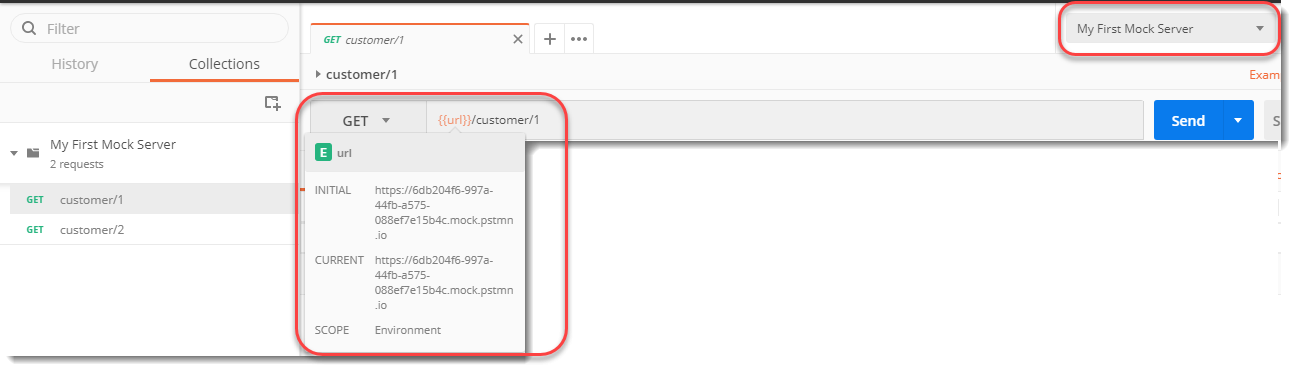
Now the URL value can be displayed. Press the Send button and see the response

We have got the same response as we created while setting up the mock server in the beginning. Check the response code also.
How to get the response in a different format in Mock Server?
It is very easy to get the response of Mock Server in other formats also. Since we received text response in the above section, we will now see how to get the response in the most common format i.e. JSON.
Follow steps 1 to 3 in the above section.
In the server creation panel, instead of writing plain text, write the response body in JSON format.
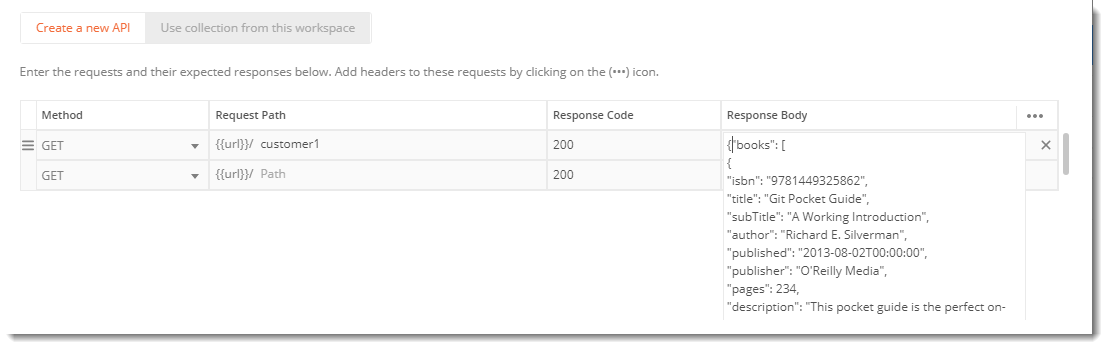
The above code is the data about a book store with different values of different books. The code is written below.
{ "books": [ { "isbn": "9781449325862", "title": "Git Pocket Guide", "subTitle": "A Working Introduction", "author": "Richard E. Silverman", "published": "2013-08-02T00:00:00", "publisher": "O'Reilly Media", "pages": 234, "description": "This pocket guide is the perfect on-the-job companion to Git, the distributed version control system. It provides a compact, readable introduction to Git for new users, as well as a reference to common commands and procedures for those of you with Git experience.", "website": "https://chimera.labs.oreilly.com/books/1230000000561/index.html" }, { "isbn": "9781449331818", "title": "Learning JavaScript Design Patterns", "subTitle": "A JavaScript and jQuery Developer's Guide", "author": "Addy Osmani", "published": "2012-07-01T00:00:00", "publisher": "O'Reilly Media", "pages": 254, "description": "With Learning JavaScript Design Patterns, you'll learn how to write beautiful, structured, and maintainable JavaScript by applying classical and modern design patterns to the language. If you want to keep your code efficient, more manageable, and up-to-date with the latest best practices, this book is for you.","website":"https://www.addyosmani.com/resources/essentialjsdesignpatterns/book/" }
] }
Create the server with the name of your choice (I used JSON RETURN as the name) and then press send after selecting the correct API and Environment.
You will receive the response in JSON format now. You might get HTML directly but change the format to JSON from the dropdown to beautify the response as shown.
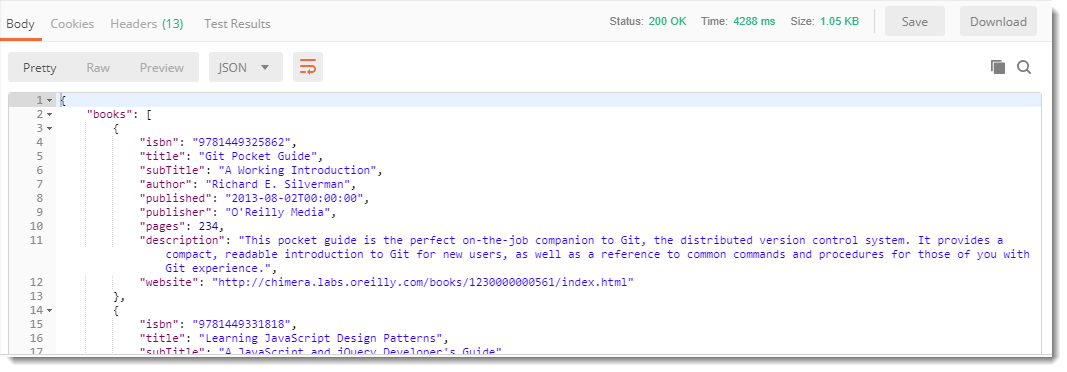
NOTE: Don't forget to select the appropriate environment before sending the request.
By this, we have created and understood a mock server in Postman. You can use different formats to practice yourself. I hope you liked this tutorial. We will continue to our next tutorial, till then, keep exploring mock server and create your own requests.