In the last tutorial we learnt everything about OAuth 2.0 Authorization, its's advantages, meaning and workflow. This tutorial is designed to make you completely understand the concept along with the practical example. OAuth 2.0 Authorization with Postman
OAuth 2.0 Authorization with Postman?
In this tutorial we will be using Postman to see the workflow of OAuth 2.0. For this, we will use imgur website API which is an online image sharing community. You can also use any other company's API which uses OAuth 2 flow.
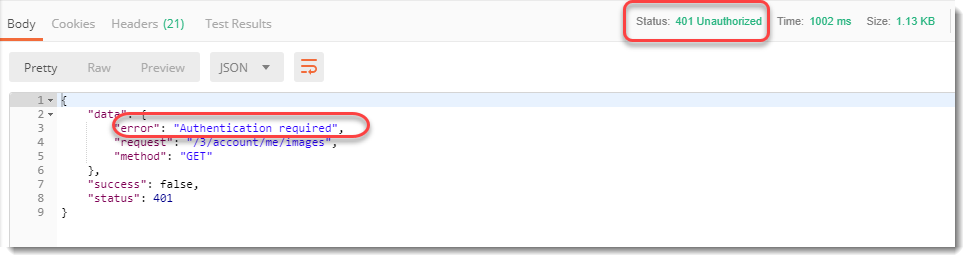
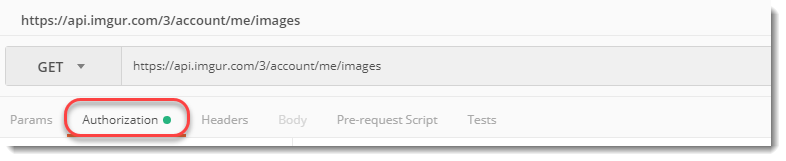
But before that lets just see what happens when we hit the secured endpoint without authorization.
1.Go to Postman and hit the endpoint: https://api.imgur.com/3/account/me/images

Note: This is the endpoint for fetching your images from your account in imgur.
2.Authentication error will occur and 401 Unauthorized status will be returned. This means that this endpoint requires Authentication to access the resource.
Let's see then how to generate an Access token.
How To Generate Access Token using OAuth 2 in Postman?
Remember in the last tutorial about the OAuth 2.0 Authorization flow we discussed that an access token can be generated through the authorization server. But to hit the authorization server, your application must be registered. We will be following the same flow here too.
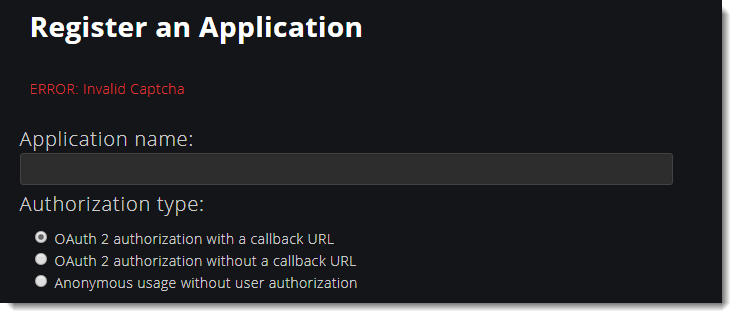
- In this section we will generate the token using OAuth in Postman. For registration, first sign up to imgur website and then go to the following URL to register your application. Make sure you are logged in to imgur using your username and password.
https://api.imgur.com/oauth2/addclient
- Fill the boxes with appropriate inputs as shown below
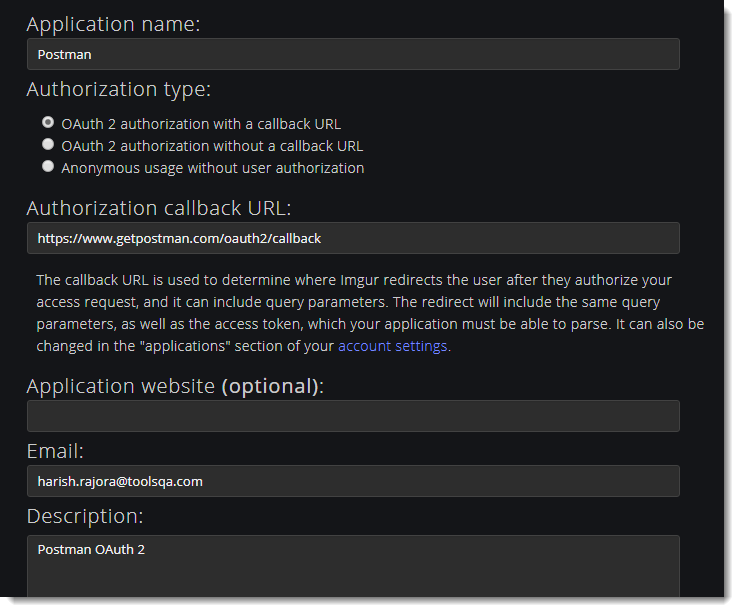
Note: Callback URL is used to know the registered address of the application from which you will be calling the imgur api. This should be same in both application and the server. This is the registered server address of the application from which you will be calling.
- Hit Submit and you will receive a Client Id and Client Secret.
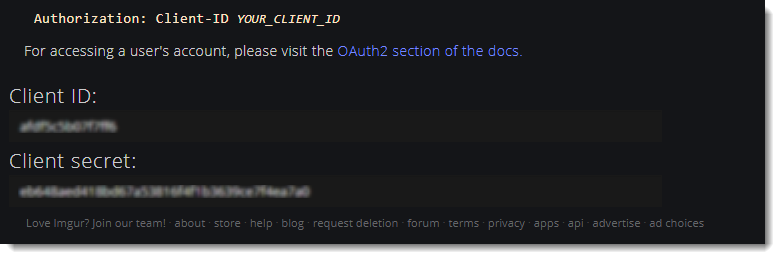
Note: Remember these are confidential values and should not be shared. To learn more please refer OAuth 2.0 tutorial.
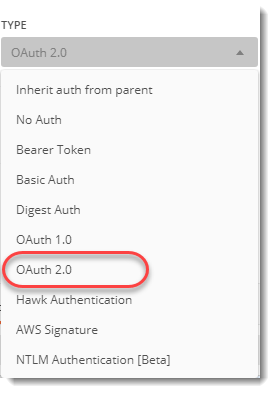
- Go to your Postman application and open the authorization tab.
- Select Oauth 2.0 authorization from the drop-down.
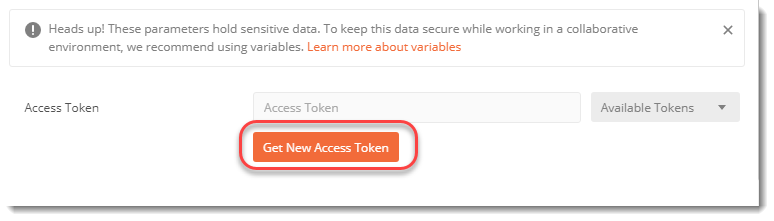
- Select Get New Access Token from the same panel.
- A new panel will open up with different values. Fill up the values as shown in the image.
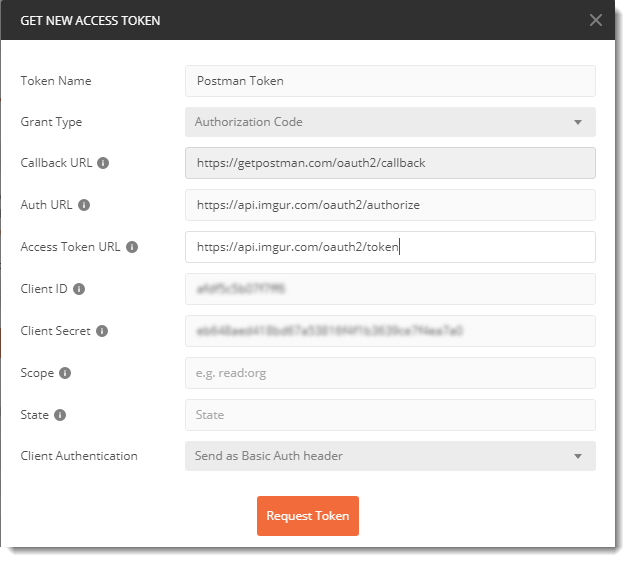
Note: Client Id and Client secret are the same which you got during registration of your application.
This information about the URL can be achieved at Imgur Documentation. If you are practicing through any other website, you will always get this information under the documentation part of the website. Normally this page is hard to find from the home page, it is better you search directly to any search engine. For example Facebook API documentation or Twitter API documentation. Each and every step will be written in the documentation.
- Press Request Token and a new window will open up asking for your credentials.
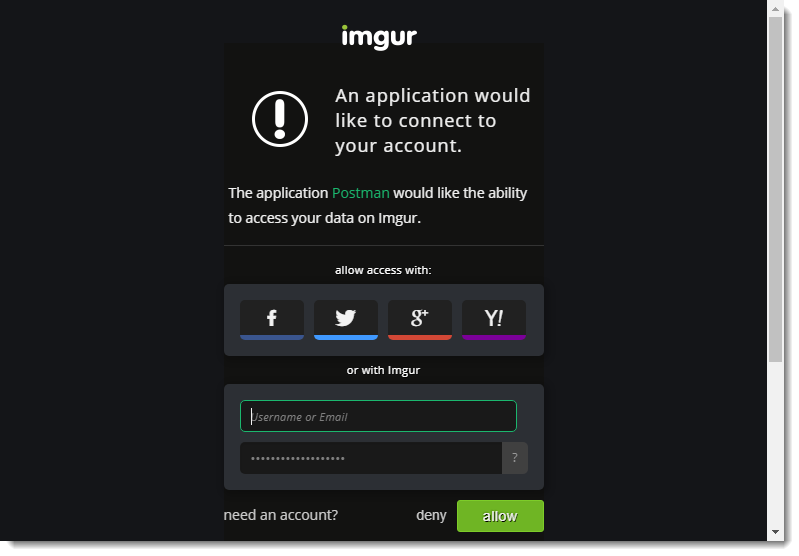
- Fill up your credentials and login into the imgur website. After pressing allow, you will receive the access token in the following panel.
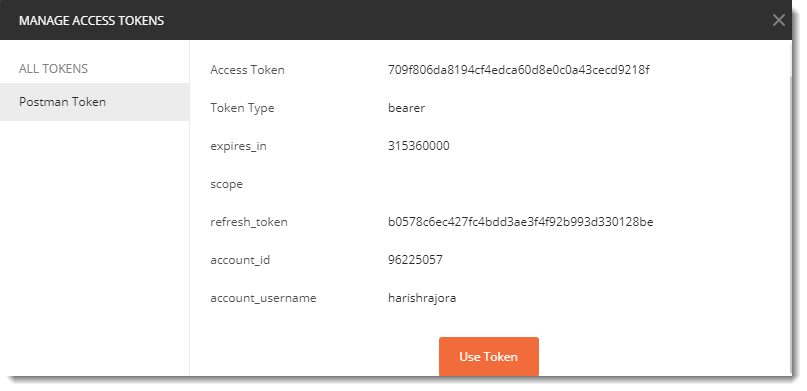
Note: An access token in Postman will expire in the number of seconds given in the above panel. This depends completely on the website server you are accessing like imgur here. The above panel shows that this token will expire in 315360000 secs. Till this time you can use the endpoint any number of times. You need to request a new token after the specified time has passed i.e. the token has expired.
- Press click on Use Token in the above screen and then select Postman Token from the drop-down panel.
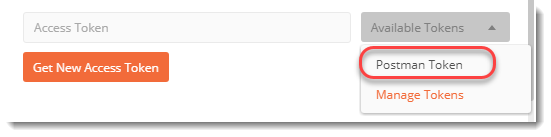
- The token will appear as soon as you click on your token name.

- Press the Preview Request to update the header automatically
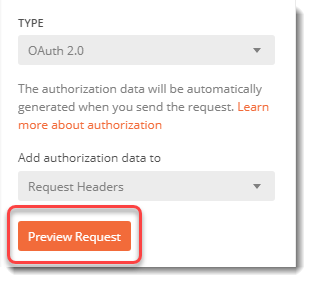
- You can also visit Header tab to see the token value entered.

- Now press send to the same API we entered in step 1 and see the response.
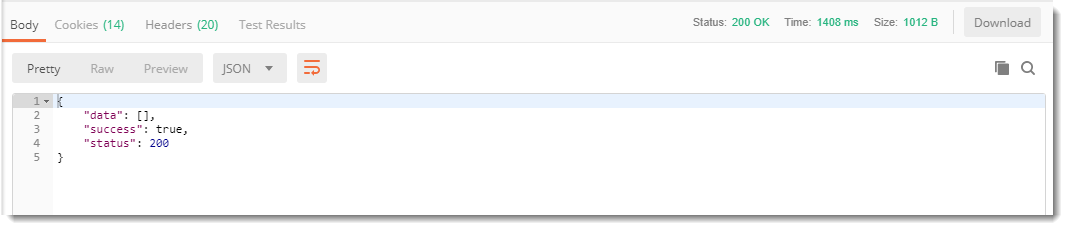
We have got the correct status and found that our data is zero. This means we were able to get into the server and access our account information through a third party application which was postman. Hence we were authorized using OAuth 2.0.
You can also practice using other website. Working with OAuth 2 is a very important feature and since it comes under security, it is highly essential. We will now move onto our next tutorial in which we will learn about session variables.