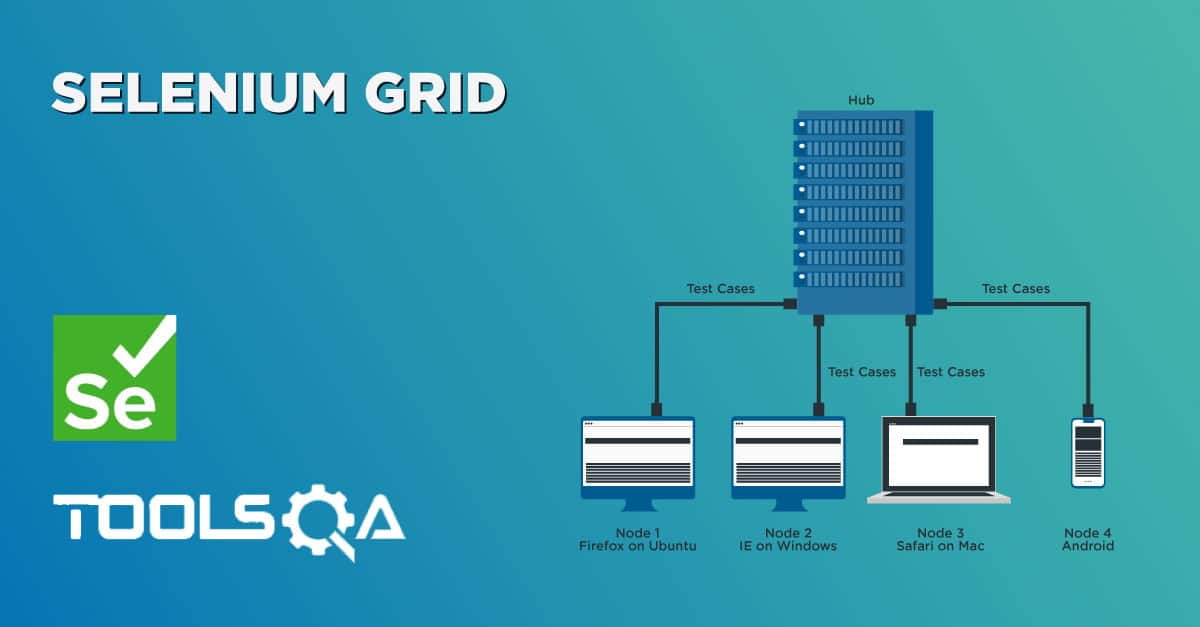
In the previous chapter, we got to know about What is Selenium Grid, its benefit and it's architecture. In this chapter, we will learn to use Grid and go through the process of Selenium Grid – How to Easily Setup a Hub and Node
- First, configure the hub.
- Secondly, configure the nodes.
- Then we will develop the script and execute
For the sake of simplicity, we will just use the one machine to set up Hub and will set up Node as well on the same machine to run test. But I will be mentioning the changes as well, which is required to do to run test on different machine.
Step 1 : Download Selenium Server and Set up Selenium GRID Hub
- Download the latest Selenium Server file from http://docs.seleniumhq.org/download/.
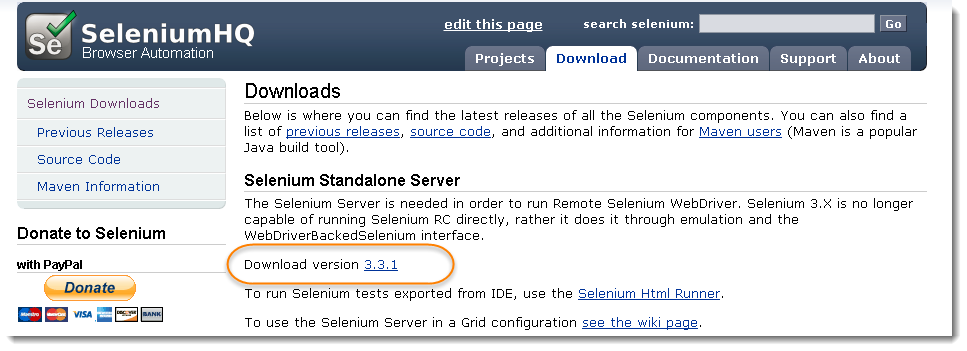
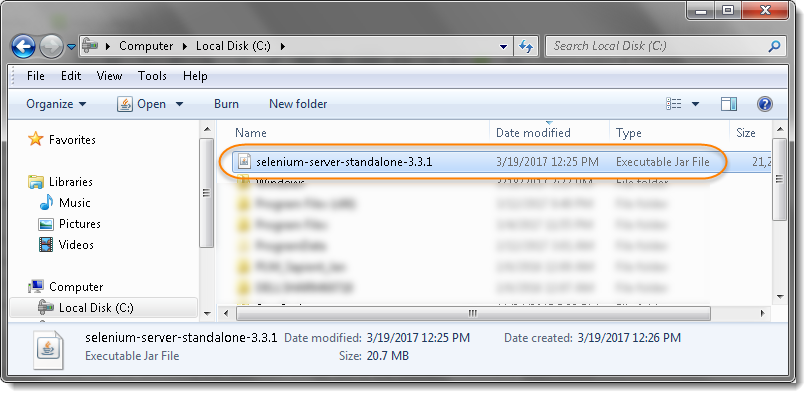
2) You can place the Selenium Server jar file anywhere in your hard drive. But for the purpose of this tutorial, place it on the C: Drive of Hub Machine. After doing this, you are now done installing Selenium Grid.
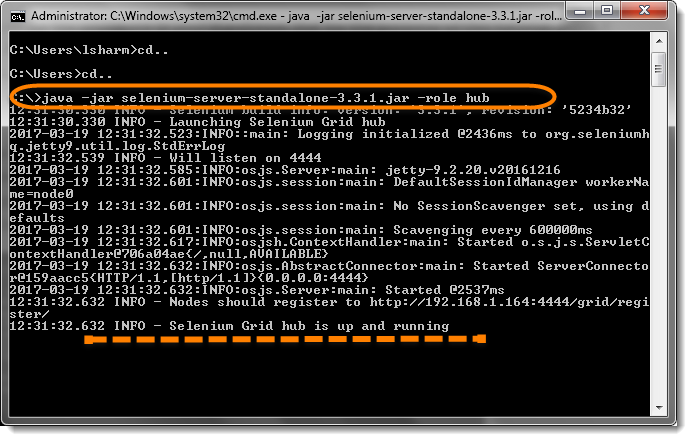
3) We are now going to launch a hub. Open command prompt and navigate to the C: Drive, because that is the directory where we placed the Selenium Server. On the command prompt, type java -jar selenium-server-standalone-3.3.1.jar -role hub
Commands says that start the Selenium Server and give it a Role of Hub. The hub will be launched and command prompt should look similar to the image above.
Note:
- Make sure you change the version number from the command accordingly.
- Your Grid server will up and running till the time command prompt window is opened, if you close it, that will also stop the selenium server.
- Selenium Grid, by default uses port 4444 for its web interface. To start the same on other port, use this command: java -jar selenium-server-standalone-3.3.1.jar -port 4455 -role hub
- To verify whether hub is running, open the browser and navigate to http://localhost:4444
Console gives the information what is available on the Hub. As of now it will be blank, as there is no machine connected to it.

- Now click the Console link and then click View Config. The config of the hub would be displayed like this:
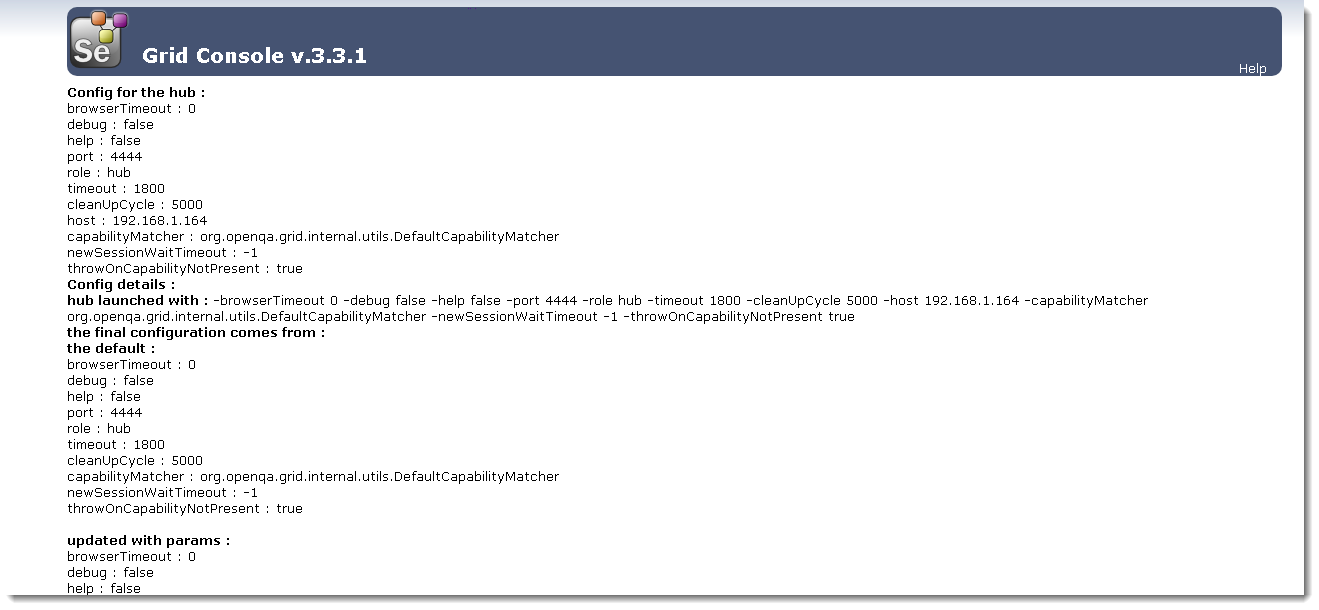
This page contains lots of details which may or may not be necessary for your test. We will cover these in the later tutorial of Grid.
Step 2 : Set up Node Machine
Ideally the Node Machine has to be different from the Hub Machine, but just to maintain the simplicity of this tutorial, i am setting up Node on the same machine where I have Hub running. But the steps are completely same, aspect that the IP address gets changed to the Node Machine IP Address.
- Also we need to find out the IP Address of the Hub Machine. Go to Command Prompt and type IPCONFIG to find out the IP Address.
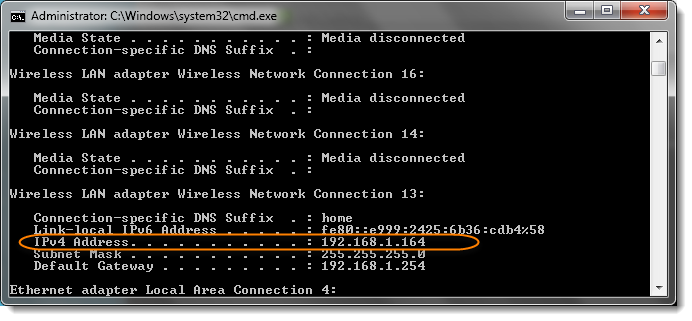
This means that the IP Address of the Hub Machine will become http:// + Hub Machine IP Address + Hub Port = http://192.168.1.164:4444
-
It is required to download the Selenium Server jar on the Node Machine as well. As i am setting up the Node on the same machine, i do not need to download the Selenium Server jar again.
-
Open Command Prompt. If you are setting up Node on different machine, log on to that machine and open Command Prompt.
-
To register Hub Machine with Node Machine, type;
java -jar selenium-server-standalone-3.3.1.jar -role node -hub http://192.168.1.164:4444/grid/register -port 5555
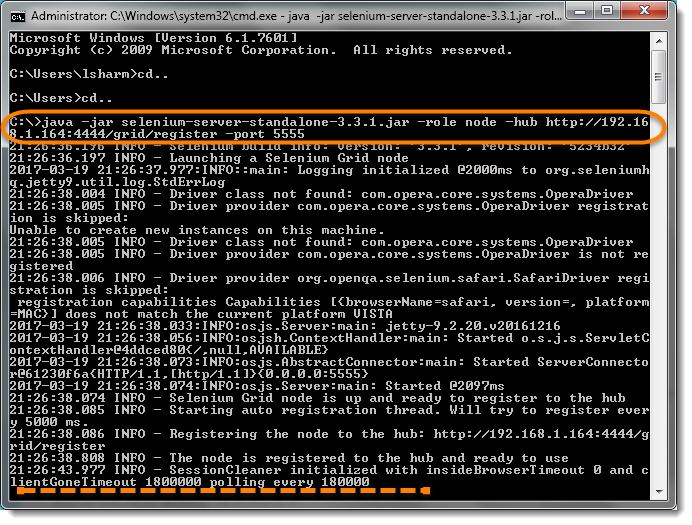
- After executing the command then return to the Hub and navigate the URL http://localhost:4444 or http://192.168.1.164:4444 and the hub will now display the node which is attached to it.
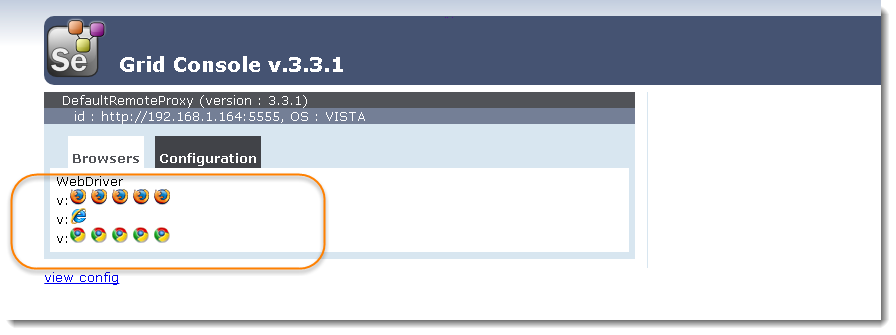
Note : The above Console page gives the information about the Node Machines, which all are connected to the Hub. It provides the information about the Node Machine IP Address, OS Type, Browsers etc. You will find 5 Chrome, 5 Firefox and 1 IE browser under Browser section like above. This indicates that by default you can use 5 Chrome, 5 Firefox and 1 IE browser.
In case of more machines attached, you would see more block on the Console Page.
Step 3 : Write a Test Script
Below is a simple WebDriver code that you can create in Eclipse. Once you run it, automation will be performed on Node Machine.
import org.openqa.selenium.WebDriver;
import org.openqa.selenium.remote.DesiredCapabilities;
import org.openqa.selenium.remote.RemoteWebDriver;

import java.net.MalformedURLException;
import java.net.URL;

public class Grid_SetUp {
	public static WebDriver driver;

	public static void main(String[]  args) throws MalformedURLException, InterruptedException{

 		String URL = "https://www.DemoQA.com";
 		String Node = "https://192.168.1.164:4444/wd/hub";
 		DesiredCapabilities cap = DesiredCapabilities.firefox();

 		driver = new RemoteWebDriver(new URL(Node), cap);

 		driver.navigate().to(URL);
 		Thread.sleep(5000);
 		driver.quit();
 	}
}
Explanation
- The URL will be IP Address of Hub Machine + Hub Port + /wd/hub = "https://192.168.1.164:5555/wd/hub";
2) RemoteWebDriver accepts the RemoteAddress which is of type URL and it also accepts the Desired Capabilities.
WebDriver driver = RemoteWebDriver(new URL(Node), cap);
Note: In case of many Node Machines attached to a Hub machine, it is a duty of Hub to decide at which Node the test should be executed. User will only passed there requirement in the test script with the help of Desired Capabilities. Hub will automatically check each and every node for the specified requirement and execute the test on the first node which satisfy the requirement.