The first step in the journey of Selenium Cucumber Framework is to decide one End 2 End Scenario to automate and start building up framework components on top of that. In this article, we’ll show you how to get the various parts and pieces, plus write and run one End 2 End test of our Demo Application. It’s easy to get up and running with WebDriver using Eclipse and the Java bindings on Windows.
Pre-Requisites to write Selenium Automation Test
- Set Up Java on System
- Set Up Eclipse IDE or any other IDE
- Set Up Maven
- Create a new Maven Project
- Create a 'resources' folder for Cucumber Tests
- Add Selenium to Project
- Add Maven Compiler Plugin
Step 1: Set Up Java
Selenium & Cucumber require a version of Java to be on the system you’re running your tests from. Selenium Java bindings require only the Java Runtime Environment (JRE), but you’ll be fine if you have either the Java Development Kit (JDK) or JRE installed. please follow our tutorial to Set up Java on Windows.
Step 2: Set up Eclipse IDE
Eclipse is one of several widely popular editors for Java. It’s an open-source project maintained by the Eclipse Foundation, and has a huge marketplace of add-ons, tools, and customization. Please follow our tutorial to download, install and set up Eclipse on Windows and set up Eclipse on Mac.
Step 3: Set Up Maven
Selenium WebDriver is great for browser automation. But, when using it for testing and building a test framework, it feels underpowered. Integrating Maven with Selenium provides following benefitsApache Maven provides support for managing the full lifecycle of a test project.
- Maven is used to define project structure, dependencies, build, and test management.
- Using pom.xml(Maven) you can configure dependencies needed for building testing and running code.
- Maven automatically downloads the necessary files from the repository while building the project.
To set up Maven on Windows, please follow the article Steps to Install Maven on Windows.
Step 4: Create a New Maven Project
Eclipse works with the concepts of workspaces, folders, and spaces where you work with your projects. Teams use different approaches for workspaces and project structures but try to follow and stick with the default structure.
To create a new maven project, please follow our article Steps to create a New Maven Project. Just to make sure that you specify below values to Maven Archetype Parameters:
- Group ID: ToolsQA
- Artifact ID: CucumberFramework
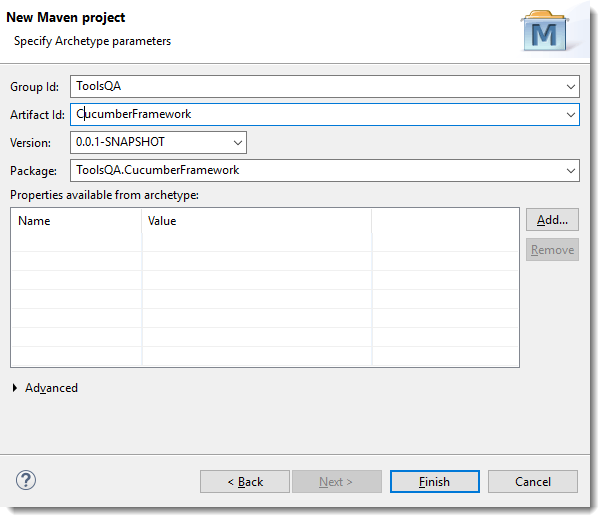
Note: Although you can have any names, but just for the ease of this tutorial, it is better to keep the same naming conventions across the project. It helps in resolving issues while copying pasting the code. Also, space is not allowed within ArtifactId.
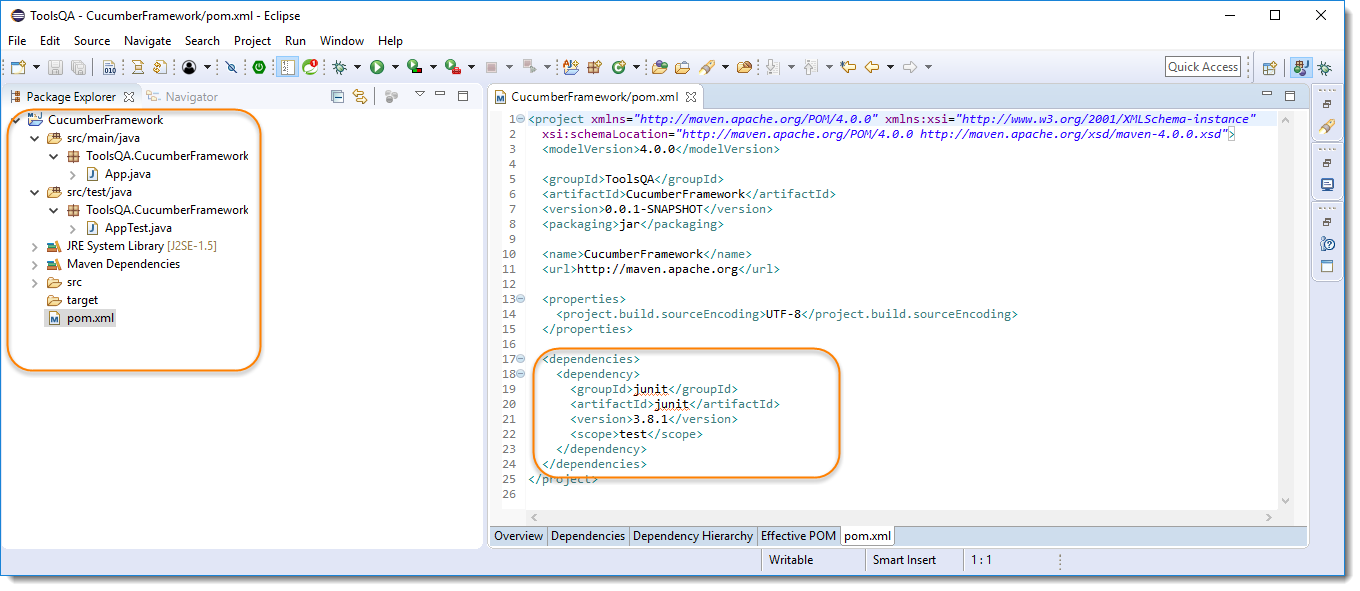
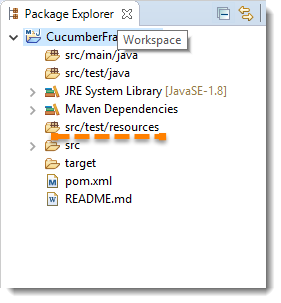
Your newly created project will look like below.
Step 5: Create a 'resources' folder
-
First, we will delete ToolsQA.CucumberFramework packages from both src/main/java and src/test/java folders and along with that App.java & AppTest.java file will also be deleted, which is just sample project files created by default by Maven. To delete the files, just right click on the package and select Delete. Do the same operation for both the packages.
-
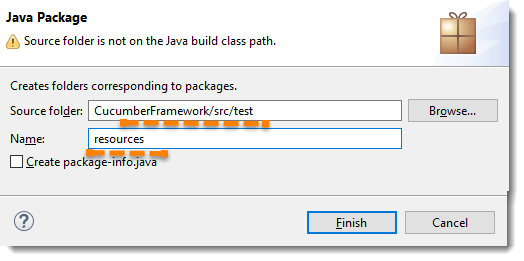
The second is to create a new resources folder under src/test/. As a standard, we keep Cucumber feature files in resources folder. And in my case, resources folder did not show up by default. So I will create my own. Right-click on the src/test/java and create a New Package. Make sure to add it under the correct path which is CucumberFramework/src/test and specify the name as resources.

At first, it may appear as a folder, not as a package. Like in the above image. In case of this, just right click on the root project and select Maven >> Update Project..
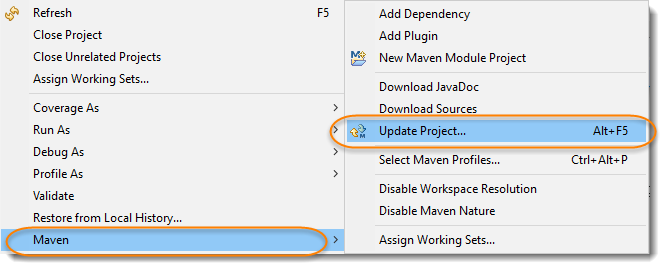
Note: Any changes in Maven POM, or any folder structure. Always update the project using maven to reflect the latest changes. As maven make sure to download all the dependencies and plugins at the update.
Just check/tick your project and click Ok.

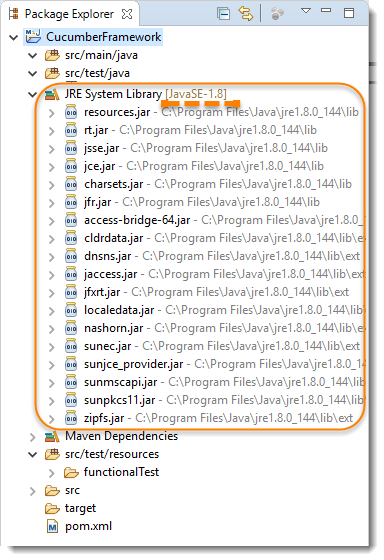
Now, the resources folder should be displayed as a package.
Step 6: Add Selenium to project
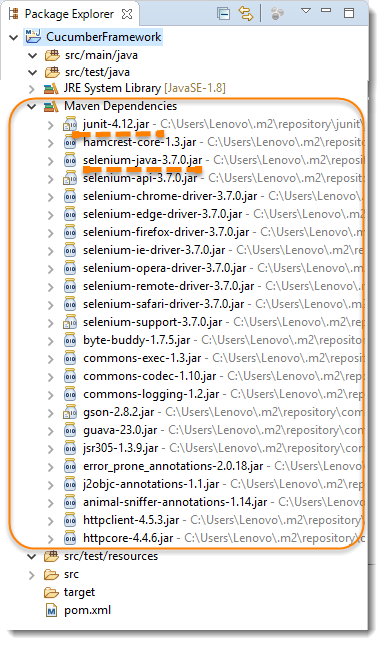
As we are managing project using Maven, we will be adding all the dependencies using maven pom only. To add Selenium, go to Selenium Maven Repository click on the latest version and there you can find the dependency. Copy-paste it in the project pom.
  <dependency>
	    <groupId>org.seleniumhq.selenium</groupId>
	    <artifactId>selenium-java</artifactId>
	    <version>3.7.0</version>
	</dependency>
Note: Also make sure to add dependency tag within the dependencies tag like below:
<dependencies>
	 <dependency>
		<Your Project Dependency
	 </dependency>
  </dependencies>
Also, we like to update the JUnit version as well. It can be possible that by default maven put the old version of the Junit. Which happened in my case, it is JUnit 3.8.1. But the latest is 4.12. To update the version, open the pom.xml from the project and replace the Junit Dependency with below:
	 <dependency>
	    <groupId>junit</groupId>
	    <artifactId>junit</artifactId>
	    <version>4.12</version>
	    <scope>test</scope>
	 </dependency>
Note: As of 19th Dec'17, the latest JUnit version is 4.12. Always use the latest Junit version.
Make sure to Save the pom file and update maven again to reflect the changes by right click on the root project and select Maven >> Update Project..
Step 7: Set up Maven Compiler Plugin
The Compiler Plugin is used to compile the sources of your project. Also note that at present the default source setting is 1.5 and the default target setting is 1.5, independently of the JDK you run Maven with. If you want to change these defaults, you should set source and target as described in Setting the -source and -target of the Java Compiler.
Below you can find the maven-compiler-plugin settings:
<build>
	    <plugins>
		      <plugin>
		        <groupId>org.apache.maven.plugins</groupId>
		        <artifactId>maven-compiler-plugin</artifactId>
		        <version>3.7.0</version>
		        <configuration>
		          <source>1.8</source>
		          <target>1.8</target>
		           <encoding>UTF-8</encoding>
		        </configuration>
		      </plugin>
      	</plugins>
  	</build>
Complete POM will look like this:
<project xmlns="https://maven.apache.org/POM/4.0.0" xmlns:xsi="https://www.w3.org/2001/XMLSchema-instance"
  xsi:schemaLocation="https://maven.apache.org/POM/4.0.0 http://maven.apache.org/xsd/maven-4.0.0.xsd">
  <modelVersion>4.0.0</modelVersion>

  <groupId>ToolsQA</groupId>
  <artifactId>CucumberFramework</artifactId>
  <version>0.0.1-SNAPSHOT</version>
  <packaging>jar</packaging>

  <name>CucumberFramework</name>
  <url>http://maven.apache.org</url>

  <properties>
    <project.build.sourceEncoding>UTF-8</project.build.sourceEncoding>
  </properties>

  <dependencies>
	 <dependency>
	    <groupId>junit</groupId>
	    <artifactId>junit</artifactId>
	    <version>4.12</version>
	    <scope>test</scope>
	 </dependency>
     <dependency>
	    <groupId>org.seleniumhq.selenium</groupId>
	    <artifactId>selenium-java</artifactId>
	    <version>3.7.0</version>
	</dependency>
  </dependencies>

    <build>
	    <plugins>
		      <plugin>
		        <groupId>org.apache.maven.plugins</groupId>
		        <artifactId>maven-compiler-plugin</artifactId>
		        <version>3.7.0</version>
		        <configuration>
		          <source>1.8</source>
		          <target>1.8</target>
		           <encoding>UTF-8</encoding>
		        </configuration>
		      </plugin>
      	</plugins>
  	</build>

</project>
Writing your first End 2 End test using Selenium
In this series, I will keep the test longer than usual. To demonstrate the right examples of framework component it is required to have complex page objects, complex configurations and various challenges. Which we surely will face in the below End 2 End Test Scenario. Let's just pretend that below is the business scenario, we have got from the BA's to automate.
I would suggest you to first automate this test by yourself, it is a good opportunity to learn automation here. Try it your self a complete end 2 end scenario.
Test to Automate
Ritika visits ToolsQA Demo Website for the first time and SEARCH for Dress. She selects the first product and goes to a product page. She successfully adds it to the bag. She continues to Cart Page from mini cart icon at the top right corner. Then she moves forward to Checkout page. She choose to be an ANONYMOUS USER (Not Registering) completes email and address details. She selects FREE delivery, and places the order using CHECK payment method with Billing & Delivery address as same.
Create a Test Package & a Test Class
-
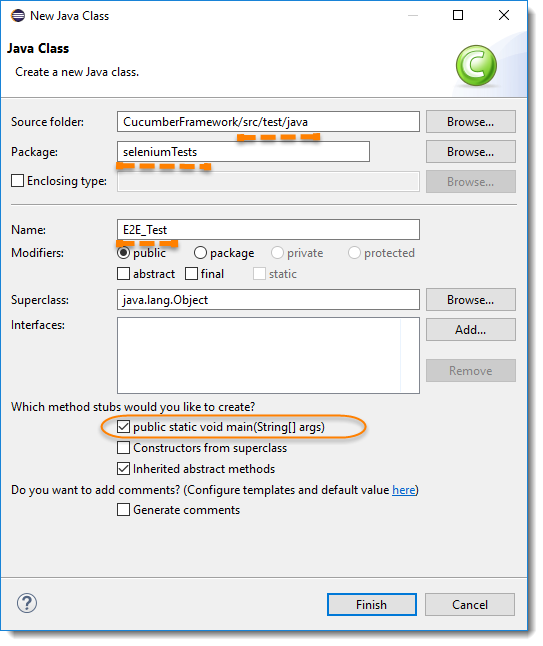
Create a New Package by right click on the src/test/java package and select New >> Package. Give your package a name seleniumTests and click Finish.
-
Create a New Class file by right click on the src/test/java package and select New >> Class. Give your test case a good name in the resulting dialog and click Finish to create the file. Also to make sure to check public static void main, as we will be running the test from the same main method.
Write the complete Test
Below is a complete test case that starts a browser locally, executes a very simple test, then closes out the browser instance. The example is extremely simple and doesn’t follow normal practices like using Page Object Patterns.
package seleniumTests;

import java.util.List;
import java.util.concurrent.TimeUnit;

import org.openqa.selenium.By;
import org.openqa.selenium.WebDriver;
import org.openqa.selenium.WebElement;
import org.openqa.selenium.chrome.ChromeDriver;

public class E2E_Test {
	private static WebDriver driver;

	public static void main(String[] args) throws InterruptedException {
		System.setProperty("webdriver.chrome.driver","C:\\ToolsQA\\Libs\\Drivers\\chromedriver.exe");
		driver = new ChromeDriver();
		driver.manage().window().maximize();
		driver.manage().timeouts().implicitlyWait(10, TimeUnit.SECONDS);
		driver.get("https://www.shop.demoqa.com");

		driver.navigate().to("https://shop.demoqa.com/?s=" + "dress" + "&post_type=product");


		List<WebElement> items = driver.findElements(By.cssSelector(".noo-product-inner"));
		items.get(0).click();

		WebElement addToCart = driver.findElement(By.cssSelector("button.single_add_to_cart_button"));
		addToCart.click();


		WebElement cart = driver.findElement(By.cssSelector(".cart-button"));
		cart.click();

		WebElement continueToCheckout = driver.findElement(By.cssSelector(".checkout-button.alt"));
		continueToCheckout.click();


		Thread.sleep(5000);
		WebElement firstName = driver.findElement(By.cssSelector("#billing_first_name"));
		firstName.sendKeys("Lakshay");

		WebElement lastName = driver.findElement(By.cssSelector("#billing_last_name"));
		lastName.sendKeys("Sharma");

		WebElement emailAddress = driver.findElement(By.cssSelector("#billing_email"));
		emailAddress.sendKeys("[email protected]");

		WebElement phone = driver.findElement(By.cssSelector("#billing_phone"));
		phone.sendKeys("07438862327");

		WebElement countryDropDown = driver.findElement(By.cssSelector("#billing_country_field .select2-arrow"));
		countryDropDown.click();
		Thread.sleep(2000);

		List<WebElement> countryList = driver.findElements(By.cssSelector("#select2-drop ul li"));
		for(WebElement country : countryList){
			if(country.getText().equals("India")) {
				country.click();
				Thread.sleep(3000);
				break;
			}
		}

		WebElement city = driver.findElement(By.cssSelector("#billing_city"));
		city.sendKeys("Delhi");

		WebElement address = driver.findElement(By.cssSelector("#billing_address_1"));
		address.sendKeys("Shalimar Bagh");

		WebElement postcode = driver.findElement(By.cssSelector("#billing_postcode"));
		postcode.sendKeys("110088");

		WebElement shipToDifferetAddress = driver.findElement(By.cssSelector("#ship-to-different-address-checkbox"));
		shipToDifferetAddress.click();
		Thread.sleep(3000);

		List<WebElement> paymentMethod = driver.findElements(By.cssSelector("ul.wc_payment_methods li"));
		paymentMethod.get(0).click();

		WebElement acceptTC = driver.findElement(By.cssSelector("#terms.input-checkbox"));
		acceptTC.click();

		WebElement placeOrder = driver.findElement(By.cssSelector("#place_order"));
		placeOrder.submit();

		driver.quit();

	}

}
Note: Make sure to change the webdriver.chrome.driver in the code, or refer our tutorial How to Run test on Chrome.
Running the Test
Execute the test by right-clicking in the test body and select Run As >> Java Application. The test will run and you’ll see the results in the Test Explorer pane.