Table of Contents
Now that we have added tests and created a test suite, lets see if Eclipse can help us run our Junit tests. As we are already using Eclipse for developing our Unit tests, we can use the inbuilt Junit runner.
Step 1: Open Junit Perspective
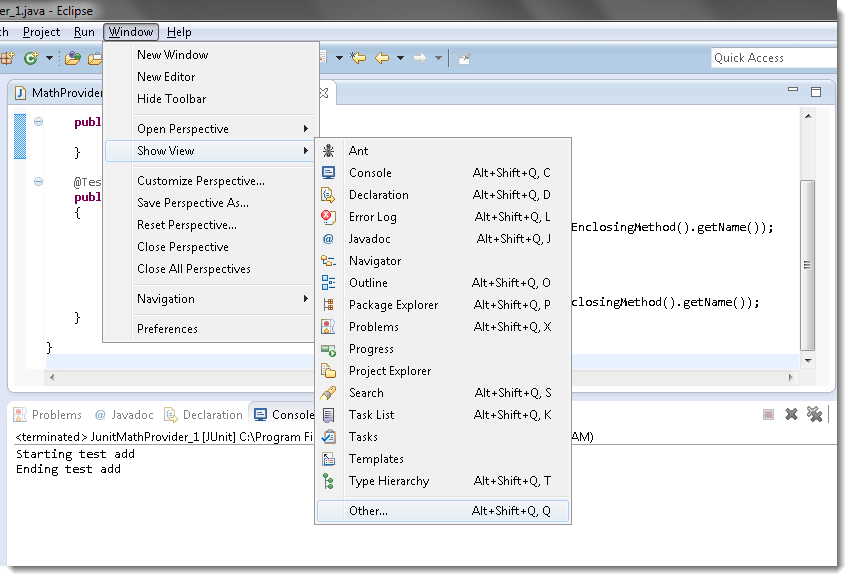
- To open Junit runner you have to go to Window > Show View > Other.
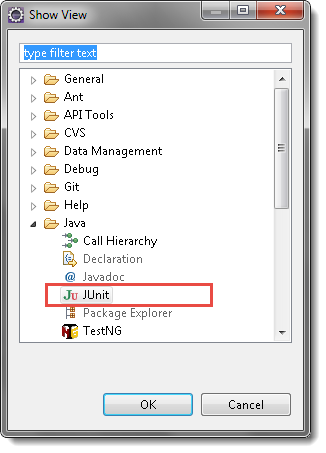
- In the pop up window select Java. In the options under Java select Junit. and click OK
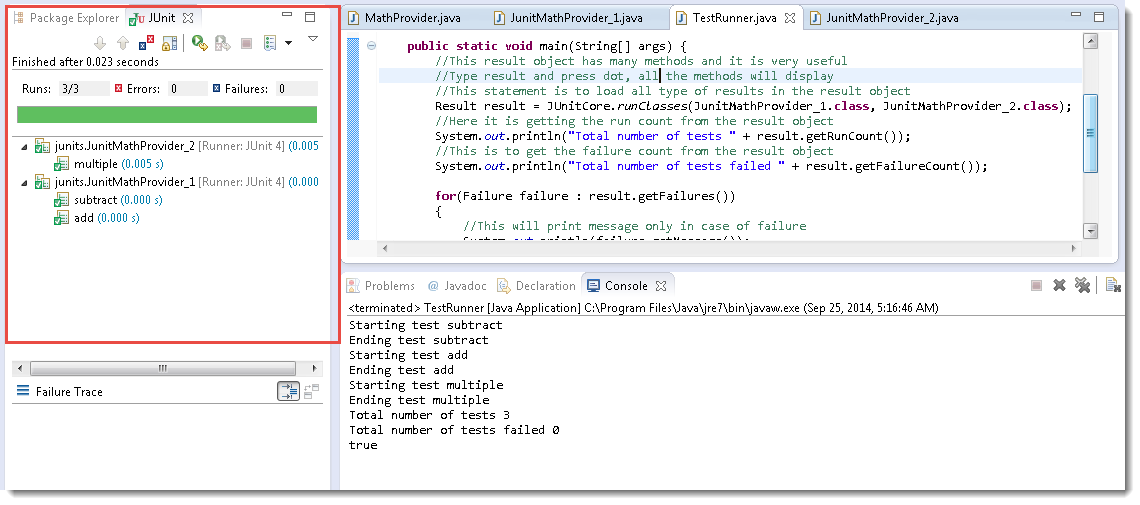
3. Baam, you will have Junit test runner in the left eclipse view explorer. You can relate from the below image.
Step 2: Run Configuration settings
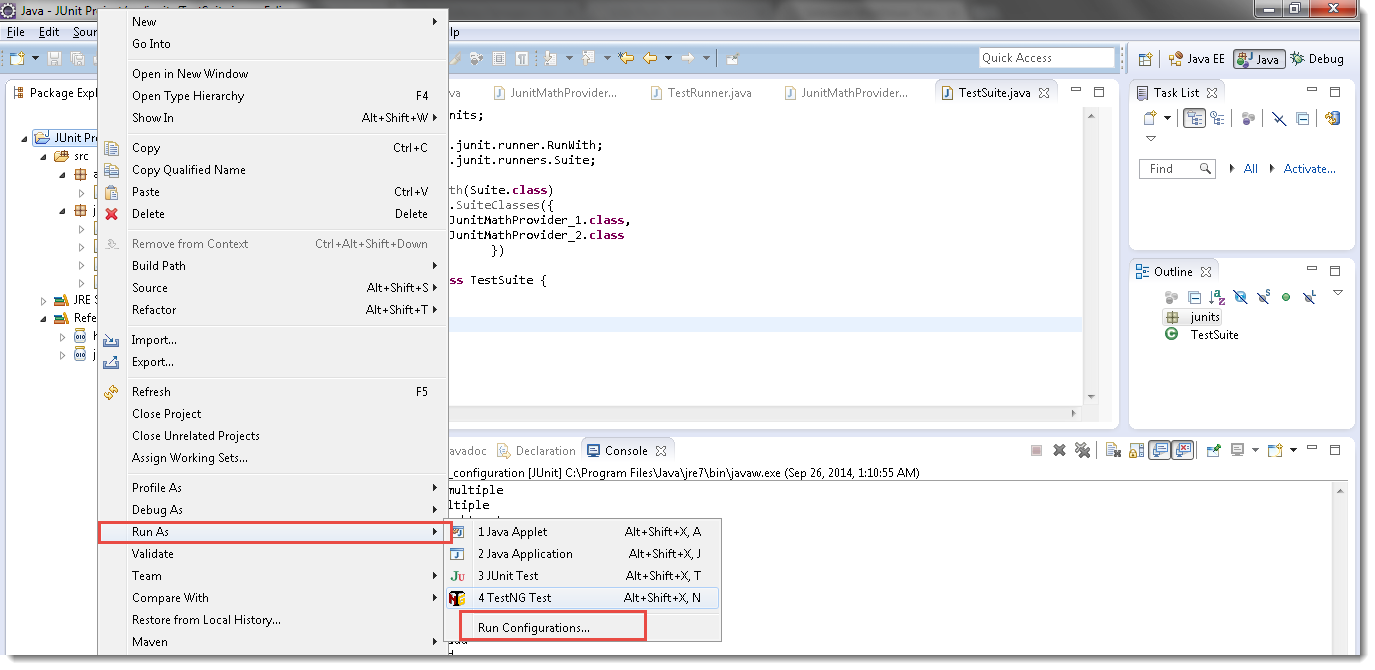
- To run your tests you have to set run configurations in your project. Go to Package explorer and right click on your project. From the menu that comes up select Run As > Run Configurations. As shown in the image below
- Once you click on the Run Configurations, you will see a Run Configuration window. In the left pane of Configuration window right-click on the Junit option and select New.
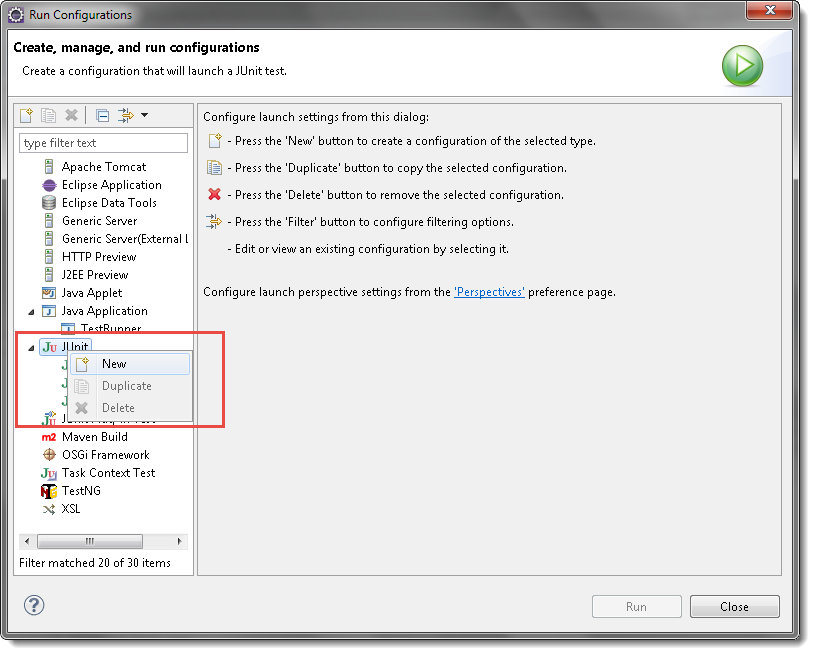
- After clicking on New you will see a new configuration set up window. Now select 'Run all tests in the selected project' radio button and browse to the folder where all your unit tests are.
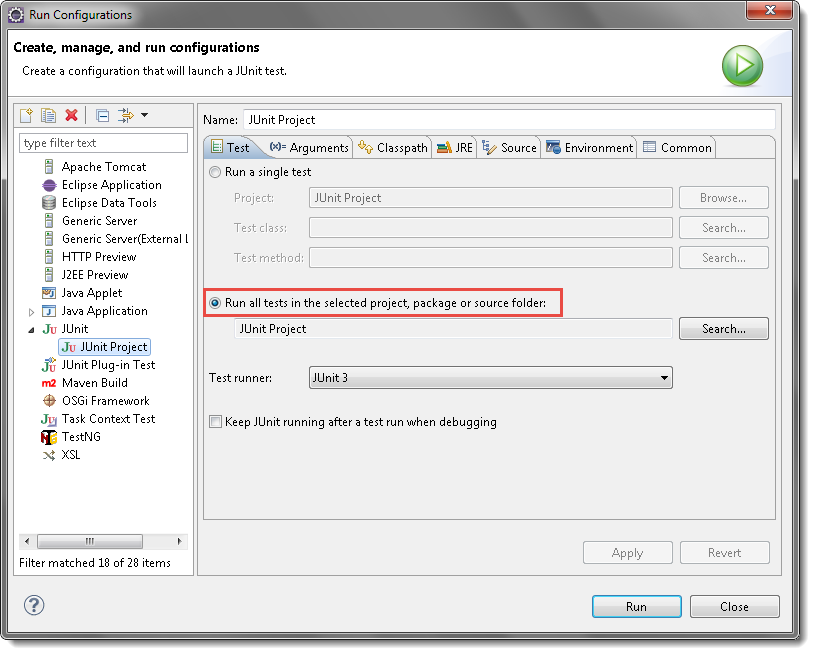
- Click on Apply and now Run your project. You will see that all tests are run and the result is displayed in the Junit runner.
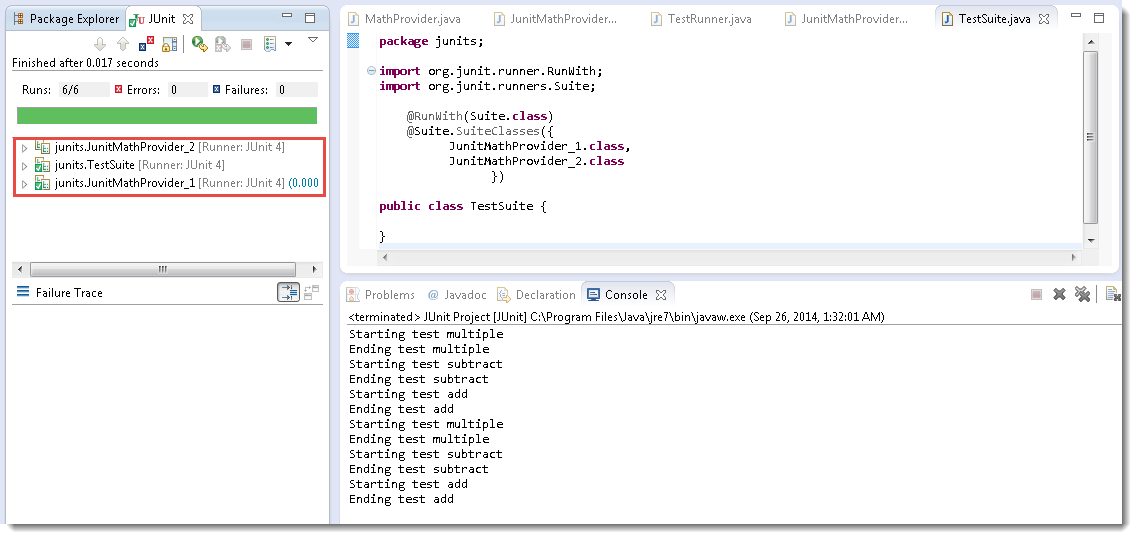
Explore different options in Junit runner and you will find some really nice features.


