There are two ways of creating Maven project. One by using command prompt and other from with in the eclipse IDE. Let's just see both of it one by one.
Create a New Maven Project from Command Prompt
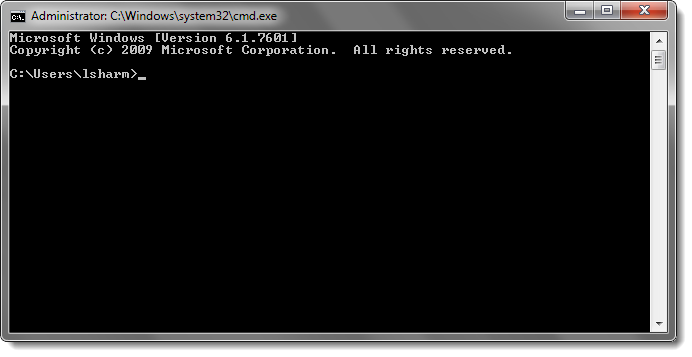
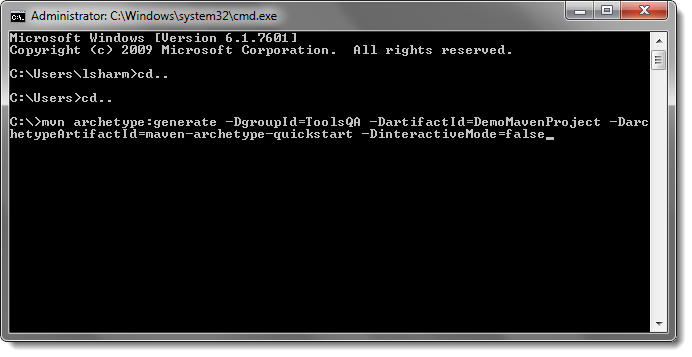
- Go to Run and type 'cmd' to open Command Prompt.
- Browse to the folder where you want to set up your project and then type the below command:
mvn archetype:generate -DgroupId=ToolsQA -DartifactId=DemoMavenProject -DarchetypeArtifactId=maven-archetype-quickstart -DinteractiveMode=false
Note: 'cd..' is used to go back to previous folder and 'cd foldername' used to go into the folder.
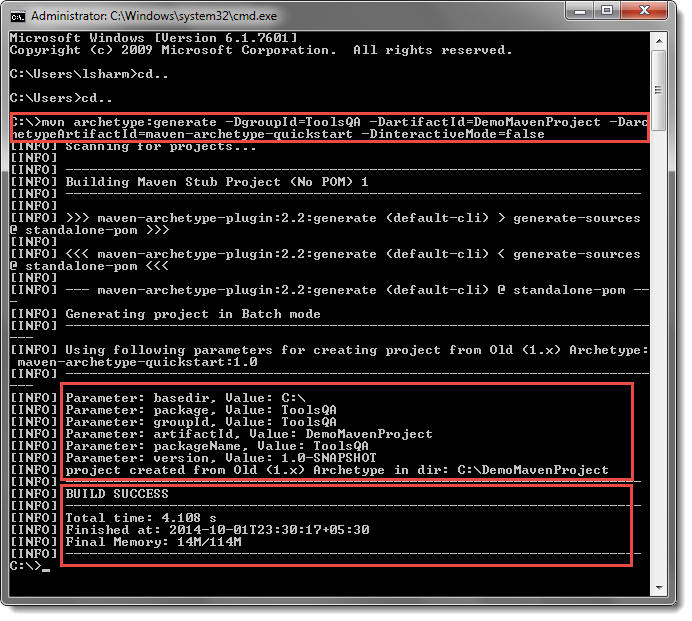
Here 'DartifactId' is your project name and 'DarchetypeArtifactId' is the *type *of Maven project. There are different types of maven projects like web projects, java projects, etc. You can go through the complete list here.
Once you press Enter after typing the above command, it will start creating the Maven project.
Note: In case of build failure, please check the Maven version number in the pom.xml file. It should match the version of Maven installed on your machine. Look for this in the POM 'http://maven.apache.org/POM/3.2.3'. Correct the version from all the places it is mentioned in the POM.
- Go to the project location to see the newly created maven project. Now open the pom.xml file, which resides in the project folder. By default the POM is generated like this:
<project xmlns="https://maven.apache.org/POM/3.2.3" xmlns:xsi="https://www.w3.org/2001/XMLSchema-instance"
  xsi:schemaLocation="https://maven.apache.org/POM/3.2.3 http://maven.apache.org/maven-v3_2_3.xsd">
  <modelVersion>4.0.0</modelVersion>
  <groupId>ToolsQA</groupId>
  <artifactId>DemoMavenProject</artifactId>
  <packaging>jar</packaging>
  <version>1.0-SNAPSHOT</version>
  <name>DemoMavenProject</name>
  <url>http://maven.apache.org</url>
  <dependencies>
    <dependency>
      <groupId>junit</groupId>
      <artifactId>junit</artifactId>
      <version>3.8.1</version>
      <scope>test</scope>
    </dependency>
  </dependencies>
</project>
- Look at the default folder structure of the Maven project.
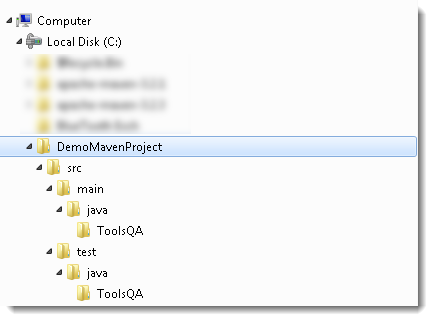
Note: Test cases reside under the src > test > java > ToolsQA will only be considered as a test by Maven, rest will be ignored if you put your test cases in some other folder.
Maven Project to work with Eclipse
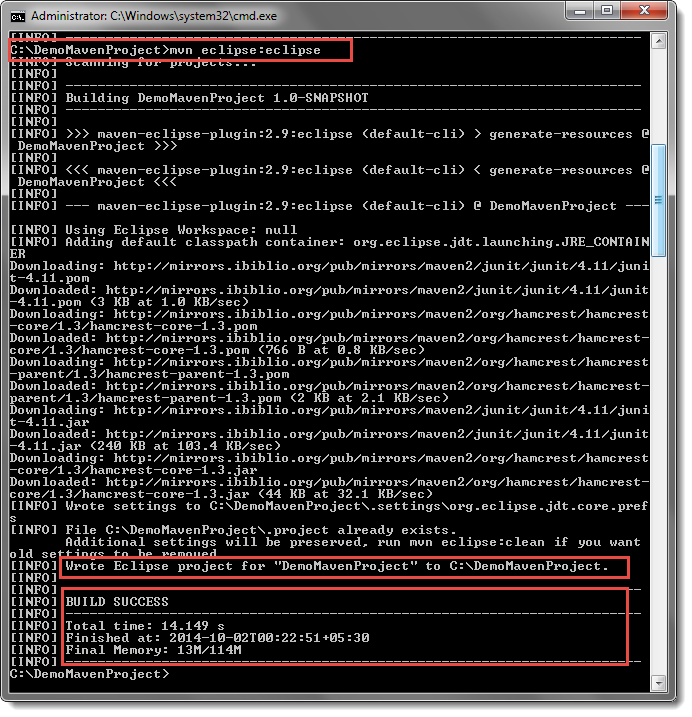
- Open command prompt and browse to your Maven project and type this 'mvn eclipse:eclipse'
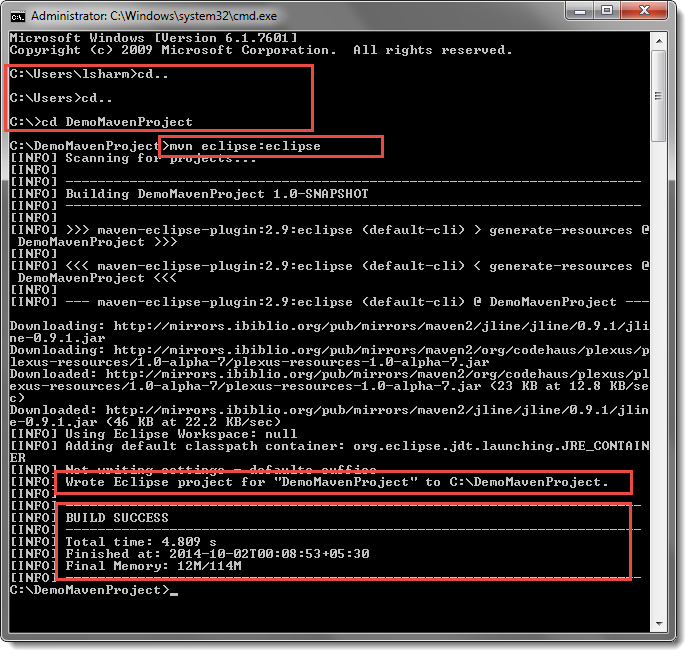
Your project is now compatible with Eclipse IDE.
Import Maven Project into Eclipse
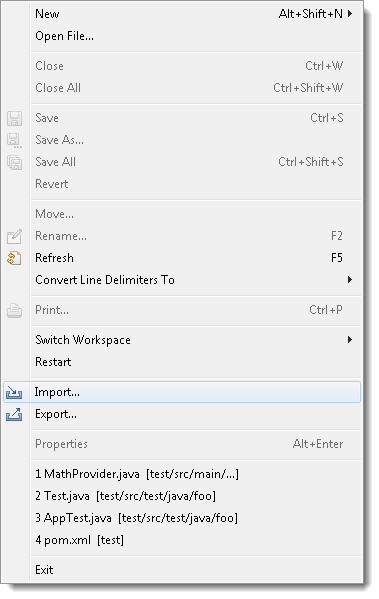
- Open Eclipse and go to File > Import.
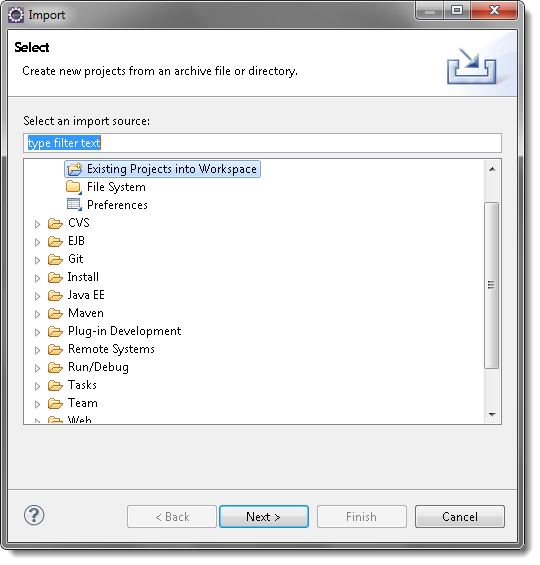
2) Click on Existing Projects into Workspace.
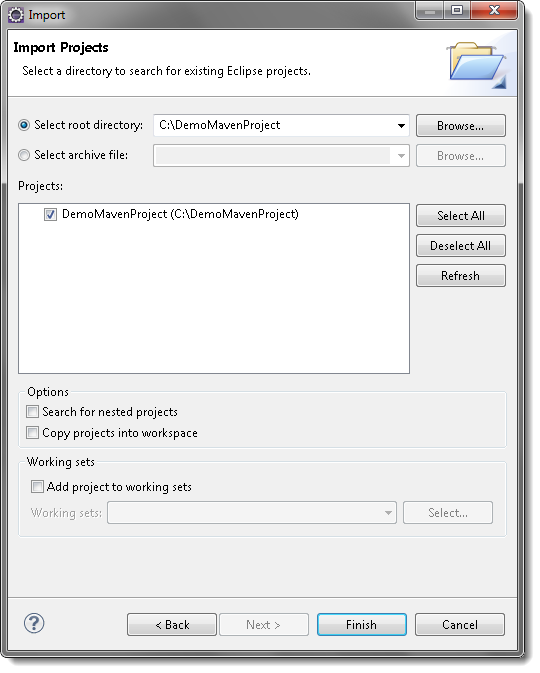
- Browse to Maven project folder and click on Finish.
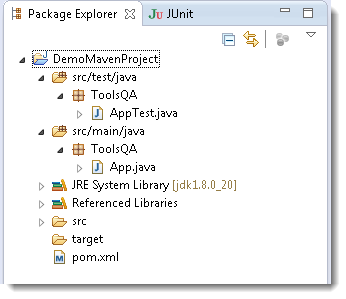
4) Project Explorer will now look like this:
- Modify the POM. The default pom.xml s too simple, oftentimes you need to add the compiler plugin to tell Maven which JDK version to compile your project.
<plugin>
		<groupId>org.apache.maven.plugins</groupId>
		<artifactId>maven-compiler-plugin</artifactId>
		<version>2.3.2</version>
		<configuration>
			<source>1.6</source>
			<target>1.6</target>
		</configuration>
</plugin>
Update the jUnit from 3.8.1 to latest 4.11
<dependency>
	<groupId>junit</groupId>
	<artifactId>junit</artifactId>
	<version>4.11</version>
	<scope>test</scope>
</dependency>
Now your POM will look like this:
<project xmlns="https://maven.apache.org/POM/3.2.3" xmlns:xsi="https://www.w3.org/2001/XMLSchema-instance"
  xsi:schemaLocation="https://maven.apache.org/POM/3.2.3 http://maven.apache.org/maven-v3_2_3.xsd">
  <modelVersion>4.0.0</modelVersion>
  <groupId>ToolsQA</groupId>
  <artifactId>DemoMavenProject</artifactId>
  <packaging>jar</packaging>
  <version>1.0-SNAPSHOT</version>
  <name>DemoMavenProject</name>
  <url>http://maven.apache.org</url>
  <dependencies>
    <dependency>
      <groupId>junit</groupId>
      <artifactId>junit</artifactId>
      <version>4.11</version>
      <scope>test</scope>
    </dependency>
  </dependencies>
  <build>
	  <plugins>
		<plugin>
			<groupId>org.apache.maven.plugins</groupId>
			<artifactId>maven-compiler-plugin</artifactId>
			<version>2.3.2</version>
			<configuration>
				<source>1.6</source>
				<target>1.6</target>
			</configuration>
		</plugin>
	  </plugins>
	</build>
</project>
Once you modify the POM, do the Maven Project to work with Eclipse step again. Open command prompt and browse to your Maven project and type this 'mvn eclipse:eclipse'
Run your first Maven Test
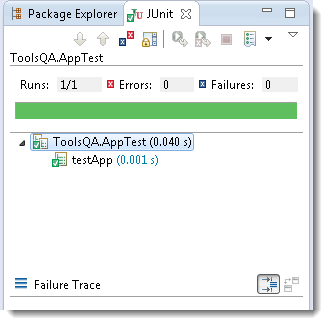
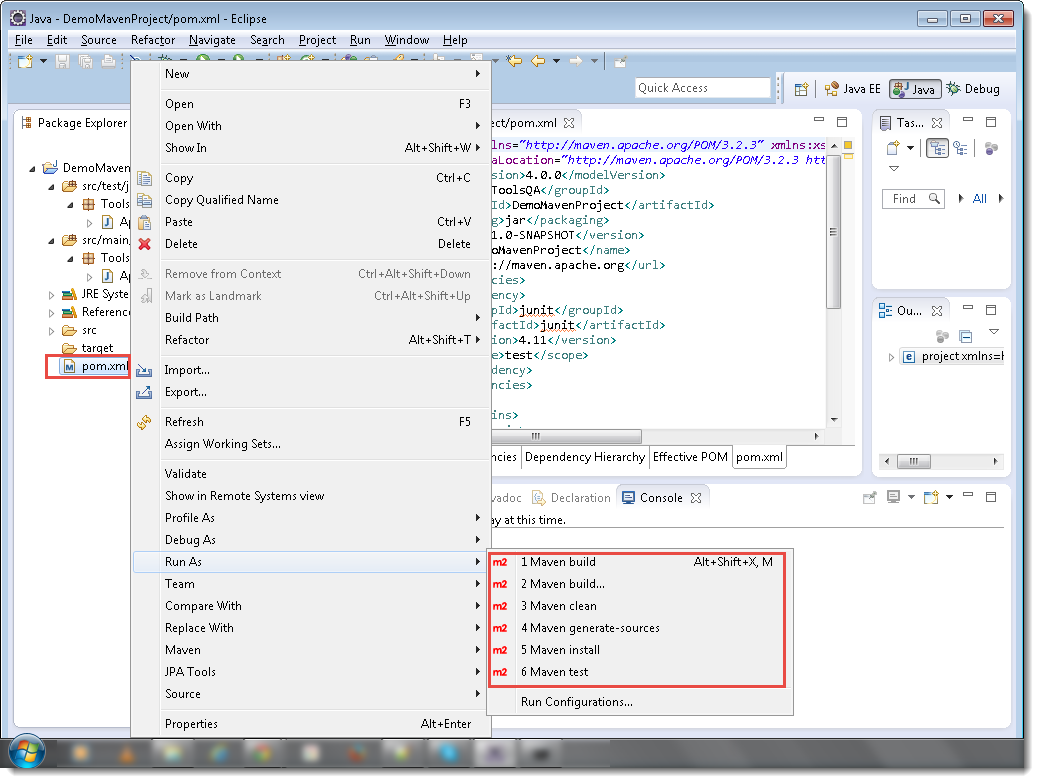
- Right-click on the pom.xml and go to Run As > Maven test.
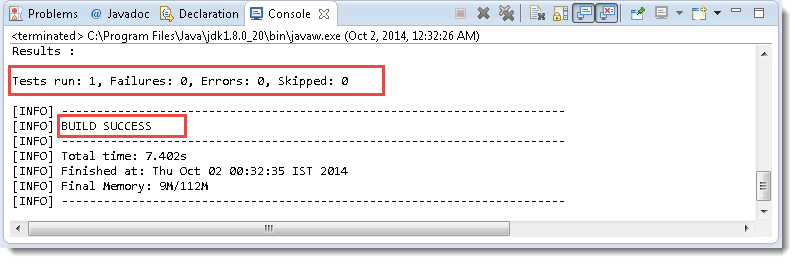
- In the console window of Eclipse, you would see the information like this:
- Go to 'SureFire Reports' folder and open the xml file.
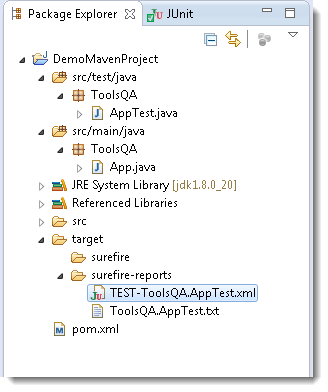
- It will display the result of the JUnit test.