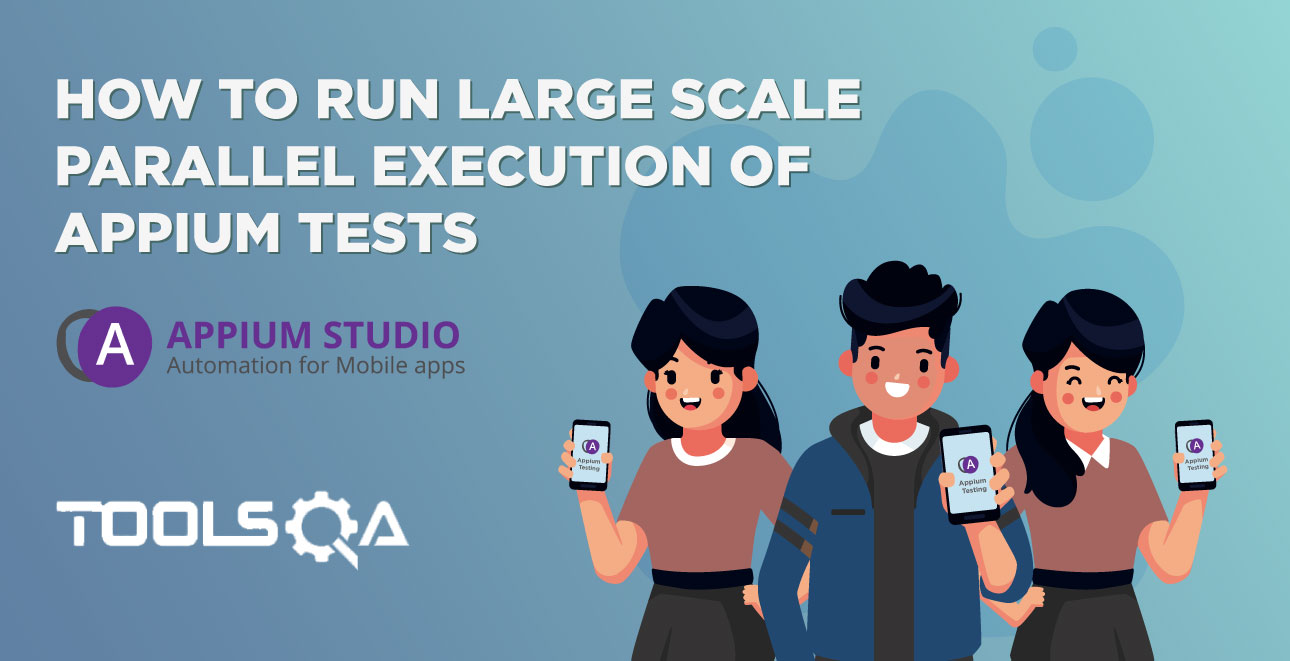
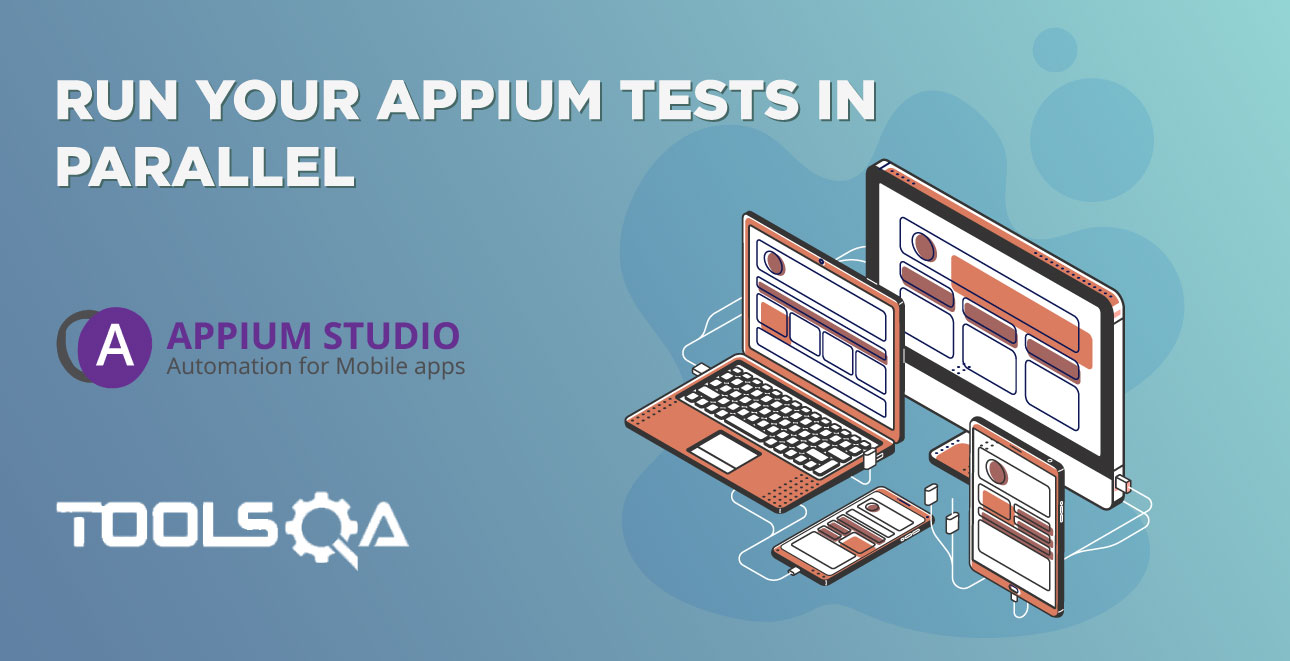
The goal of test automation is not to execute tests one by one. What we need to do is to create an execution environment that runs multiple tests on multiple devices in parallel. It is also critical that the environment can use logic to create more complex rules and dependencies between tests.
Appium Studio integrates with your existing testing frameworks and IDE’s such as Junit, TestNG, Eclipse, IntelliJ, Visual Studio, etc. Once you have created your tests using Appium Studio you will be able to export your tests into your IDE, edit them and run them from your testing environment.

To scale your Appium testing you can use Appium Studio to run your test on two mobile devices in parallel (locally connected devices). You can even run your test in parallel on an unlimited number of mobile devices using the SeeTest Digital Assurance Lab.
Watch the two video tutorials and follow the instructions below to learn how to integrate into your testing environment and perform parallel execution on two locally connected mobile devices in parallel.
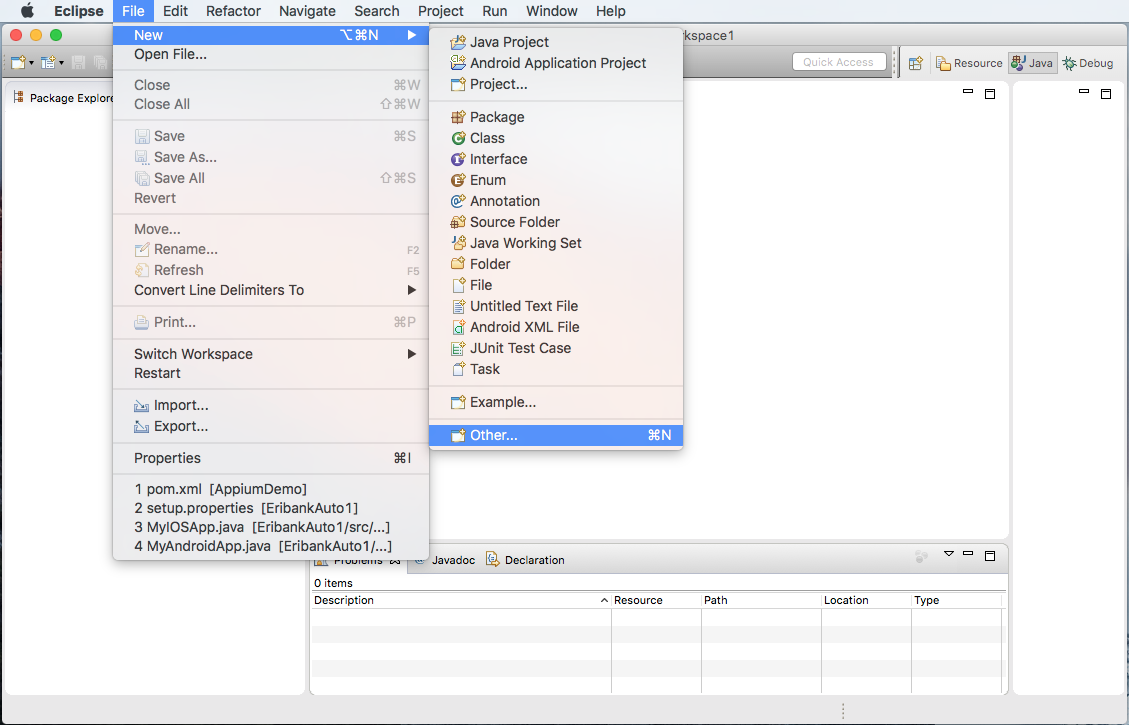
1. Create a new Appium testing project in Eclipse (Gradle)
The first step will be to create a new project in your preferred IDE. In this case. we are using Eclipse. In Eclipse (IDE) start a new Java project. Next, we have to add the libraries and dependencies to the project. The JAR files available in the clients\appium\java folder to the build path of the project. Ongoing updates are included in the Appium Studio updates, so you do not need to worry about version maintenance and updates.
1.1. Create a new Gradle project, File->New->Other...
1.2. Select 'Gradle Project'
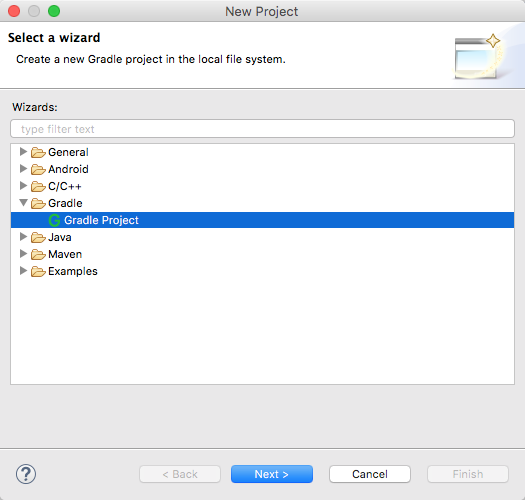
1.3. Check the 'Create a simple project (skip archetype selection)' checkbox. Click 'Next' button.
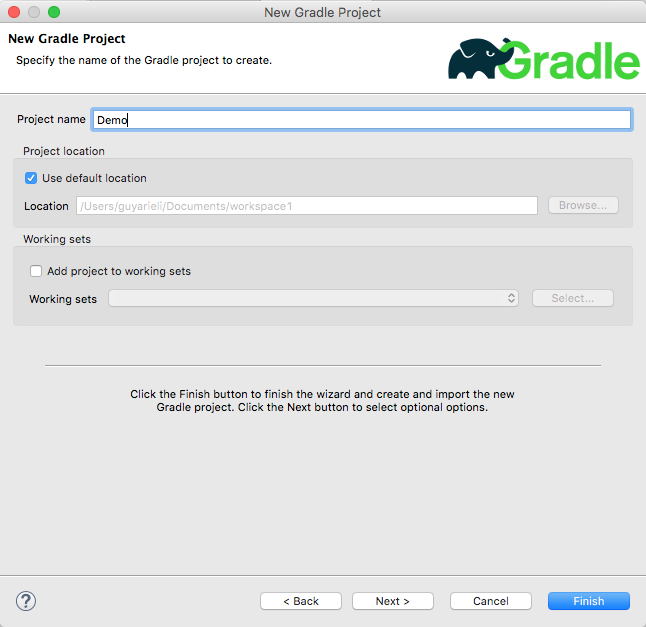
1.4. Open the newly created project, open the build. Gradle file that was created. Replace the generated content with the following:
Build.gradle
apply plugin: 'java'

apply plugin: 'maven'

apply plugin: 'eclipse'

repositories {

     maven { url "https://cloud.experitest.com/repo" }

     maven { url "https://repo.maven.apache.org/maven2" }

     mavenCentral()

}

dependencies {

    compile group: 'com.experitest', name: 'appium', version:'4.1.2'

}
1.5. Run the clean, cleanEclipse and Eclipse task to prepare your Eclipse environment.

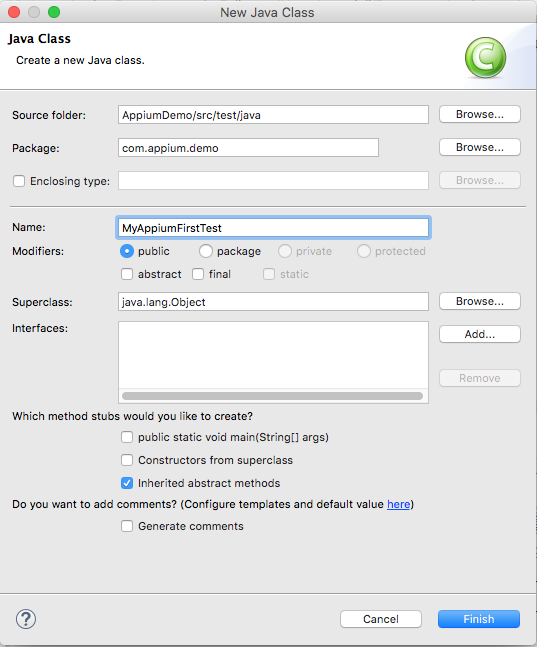
2. Create a new Appium Test class
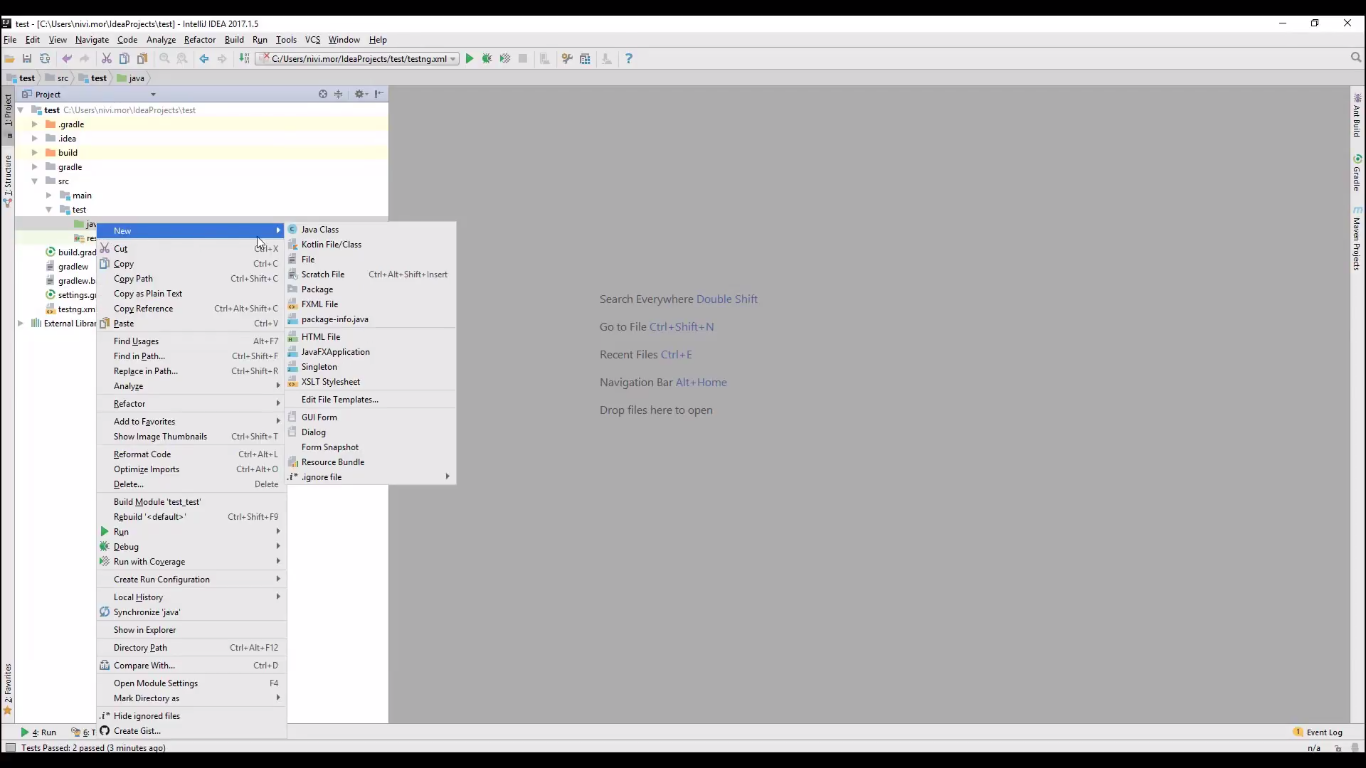
2.1. Right-click on your test source folder, select New->Class
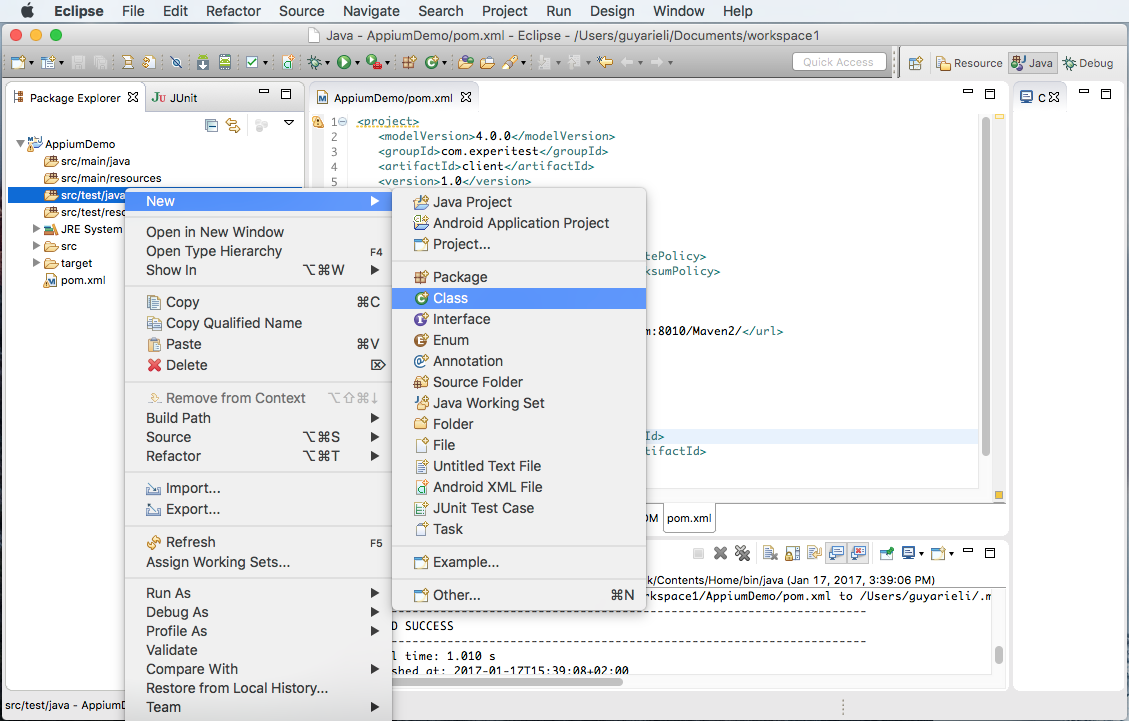
2.2. Provide a name for your test. (You can also provide a package that your test will be placed in). Click 'Finish'.
3. Export your Appium test into Eclipse or any other IDE
Once the project is ready, we go back to Appium Studio.
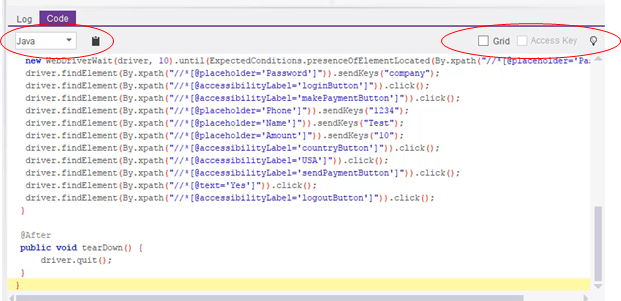
In the code area, you will see a drop-down menu where you can select the programming language. The default is Java, but you can also generate code for C#, Ruby, and Python.
Appium Studio automatically generates code in your required framework.
After selecting the programing language, copy the code by clicking on the clipboard icon. You have copied a full test project written in Java, ready to paste in your IDE.
4. Edit your Appium tests according to your testing requirements
Every test is comprised of three parts - Before, test, and after.
The specific annotations differ slightly between test framework but the structure is the same.
As the names suggest, the before section deals with environment setup - for example, where reports will be saved, what devices to execute on and reference to dependencies such as libraries and drivers.
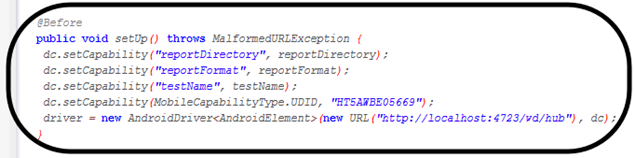
4.1 Script - Before
The before section deals with environment setup - for example, where reports will be saved, what devices to execute on and initializing a web driver object, on which all of our test commands will be executed.
- The first three lines set the parameters of the Appium Studio report that will be generated for the execution
- The fourth line indicates the device on which the test will run
- The last line, driver = new AndroidDriver<AndroidElement>(new URL("https://localhost:4723/wd/hub"), dc); initializes an object of class WebDriver. This is the basic Appium object, which gives you access to all the Appium commands and utilities
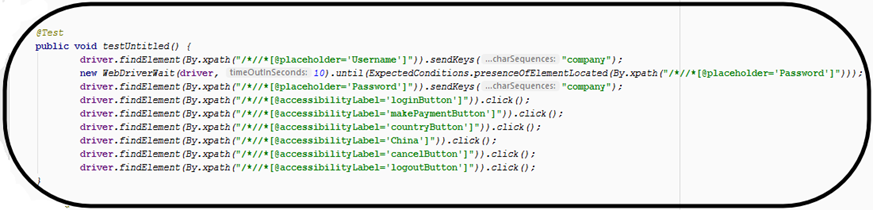
4.2 Test The Test section contains the test itself. The Appium commands are executed using the Webdriver which we created in the test setup and defined in the before section.
- All the different Appium Studio commands available from inside Appium Studio can now be accessed as methods of the WebDriver
- Some of the commands will be void methods that perform actions without returning any data, and some will return a value that can be analyzed and used again as part of the script logic
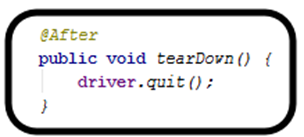
4.3 After The After section contains instructions on what to do after the test section was completed. This is not related to the outcome of the test, but to the completion of the process defined in the test section.
Basically, the after section generates the test report and saves it to the place defined in the before section, and releases the drivers.
- It includes the command quit(); which will create the report for the current test case (as configured in the in the @Before block) and will also release the execution agent from the current device, freeing it to connect to another one
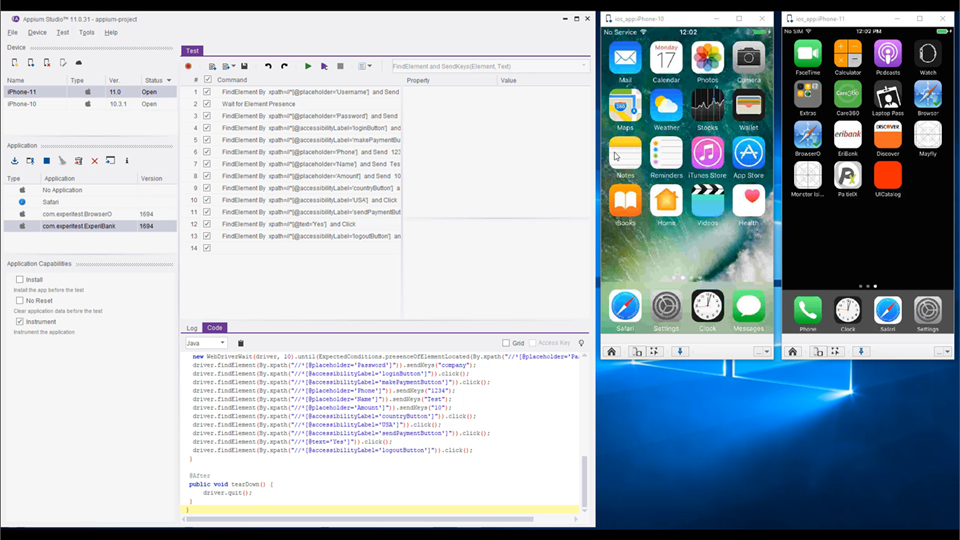
5. Run your Appium tests in parallel on two locally connected devices
We will see the details of how we use TestNG and IntelliJ to create parallel execution automation in the following demo.
By now you are familiar with the Appium Studio screen and this test. This is an extension of the test we created earlier using XPath. I added a few commands, performing money transfer and validating the balance has changed after the transfer. I also opened another device for the parallel execution demonstration.
What we need to do is export the code to use in our IDE.
In the code area, I select the programing language - in this case, Java, and click on the clipboard.
Now let's move to IntelliJ.
Open a new test class and name it.
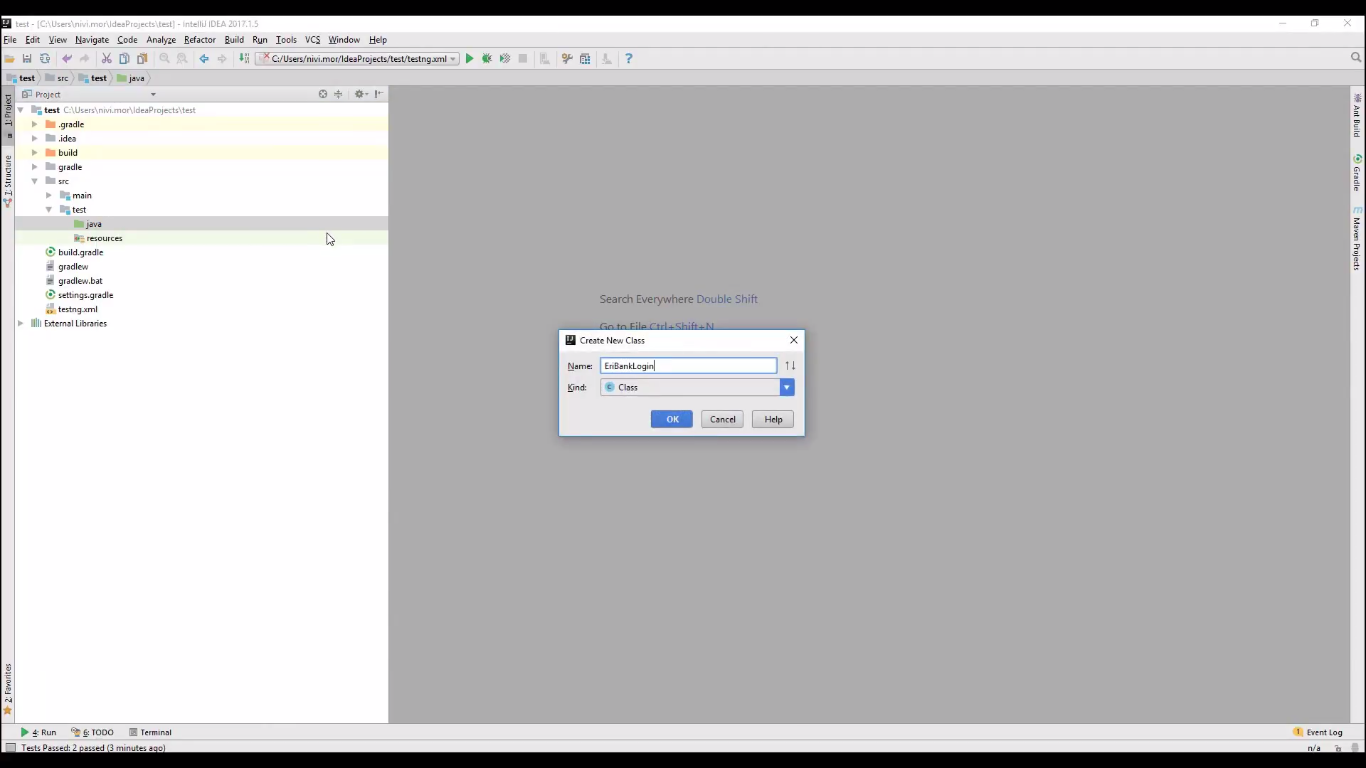
Edit the name of the test class we just created.
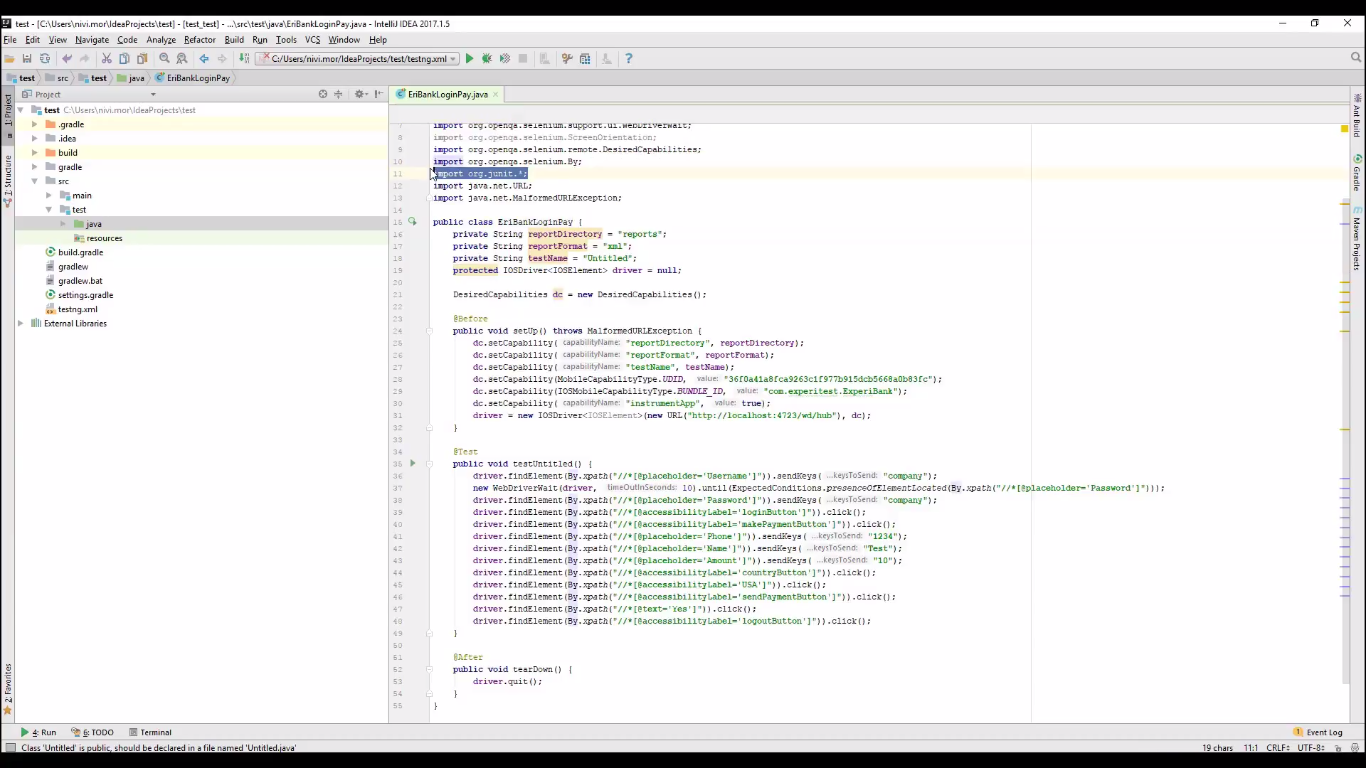
The Before, test and after annotations in TestNG are slightly different, so I update these as well. As you see, the IDE suggests the appropriate annotation.
Change the TYPE from UDID to platform, and the value to iOS so that you can run the test on iOS devices in parallel.
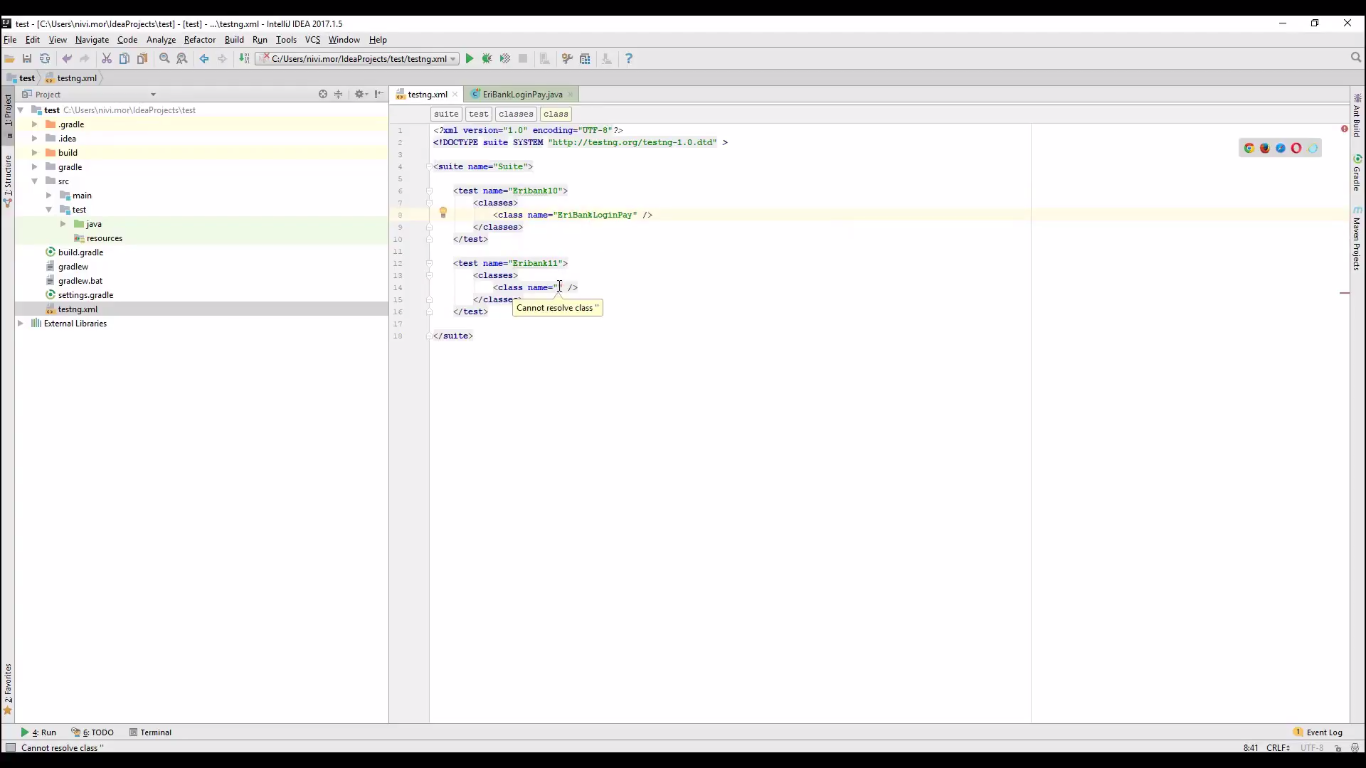
Define the parallel execution in the XML file
Now let's define the test suite we would like to run. I would like to run 2 tests in parallel, so I create two tests and name them Eribank10 and 11. Now I add the name of the java class I would like to run - in this case, it is the same for both.
Finally, I chose to run the tests in parallel, and the number of threads, and we are done.
Let’s run the project and go to Appium Studio to see the tests being executed on the device reflection.
Appium Studio needs to be open during the execution. We see that the application is being installed in instrumented mode on both devices, the login process, the money transfer and log out. Once the execution has finished we see the suite results along with the test results in the IDE.