Till now, we have seen how to perform Live Testing on to the CrossBrowserTesting and Live Test settings available in the live testing environment. In addition to it, we learned about the advanced options available in the same environment. Live Testing in CrossBrowserTesting is a very powerful element that includes tons of features to provide efficient and easy cross-browser testing, and which can be accessed from Live Testing Tool Panel. Some of the settings are just preferences that depend on the user itself. Since there is every type of user, taking care of each of them is necessary. The last post was dedicated to the settings that can be changed or set before the test is run.
In this tutorial, we will see the settings that are available after we have run the test and are currently viewing the website remotely. This setting panel is called a tool panel and automatically appears on the screen when the test is run. This post is dedicated to each of the setting available in the tool panel:
- Changing Specification from Tool Panel
- Capturing a screenshot in Live Testing
- Recording the video of the Live Test session
- Capturing the network traffic while performing Live Testing in CrossBrowserTesting
- Pasting text from the keyboard to remote website in Live Testing
- Uploading files in Live Testing in CrossBrowserTesting
- Toggle Developer tools in Live Testing
- Changing the scale of the cast while Live Testing
- Live test settings in Live Testing
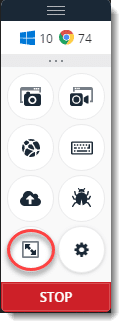
Settings in Live Testing Tool Panel
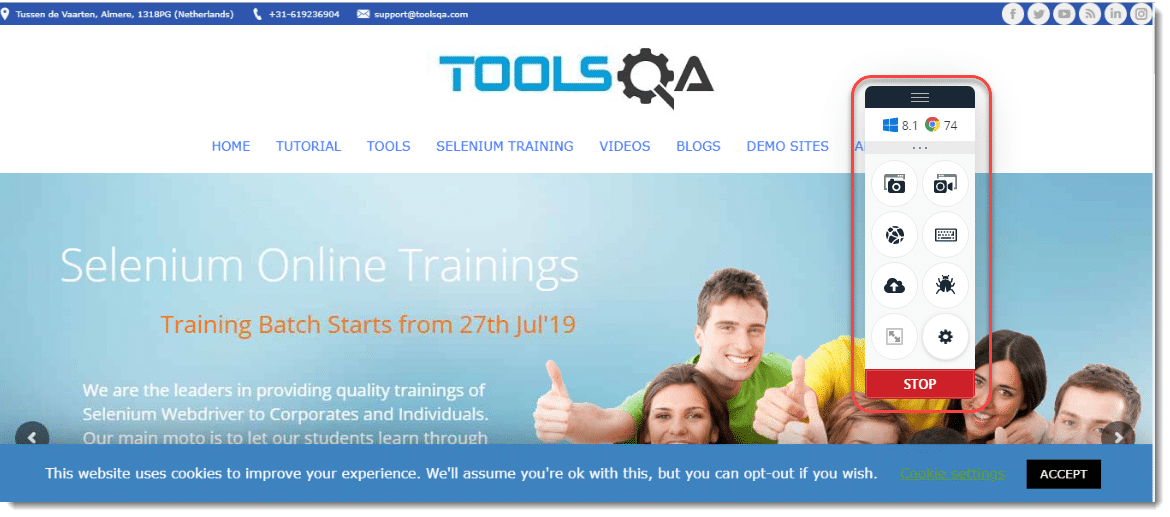
Tool panel in Live Testing is available once the user has run the test. Tool panel contains a few settings for the convenience of the user to perform certain functions such as capturing a screenshot etc while the user is performing the test. To view the test panel, just run a test with the desired specifications. Tool panel will appear on the home screen of the website.
We will see each option from the top.
Changing the specifications in Live Testing
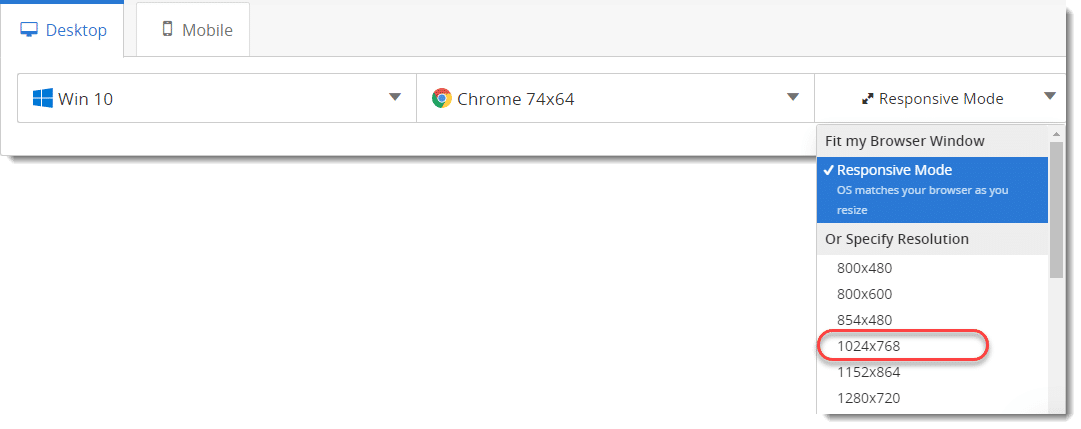
On the topmost bar of the tool panel, you will notice the windows and browser type and version. Hover your mouse on the same to switch the operating system or the browser or their versions.
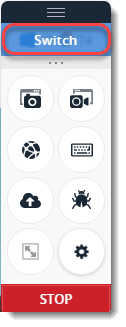
Clicking on Switch will open up the panel where you can switch the operating system and the browser.
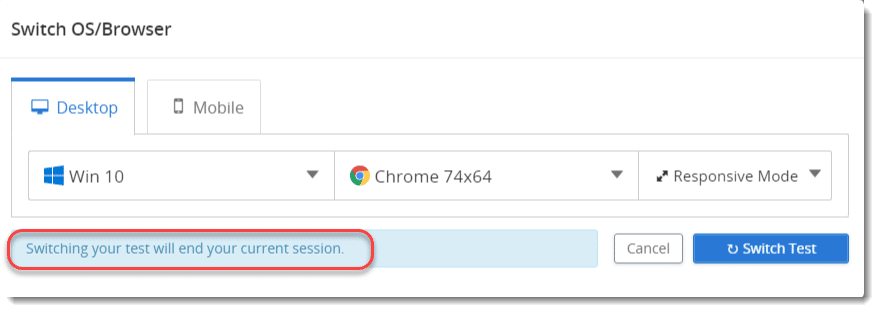
As highlighted, switching the specifications will end the current and will launch a new session immediately with the new specifications without redirecting to the live testing dashboard screen. Details about the specifications are already discussed in how to perform Live Testing tutorial.
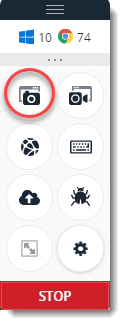
Coming onto the tool panel, the first option is capturing the screenshot.
Capturing the screenshot in CrossBrowserTesting
To capture the screenshot of the page you are currently on, click the snapshot button on the tool panel.
Once pressed, you will be notified about the screenshot taken. The snapshots can be viewed from the test results in the test summary section about which you can learn more in Results and Summary.
Record Video in Live Testing Tool Panel
The record video option is the next option in the tool panel.
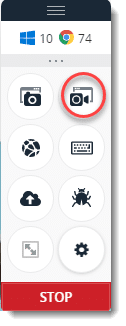
Choosing this option records the video of the entire testing session for a maximum of ten minutes. Once the video is recorded, it can be viewed from the test summary.
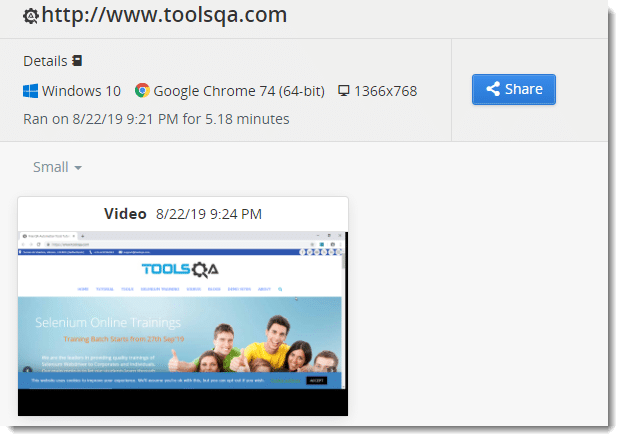
This summary will contain all the details about the test along with the video that you just recorded. It should be noted that this option is the same as available in the advanced options.
Record Network Traffic in Live Testing Tool Panel
Record network traffic records the traffic from the network encountered while accessing the website and its elements. It has been discussed in the advanced options section. This is the same setting and can be enabled after the test from the tool panel.
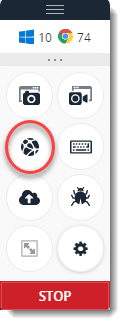
The network analysis can be done from the test summary.
Paste Text on the Live Screen in CrossBrowserTesting
This is the next option in the tool panel of CrossBrowserTesting.
![]()
Sometimes the user requires to input some text on the text field available on the website. For example, a text field on the e-commerce website where the user enters the item they want to search or buy. While this can be done by clicking, it is too slow and creates a rough experience for the user. This is because of the screencast that takes good bandwidth and requires network stability. CrossBrowserTesting has solved this issue by providing the option of pasting the text on to the text field.
We will test this option on www.amazon.com to provide a clear picture.
To use this option, open the live test by running www.amazon.com on the Live Testing screen.
Choose Paste Text to Send to your test option beside the Record Network option discussed in the previous section. It will open a pop-up.
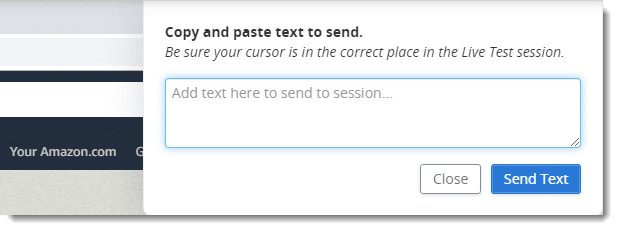
Now, you must be wondering, if not by click then how would you paste the text onto the text field of the website. Well, to achieve that, take your cursor to the Amazon text field on which you want to enter the text and type through your keyboard in the pop-up.
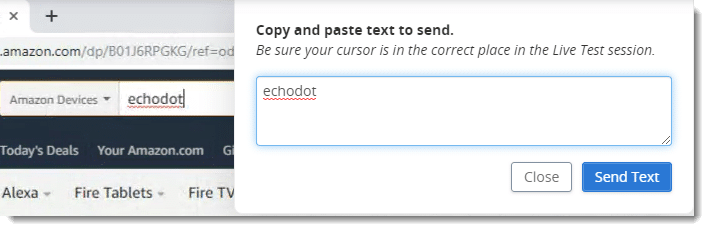
The same text will be copied and pasted to the search field. This process is faster and easier. You can now continue your testing as usual.
Upload files in Live Testing in CrossBrowserTesting
Uploading the files is a very important component of a website which you are either surfing through or developing. The correct working of this element should be 100% guaranteed by the developer i.e. you. So, it becomes highly important to test this option in Live Testing in CrossBrowserTesting. Uploading the files on a remote environment is difficult. Since CrossBrowserTesting has the device labs, clicking upload will not open your own system's folder and upload remotely. Therefore you need a method to upload it from the device itself on which your website is currently running. Let's see how to do it.
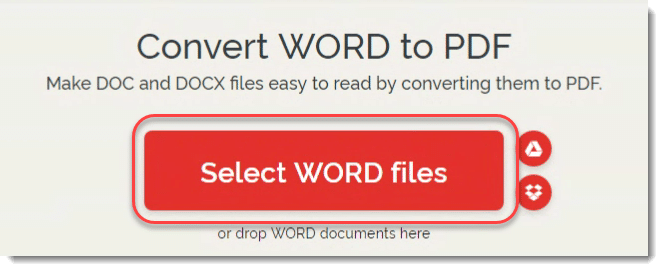
Since we need a website that takes an upload from the system, for this option we will be using ilovepdf website. This lets the user upload a document file and convert to the pdf format.
Click Upload files from the tool panel.
Clicking this button will open the popup to upload the files.
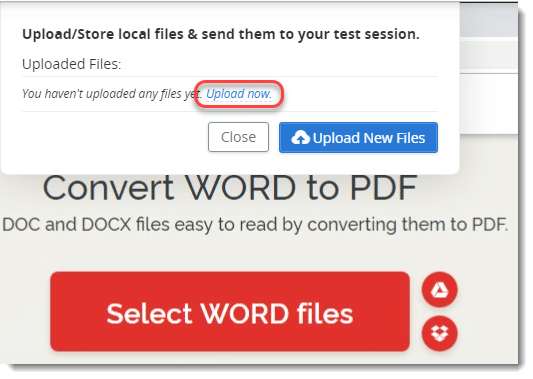
Select upload now to upload the file from your system onto the SmartBear system. Once you have selected the file, it will appear on the popup. Select Upload New Files to upload the file.
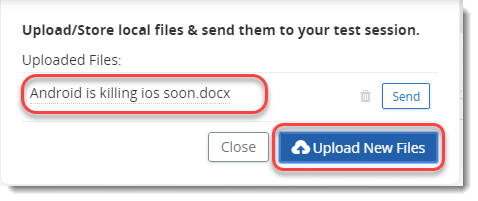
You will be able to see the file on SmartBear server once uploaded.
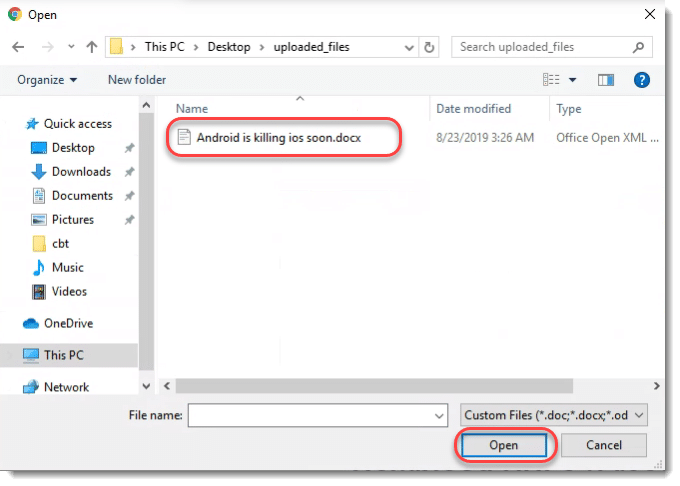
Close this box and select the Select Word File on the website.
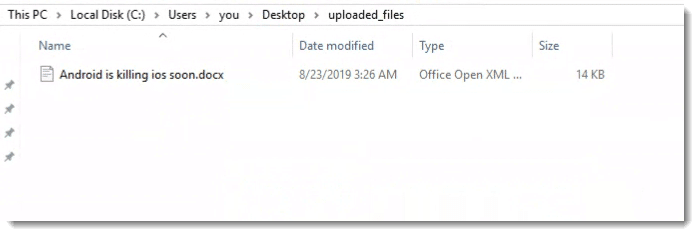
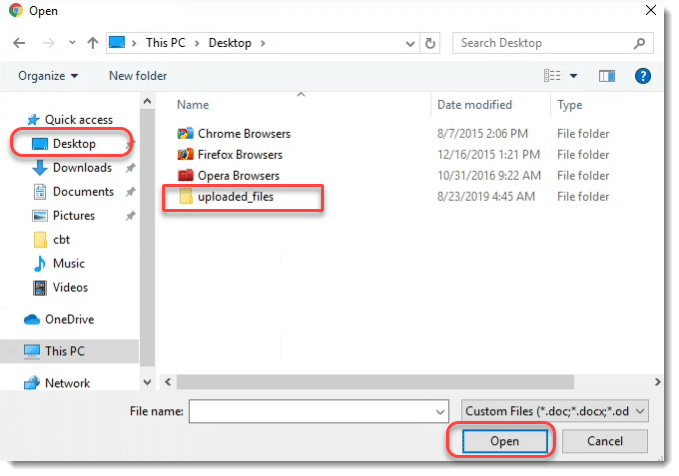
The folder will open on the SmartBear server like your own Windows system (since we selected Windows8). Go to Desktop from the side panel (highlighted). You will notice a folder called uploaded_files. Select the folder and press open.
Uploaded files folder will open and you will be able to see all the uploaded files. Since we uploaded just one file, we will see only that. Select the file and press open.
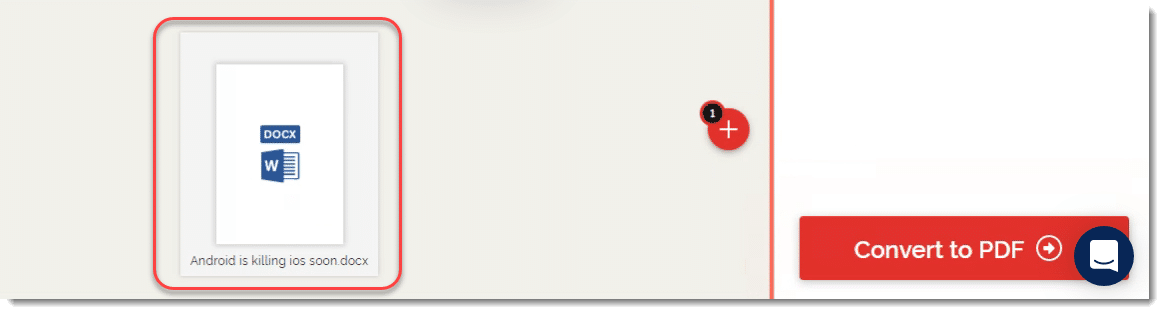
The file will be uploaded successfully on the website and hence the test is well performed.
Toggle Developer Tools in Live Testing in CrossBrowserTesting
The next option in the tool panel located in Live Testing is toggle dev tools.
As a web developer, you might already be familiar with developer tools of a browser and they need no introduction. But to brief it out, a browser contains powerful tools built in to test the elements of the website. It helps in inspecting the HTML components, JavaScript modules and more. Developer tools help the developer inspect how their elements are loaded and how the variables are behaving in the backend, as an example. Since the developers do not have the browser installed, how will they open the tools inside it? Therefore, to solve this problem, CrossBrowserTesting has provided this option. Just click on the button and the developer tools of the browser will open up.
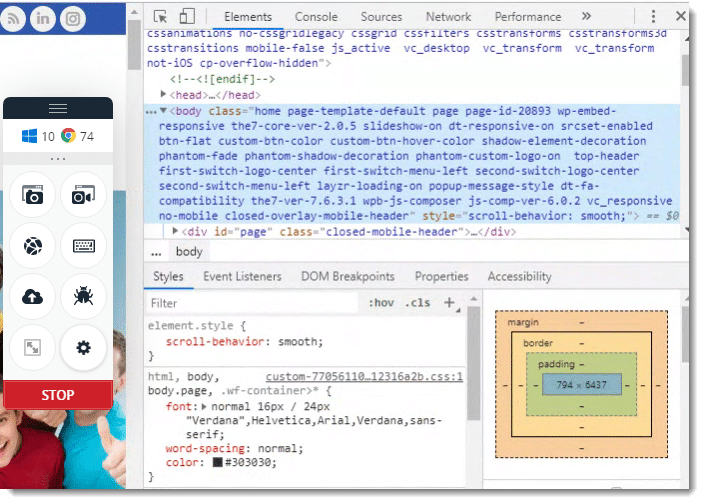
Now the developer can inspect as if it is on the personal system.
Scaling in Live Testing in CrossBrowserTesting
Scaling in terms of computers means increasing or decreasing the size of something. Basically, the user tries to change the size from its original size. Scaling can be done on any element of the page or the objects. It is similar to zooming to fit option in YouTube when the original video starts on the lesser viewing area. The scaling option is the next option after the developer tools option.
To see how this setting work, follow these steps.
- Choose a resolution of your choice from the Live Test dashboard screen. I have chosen a 1024x768 resolution.
-
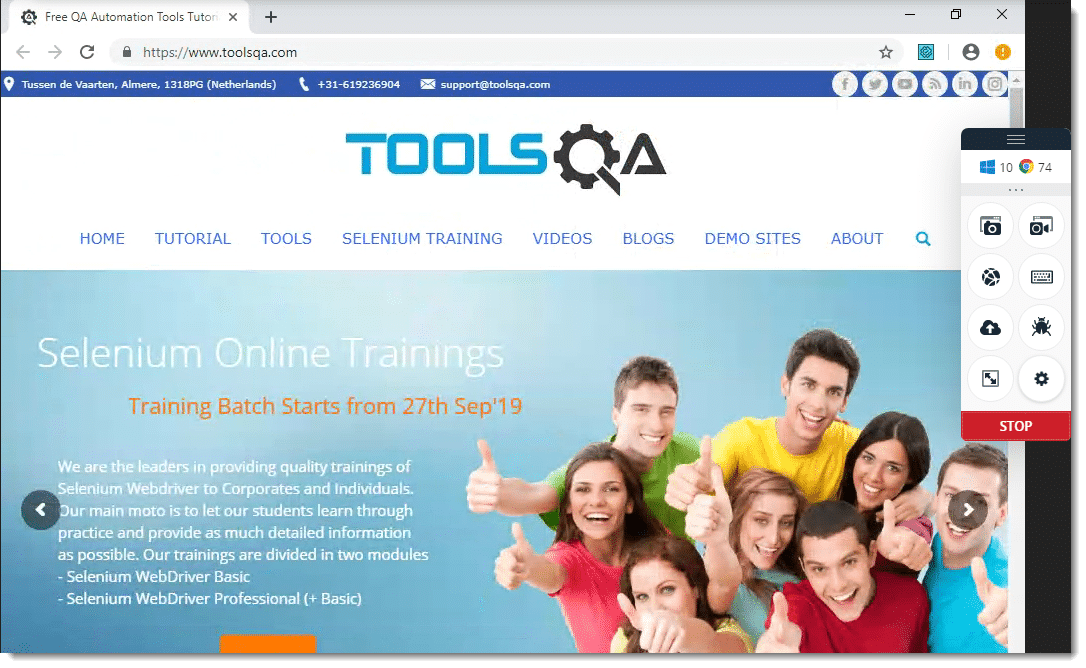
Run the test with the same chosen resolution on the website.
-
You will be able to view the website with the same resolution on the remote system. Observe the screen and the website area that can be seen on my system while running the test.
- Select the Scaling option that will enable the Scale-to-fit setting on the remote system.
Again observe the screen and how the website is displayed this time.

So, as you might have guessed it, scaling option in tool panel helps in scale-to-fit the screen of the remote system. This means that the remote system on which you are actually running the website will be scaled with the system on which you are viewing the website with respect to your current viewing area. This difference can be seen above. It will fit the match and fit the website with your current viewing screen. You can toggle it off to view the website on the original scaling.
Settings in Live Testing in CrossBrowserTesting
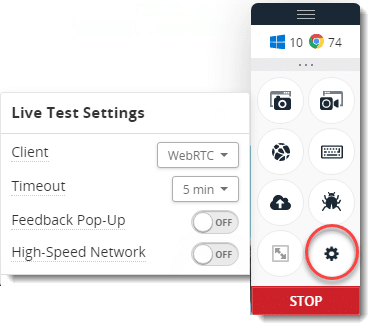
Settings option in Live Testing panel opens the Live Test settings panel. This is the same panel that we discussed in the Live Test Settings part.
Select the button and the settings menu will pop-up.
Press Stop to stop the live testing session. All the settings in the tool panel are very important with respect to testing purposes. Once you start testing a website on the CrossBrowserTesting, you will know how to use each of them efficiently. I am sure you will be amazed by the capabilities of Live Testing in CrossBrowserTesting. As you might have noticed, to provide a good picture, we have used three different websites and perform live tests on them. Therefore, it is better you keep on using the software as much as you can on a variety of website to have a good sense of each setting and how to use them.