Performing real-time testing in LambdaTest was quite an exercise. Not to mention the tool panel in real-time testing that helped make real-time testing more efficient and incorporating many features at a single place. All those tools are extensively required and used in real-time testing by the users. In this tutorial, we will be focussing on Screenshot Testing in LambdaTest. Screenshots, as you must remember, were taken at different points in real-time testing to view and share the report of the website with your teammates. Screenshots are one of the most used, if not most, feature in cross-browser testing. Since you are testing your website on different browsers, you must be able to show the bug or an issue directly through images and not by writing long issue reports. This saves your time and improves the overall process of testing. Walking in the same direction we will explore
- What is Screenshot Testing?
- Performing Screenshot Testing in LambdaTest.
- Lists in Screenshot Testing: How to save your favourite browsers in a single List.
- Basic Authentication in Screenshot Testing: How to perform screenshot testing on the web pages that require authentication.
- Resolution in Screenshot Testing: How to set up one resolution for all the browsers.
- Preference panel in screenshot testing: How to set up your preferences in Screenshot Testing.
What is Screenshot Testing in LambdaTest?
As discussed above, screenshots are taken and used to improve the overall process of testing the websites. They take very less time to explain something very complex and are easily understandable. Screenshot testing in LambdaTest is the process of taking screenshots on different browsers simultaneously to analyze them. In real-time testing, we selected one browser and a version of that browser to perform the testing. If we are to take every browser one by one (with versions), it will take a lot of time. This brute force method is very inefficient. Screenshot testing comes to the rescue here. Screenshot testing in LambdaTest lets you take bulk screenshots (25 to be exact) of different devices (desktops and mobile) with different versions and screen resolution in a single click. This way you get all the screenshots easily in a single .zip file which you can analyze one by one.
How to perform screenshot testing?
To perform screenshot testing in LambdaTest, you have to Login to your LambdaTest account.
- Once you have logged in, select Screenshot under Visual UI Testing.

- Select the browsers on which you want to test your website.
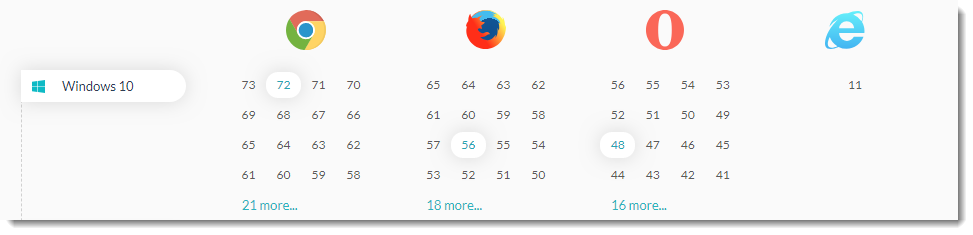
Note: You can choose a maximum of 25 browsers from the list. You can also see the number of browsers you have selected on the top options bar.

As you can see I have selected 11 Desktop Browsers and 0 Mobile Browsers. You can select mobile browsers from the side device selection bar which can also be seen in the above image.
- Once you are done with the selection. Press Capture from the top address bar.

-
Once you press Capture, LambdaTest will start to run your website on different devices, browsers, and versions and capture their screenshot. This might take a few minutes depending upon your selection.
-
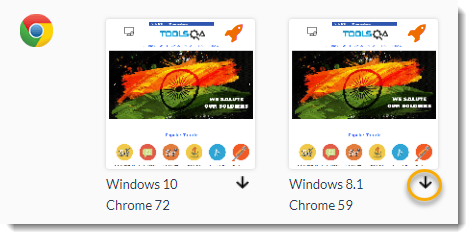
After all the screenshots have been generated, you will see them on the window screen. You can download the screenshot for a particular browser and particular version by clicking the down arrow beside the screenshot.
- The top panel will show you three option to work with.

- Download all (Zip): This option is used for downloading all the screenshots into one single zip file into your assigned downloads folder of the system.
- Share Screenshots: This option is used for sharing the screenshot with the sharing link or providing the email address. This link will expire in the time period that you will provide.
- Back Recent History: It will take you to the history of your screenshot testing. It is similar to the history icon provided in the device selection panel in your screenshot testing dashboard.
![]()
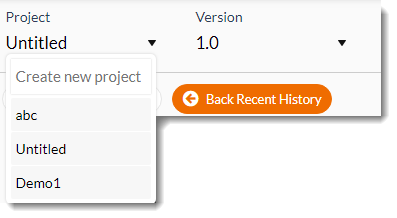
You can also save your screenshot test in your predefined project about which we talked in tool panel in LambdaTest tutorial. You can locate the project dropdown above share screenshot option.
After saving the screenshots into your project, you can see them under Test Logs. So this way you can perform screenshot testing in a step-wise manner.
Coming back to the dashboard of screenshot testing, you might have noticed a few other options besides selecting the browsers. A snapshot of the same is shown below.

We will discuss these options one by one in our next section because they are very helpful in screenshot testing.
Lists in Screenshot Testing
Seen in the above screenshot, the first dropdown beside the star icon is List. A List in screenshot testing is the predefined set of browsers (with their versions) that you can save for future use. Considering a simple example, let us say that you have a website that you want to test on a particular browser (with versions). Now that you have tested it, you will pass it on to the developers. Let us now say that the developers give you the website again to test. You have to perform testing on the same set of browsers. This happens a few times. Now if you will select all those browsers and version, again and again, it would be really time consuming and inefficient. For this, List comes into the picture. With List, you can save the browsers that you wish to test on and whenever needed, you can just select the list.
To set a List in screenshot testing, follow these steps.
-
Select the browsers and versions as we did in the previous section.
-
Once done, select the star icon which says Save to List.

- As soon as you press the button, you will see that the List value has changed.

- Now that you have saved your list, you can come anytime and select this list. It will run the test on your selected browsers only.
You can add more browsers to the same list by tapping the star button again after selecting more (or less) browsers.
Basic Authentication in Screenshot Testing
The next option that we see in the image is Basic Authentication. You can brief yourself about authentication and basic authentication from here. Basic Authentication is the kind of authentication that requires username and password to access something. It can be anything from an API to a website. Your username and password decide whether you are allowed to access the API or website you are trying to access. So why do we need it here? Basic Authentication option in screenshot testing helps you perform screenshot testing on the websites that require basic authentication. To see how does it look like, visit www.lambdatest.com. You will be prompted to enter your credentials. If you are having such a website, just click on Basic Authentication in the options and enter your credentials.

Now when you perform the testing on the pages requesting authentication, it will be smooth like usual as LambdaTest will authenticate automatically on your behalf using your credentials
Resolution in Screenshot Testing in LambdaTest
The next option beside the basic authentication is Resolution. Resolution sets the resolution for the Windows and MacOSX devices.
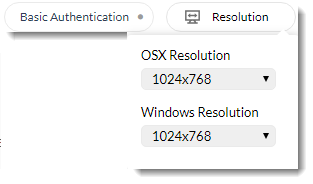
Remember that while doing the real-time testing, we used to set resolution too when selecting the browsers and devices. Since here we can select more than one browsers (unlike real-time testing), we set the resolution for all of them at one single place. It should be noted that the resolution you select will be set for all the browsers and cannot be changed for each browser separately. So as seen in the figure, all the Mac selected browsers and versions will run on 1024x768 resolution and all the windows selected browsers and versions will run on 1024x768 resolution.
Preferences in Screenshot testing
The next icon that we see on the screenshot testing dashboard is the preferences icon. As the name suggests, you can set your preferences for screenshot testing through it. This option is located right next to the Resolution icon. It should be noted that whatever preferences you select in this panel, they will be applicable to all the screenshots and not on individual browsers.

Once you click on this icon, it will open the preference panel for you which contains multiple options.
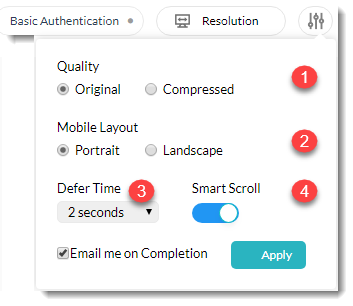
We will brief you about each option one by one.
Quality - This is the quality of the screenshots generated. This will depend upon resolution.
Original: In original quality, the better resolution will have bigger sized screenshots. They are sometimes needed and sometimes not.
Compressed: Therefore, another option of compressed screenshots is available. Compressed screenshots help you get the screenshots with the compressed quality resulting in lesser size as compared to the screenshots in original quality. This also helps the image to be shared with the less consumption of bandwidth and saving time and resources.
Mobile Layout - The Mobile layout is the type of mode you want your website to be seen in the mobile device.
Portrait: This mode will let you see the website as it will be seen on a mobile device in portrait mode.
Landscape: Same goes for landscape mode. Confused? Have a look at the below images.
Landscape Mode:

Portrait Mode

Note: These are the snaps of the single screen (without scroll) in both the modes.
Defer Time - Defer Time (Or Postponing) is a very useful feature in screenshot testing. Sometimes it may so happen that you will encounter the issue on something that is available/visible on the website after a few seconds. This can be a popup or modal etc. For testing such web pages and capturing their screenshots, you need to apply the defer time. This will postpone or halt the screenshot capturing process up to that time.
Smart Scroll - In case you have a webpage that can be scrolled and you want to show the complete page in a single image, you use smart scroll. So, if you have a webpage and have turned on the smart scroll feature, your screenshot will look something like this:
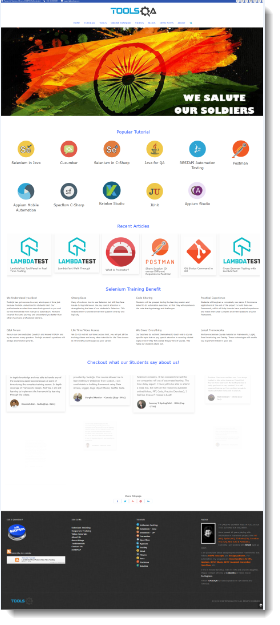
As you can see, the complete page of the website is now visible from top to end. You can turn the feature off and see how you will get the screenshot now. Do it as a practice.
Email me on Completion - As the name suggests, you will be intimated once your screenshots are captured. The email will contain a link to download your screenshots as a zip file.
Screenshot testing is a very important part of cross-browser testing because screenshots are the main method of conveying your issue in pictorial form. I hope you got the heart and core of this concept. It has been a lengthy tutorial and a lot to digest. I recommend you practice screenshot testing a lot on LambdaTest and have a good command over it. Try to use each feature described a number of times. We will move on to our next tutorial now.