In the Previous section, we understood What is Protractor? looks quite complicated right? But using protractor is not at all difficult. In this tutorial we will look at How to Set up Protractor? It is simple and easy just 3 steps. In this article, we are going to explore
- How to install Node.js?
- How to Install Protractor?
- How to update Webdriver Manager to the latest version?
How to Set Up Protractor?
Let's start with the tutorial now, below are the required steps to set up Protractor.
Step 1 - Download & Install Node
The protractor is a node.js program, we need to have node binaries installed on our machine.
Once you have installed the Node, it is better to verify the installation. To verify the installation, please follow the below steps:
Open command prompt and type node -v, This command outputs currently installed version of the node in your machine.

Step 2 - Install Protractor
In the previous step, we have installed Node. Once we install the node, we can install any node.js packages using node commands. As we discussed in the Introduction of Protractor that Protractor is Node application, we can install protractor using the simple install command.
Open your command prompt and type npm install -g protractor

Note: -g is for installing protractor globally. So that we can run protractor from anywhere in the system.
Note: If you notice above, install protractor command has automatically installed Webdriver-Manager along with Protractor.
Once Installation is complete, verify the installation using command protractor ––version. This command outputs the current version of protractor if it is installed correctly in your machine.

Note: There is double hyphen without any space before version. A single hyphen may not result in the expected output.
What is WebDriver Manager?
WebDriver-Manager allows automating the management of the binary drivers (e.g. chromedriver, geckodriver, etc.) required by Selenium WebDriver. Webdriver-Manager started in protractor as a binary manager for selenium server and browser drivers. It is an awesome solution for setting up a selenium server for your end to end web tests. Webdriver manager was originally part of the Protractor project and has been extracted as its own node module.
Goals of Webdriver manager:
There are three goals of webdriver manager:
- Downloads the selenium server jar and browser drivers
- Runs the selenium server for the end to end tests
- Manages downloaded versions
To get a list of commands for webdriver-manager, use the help flag like webdriver-manager --help


Step 3 - Update Webdriver Manager - Set Up Protractor
WebDriver Manager package is installed, but as of now it does not has anything available in it. It is an empty package. Let us have a check on this by using command webdriver-manager status

You can notice that by default when WebDriver Manager gets installed, it doesn't have anything in it. No Selenium Standalone, Chromedriver, etc.
To install the required Selenium Standalone Jars and Drivers executables, we need to make use of update command on WebDriver Manager. When we run the command webdriver-manager update it downloads and updates three things namely browser drivers such as ChromeDriver, GheckoDriver, and Selenium Standalone Server. Running the test after this command always ensures that it works fine with the latest version of the browser which we use such as Chrome Latest or Firefox Latest as the browser updates their version their relevant drivers also gets updated to support the latest feature of the browser.
To update the webdriver manager, run command in command prompt webdriver-manager update
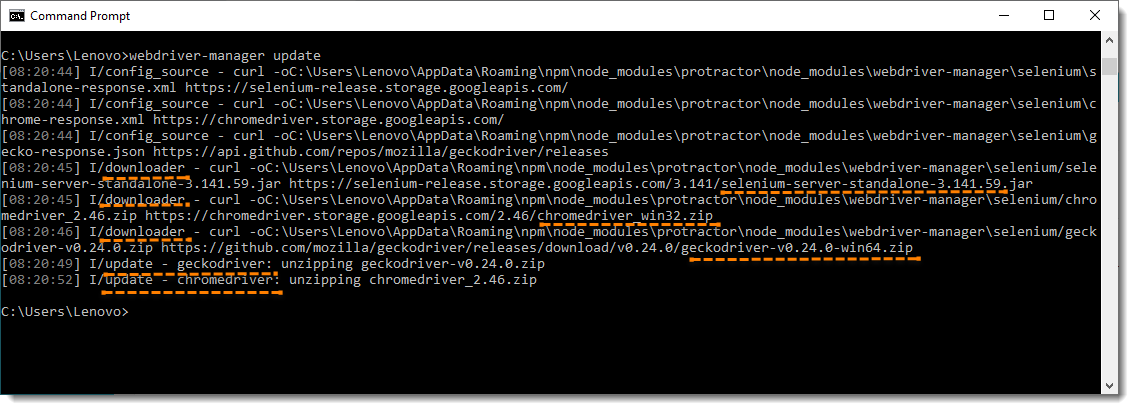
It is now visible that the webdriver manager is first downloading the Jars & Executables and then updating those to the latest version automatically.
Once you update is done, check the status again and you will find that all of the three things mentioned above is now available within the webdriver manager package.

We are done with Protractor installation.
