Organizing the tests in a proper format is one of the basic functionality provided by all the automation tools. Following the same synthetics, SoapUI also provides a few standard guidelines to structure the test cases in a defined hierarchy. We have already covered the details of creating and setting up a Project in SoapUI. Subsequently, in this article, we will understand how to create and organize the test cases in SoapUI by covering the details under the following topics:
- What is the structure of test cases in SoapUI?
- What is a TestSuite in SoapUI?
- Similarly, what is a TestCase in SoapUI?
- What is a TestStep in SoapUI?
- How to generate a TestSuite for all requests of the WebService?
What is the structure of test cases in SoapUI?
SoapUI structures the test-cases in a three-tier hierarchy, as shown below:
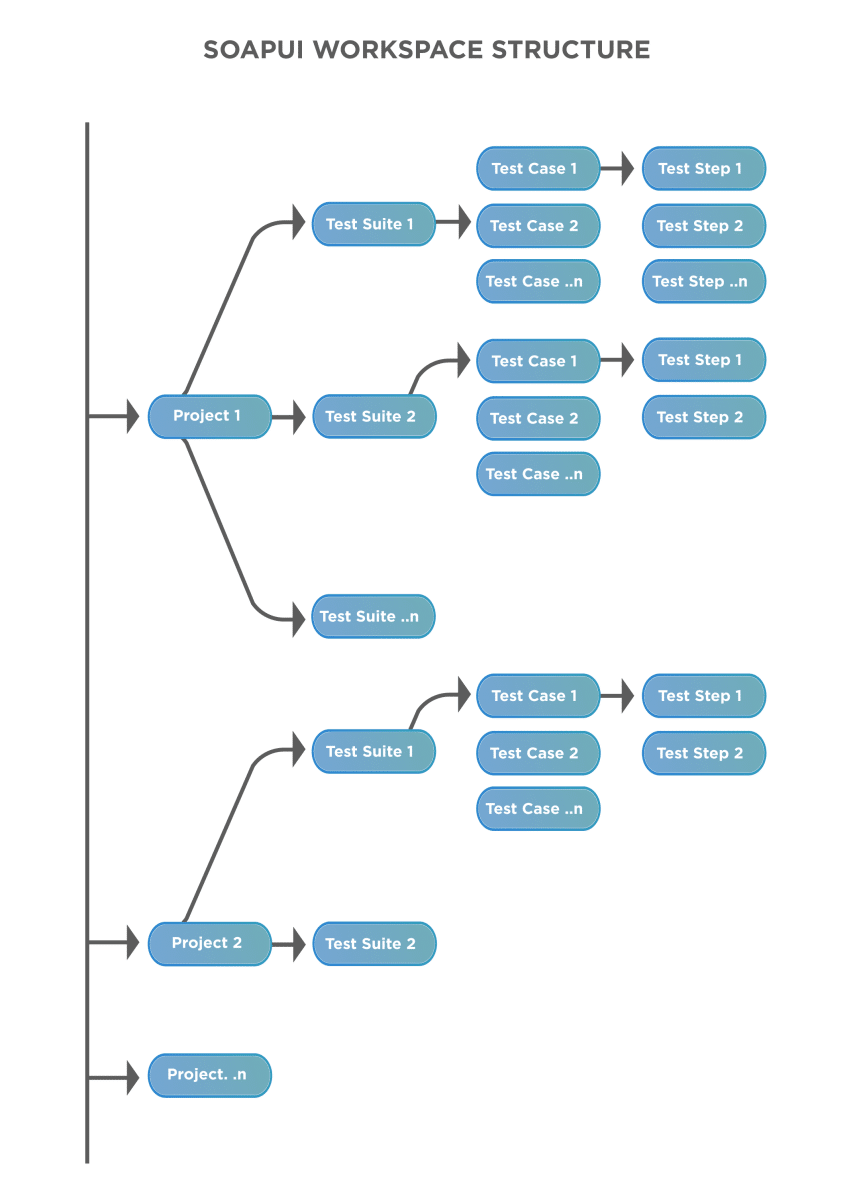
As is evident from the above figure, the top-level element in the test case hierarchy designates the "TestSuite". Each TestSuite can contain multiple "TestCases", and each TestCase can inturn contain multiple "TestSteps". The same hierarchy will be represented in SoapUI as follows:
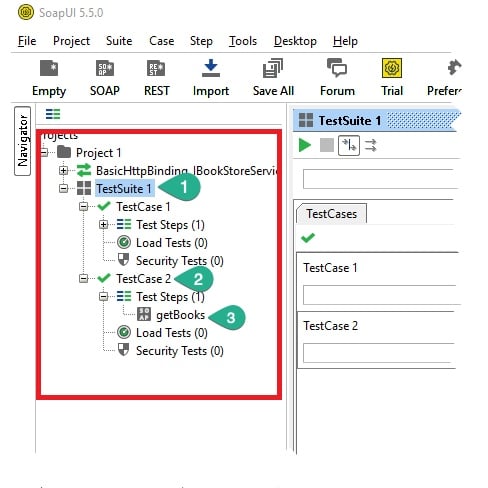
Where,
- Marker 1 highlights above is a TestSuite. Additionally, it has two test cases under it, namely TestCase1 and TestCase2.
- Similarly, Marker 2 highlights a TestCase, which in turn carries TestSteps.
- And, Marker 3 highlights a TestStep.
Let's understand the details and how to create these test elements in SoapUI in the following sections:
What is a TestSuite in SoapUI?
A TestSuite is a logical unit that groups TestCases. Moreover, a SoapUI project can contain any number of TestSuites. The following figure shows how a TestSuite reflects the grouping of TestCases:
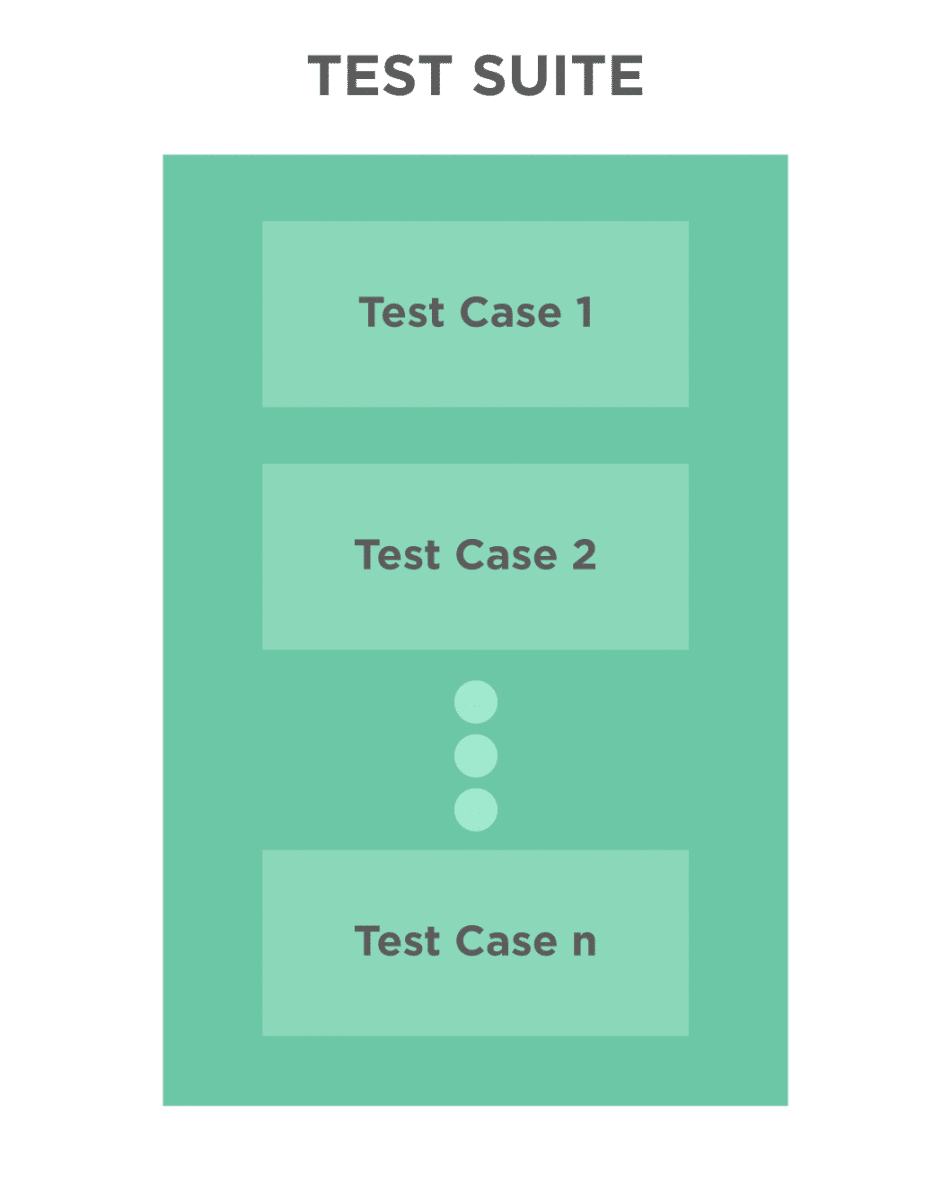
Let's understand in the next section, how we can create a TestSuite in SoapUI:
How to create a TestSuite in SoapUI?
To create a new TestSuite in SoapUI, follow the steps below:
-
Firstly, create a new SOAP project as detailed in the article "SoapUI: Working with Projects" for URI: "http://bookstore.toolsqa.com/BookStoreService.wsdl" and name it as "BookStoreService".
-
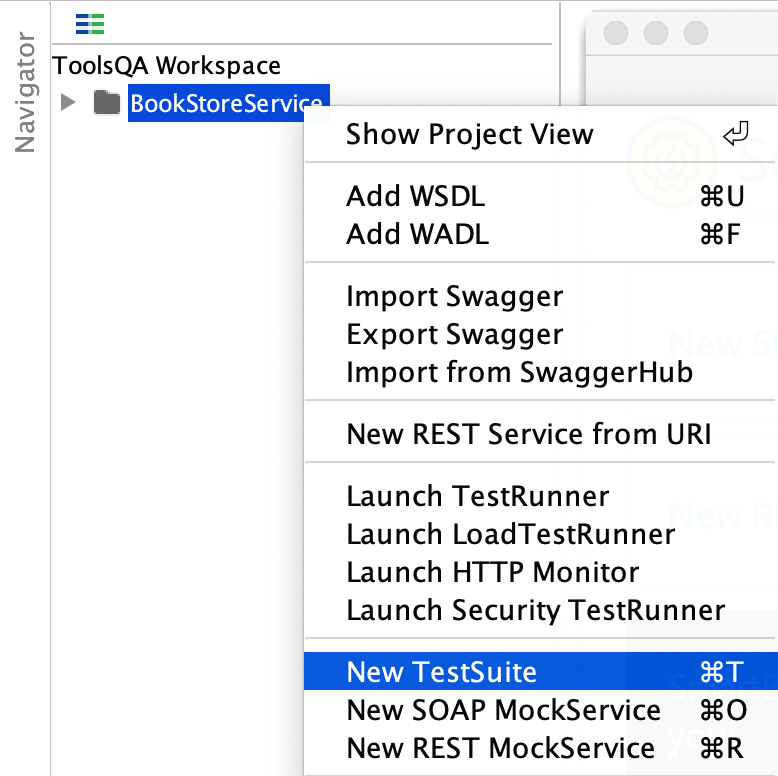
Secondly, right-click on the Project in the left navigation bar or click on the "Project" menu on the top navigation bar. After that, select "New TestSuite" as shown below:
OR
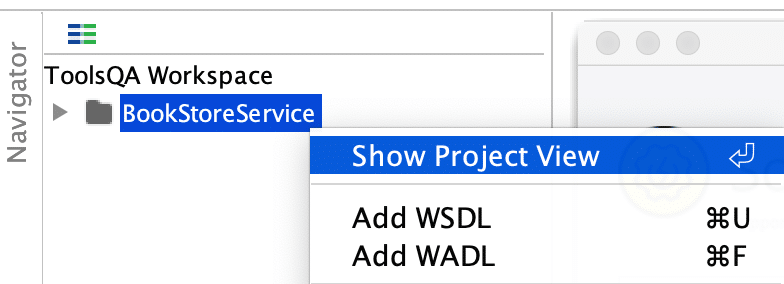
- Thirdly, right-click on the Project and select "Show Project View" as shown below:
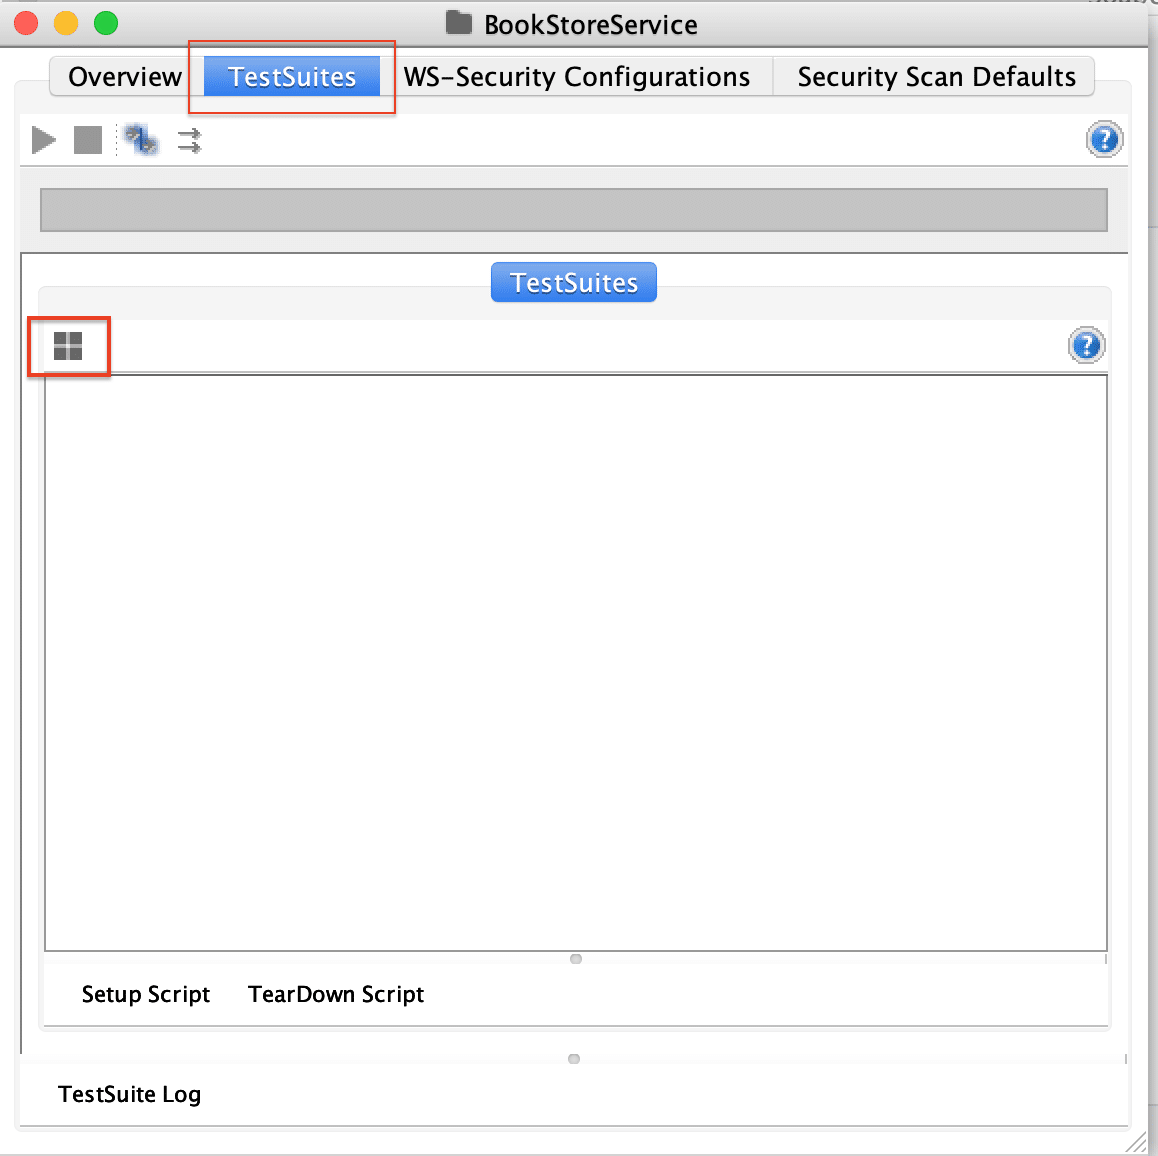
- Fourthly, on the "Project View" dialogue box, click on the "TestSuites" tab. After that, click on the "Create a new Test Suite" option, as shown below:
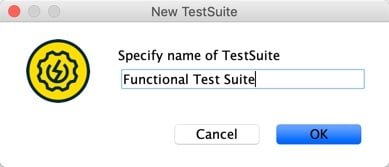
- After that, both of the ways mentioned above will open a dialogue box where you can specify the name of the TestSuite. Its as shown below:
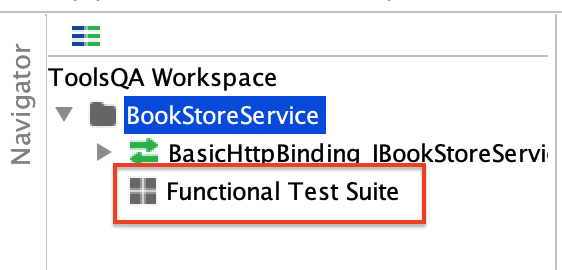
- Finally, after clicking on the "OK" button, it will create an empty TestSuite under the SoapUI project, as shown below:
So, now that we have a test-suite available in SoapUI. Consequently, let's add some test-cases to the test suite, as mentioned in the section below:
What is a TestCase in SoapUI?
A TestCase is the organized series of steps that need to be executed in a given sequence to validate the expected behavior of the system under test. Following the same concept, a SoapUI test-case also specifies a set of steps to validate a specific feature. Additionally, a SoapUI TestSuite can contain multiple TestCases. Let's understand in the below section, how we can create a TestCase in SoapUI?
How to create a TestCase in SoapUI?
Follow the steps mentioned below to add a TestCase to the above-created TestSuite:
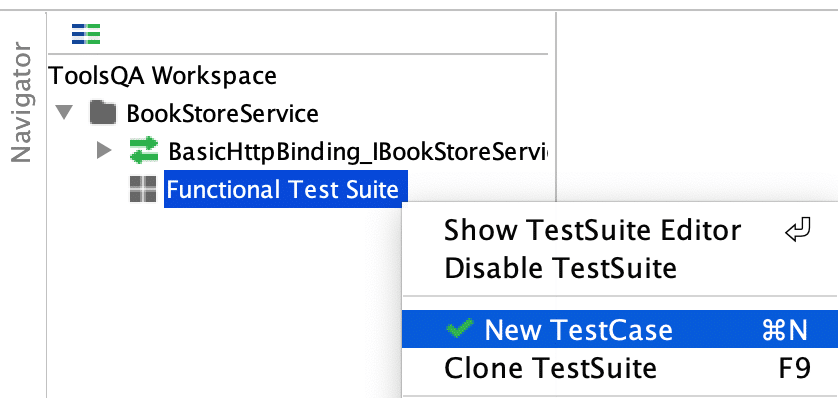
- Firstly, Right-click on the TestSuite "Functional Test Suite" in the left navigation bar or click on the "Suite" menu on the top navigation bar. After that, select "New TestSuite" as shown below:
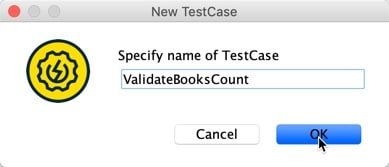
- Secondly, it will open a dialogue box as shown below, where you can specify the name of the TestCase:
3)Thirdly, it will add a new empty TestCase under the TestSuite and will open the TestCase Dialog box, as shown below:
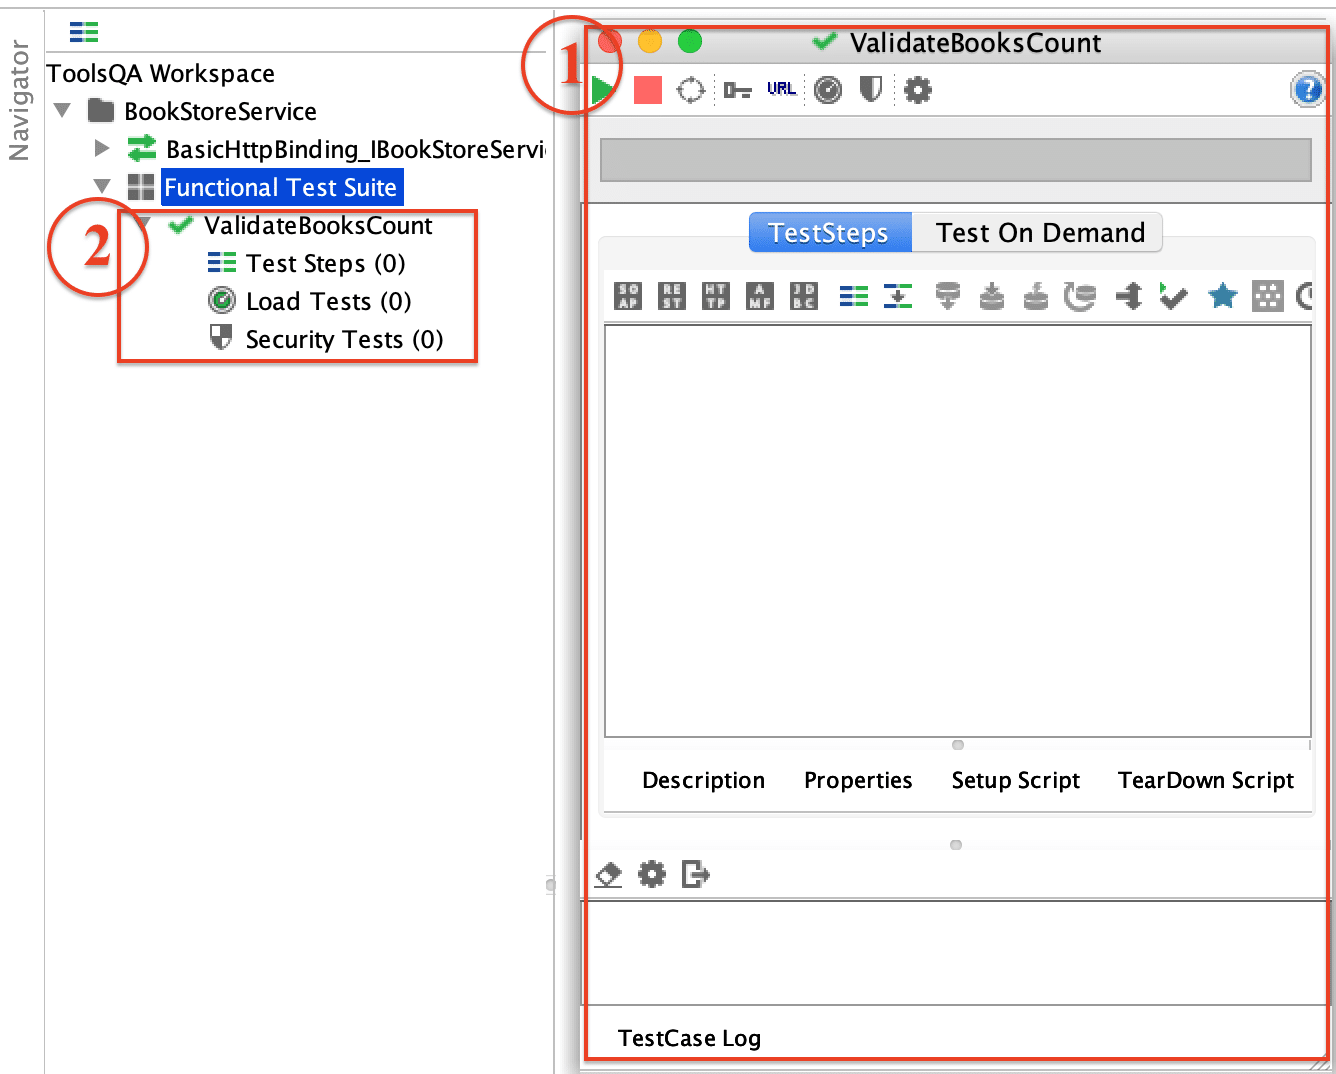
As we can see in the above screenshot, it will open the TestCase dialogue box, as depicted by marker 1, in the right-side panel. Also, we can see, marked by Marker 2, that a new TestCase named "ValidateBooksCount" gets added under the TestSuite "Functional Test Suite", and it has zero(0) Test Steps, i.e., it has no Test Steps.
So, now that we have a test-case available in SoapUI. Consequently, let's add some test-steps to the test case, as mentioned in the section below:
What is a TestStep in SoapUI?
The TestSteps are the "building blocks" of functional tests in SoapUI. These are added to a TestCase and validate the functionality of the web service(s) that requires testing. Subsequently, let's understand in the following section, How we can add a TestStep to the SoapUI TestSuite:
How to create a SOAP TestStep in SoapUI?
Follow the steps mentioned below to add a TestStep to the above-created TestCase:
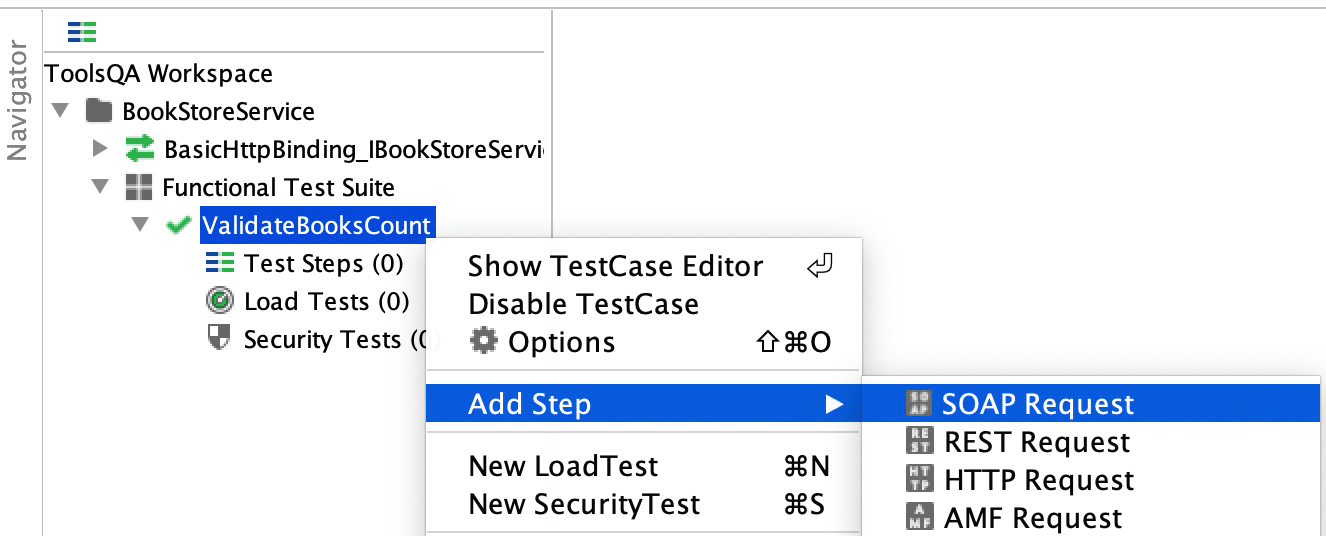
- Firstly, right-click on the TestCase and click on "Add Step >> SOAP Request" as shown below:
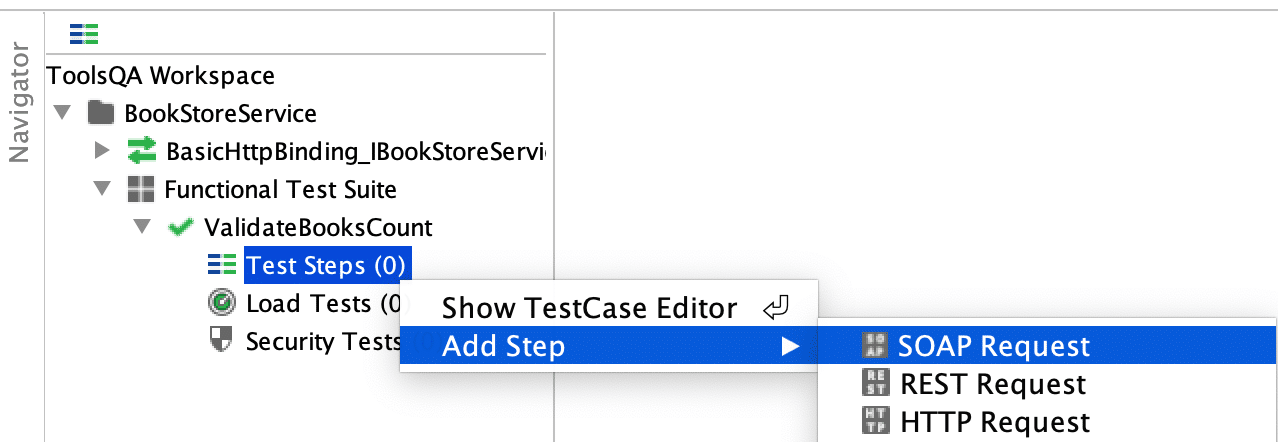
OR you can add the same by right-clicking on "Test Steps" option as shown below:
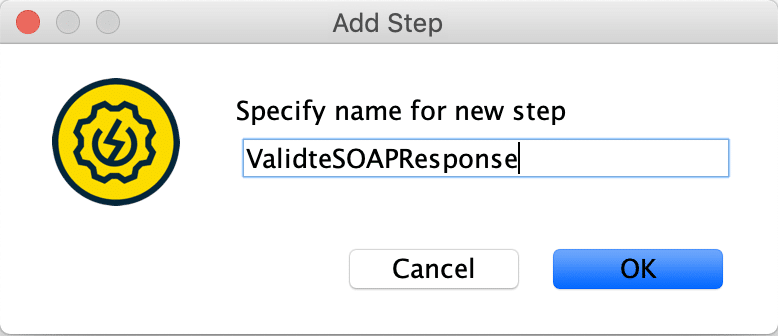
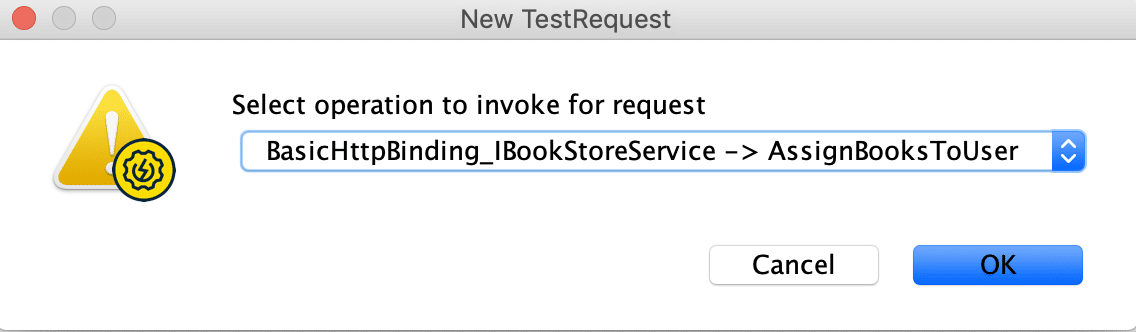
- Secondly, after clicking on the "SOAP Request" option, specify the name of "Test Step" as "ValidteSOAPResponse" as shown below:
- Thirdly, click on the "OK" button. After that, it will show a dialogue box which specifies the list of all the functions exposed by the SOAP service, as shown below:
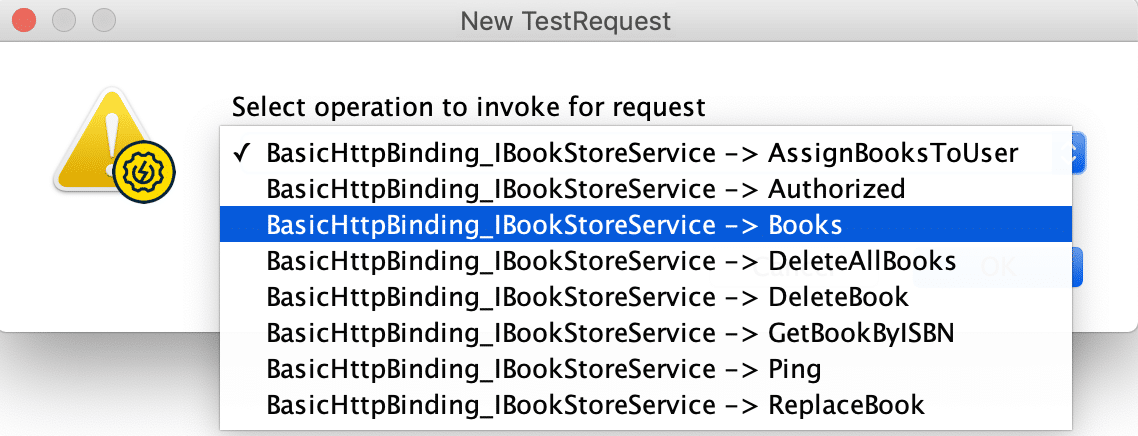
- Fourthly, click on the drop-down to select "Books" endpoint exposed by the Webservice, as shown below:
- Fifthly, clicking on the "OK" button after selecting the "Books" method, it shows the below dialogue box to select the needed assertions in the TestStep.
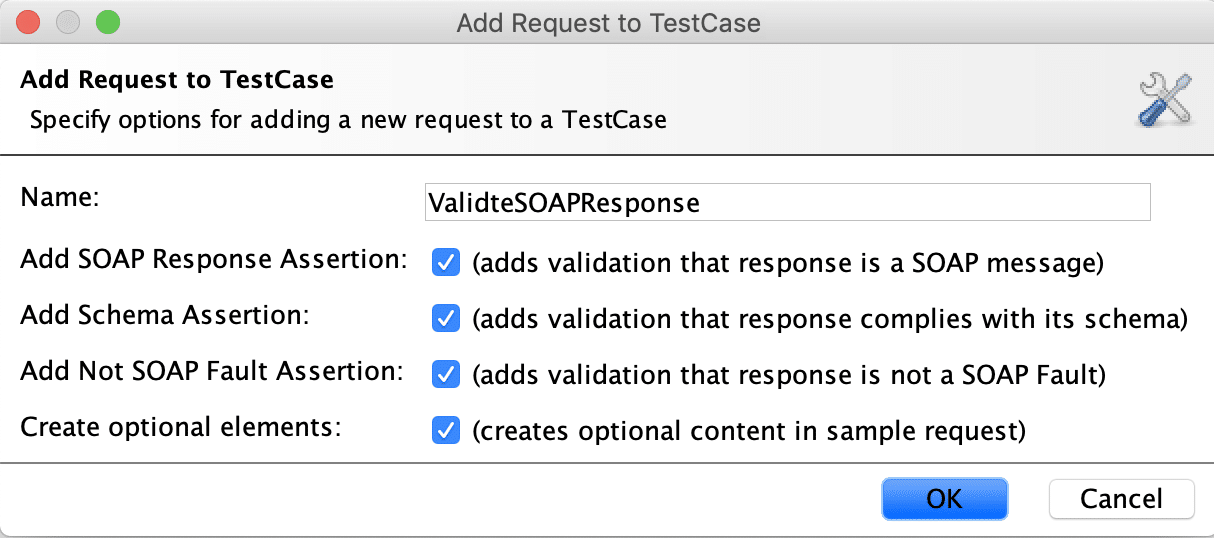
Note: These are few of the SOAP specific assertions which we can add while adding a "SOAP Request TestStep". Additionally, we will be covering all the SOAP and REST assertions in the next articles dedicated to SoapUI assertions.
- Sixthly, after clicking on the "OK" button, a new TestStep (shown by Marker 1) will add under the TestCase. It will open the details of the SOAP request in the right panel. After that, at the bottom of the right-side panel will display all the assertions selected in the previous dialogue box (shown by Marker 2).
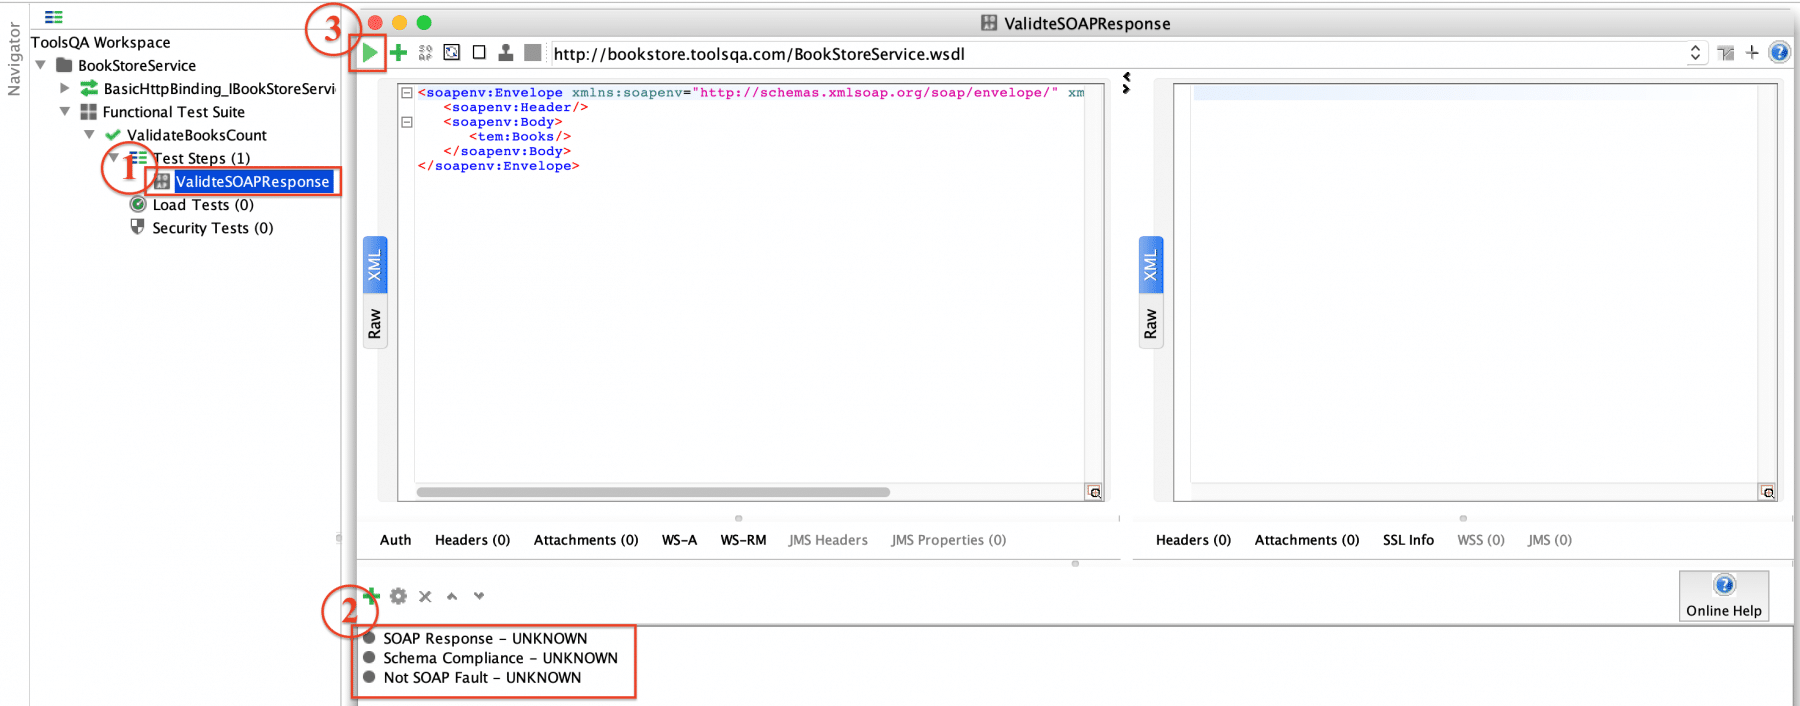
- Finally, click on the play button*(indicated by Marker3)* in the above screenshot, to execute the TestCase. It will show the result, as shown below:
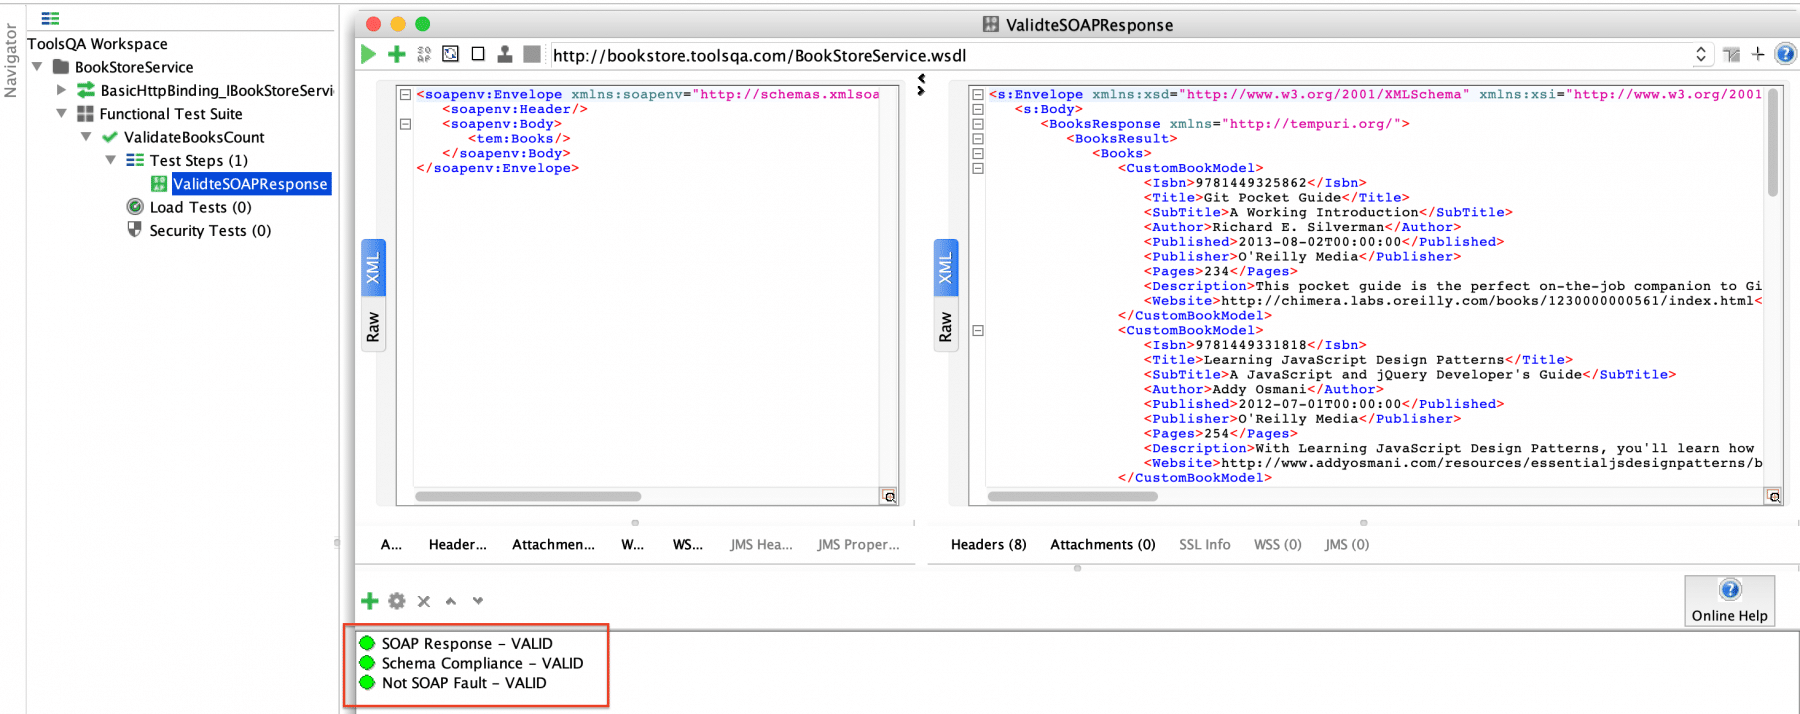
As we can see in the above screenshot, all the assertions are showing in green with a "VALID" result, which indicates that the test case executed successfully.
How to create a REST TestStep in SoapUI?
Now consider a scenario that instead of the SOAP services (we mentioned above in the TestSuite scenario), we have to test a REST service. For testing REST services, the maximum of steps will be the same, as we followed for the SOAP services, except that, we will be adding the TestSteps for REST service, instead of the SOAP service. Let's see how we can achieve the same in SoapUI:
-
Firstly, create a new REST project as detailed in the article "SoapUI: Working with Projects" for URI: "http://bookstore.toolsqa.com/BookStore/v1/Books" and name it as "BookStoreService".
-
Secondly, add a new TestSuite under the project named "Functional Test Suite", as mentioned in the section " How to create a TestSuite in SoapUI?"
-
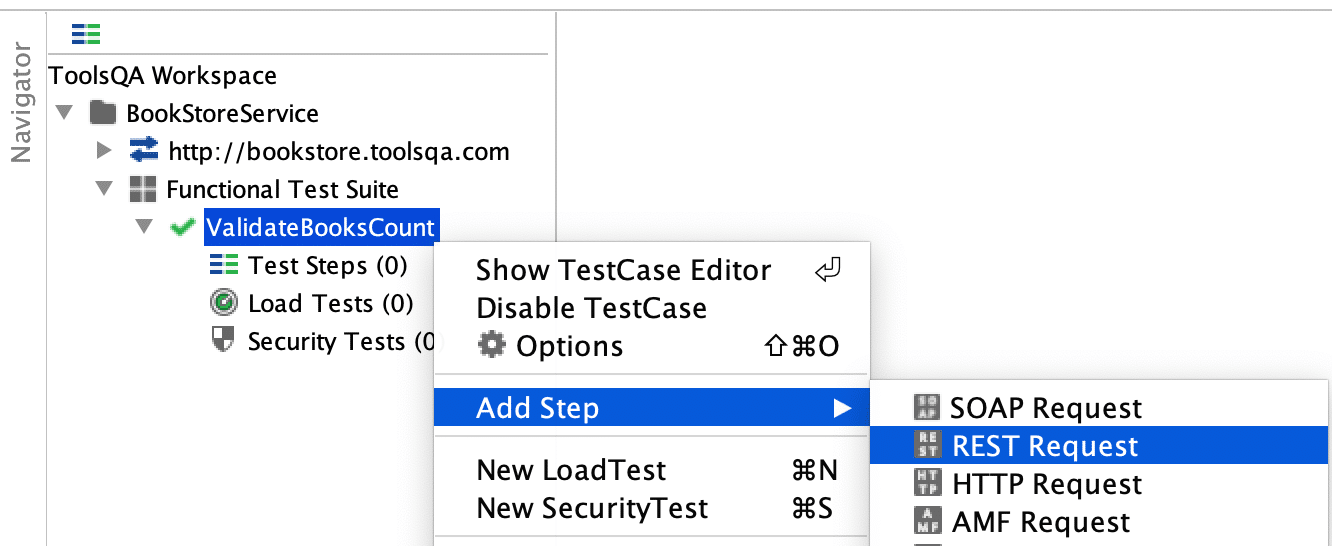
Thirdly, add a new TestCase named "ValidateBooksCount" under the TestSuite created above by following the steps mentioned in the section "How to create a TestCase in SoapUI?"
-
Now, right-click on the created test case and select "Add Step >> REST Request" as shown below:
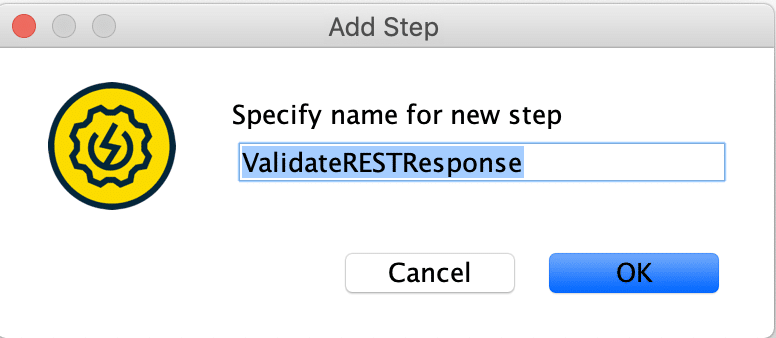
- Fifthly, selecting the "REST Request" will show you a dialogue box, where you can specify the name of the test step as below:
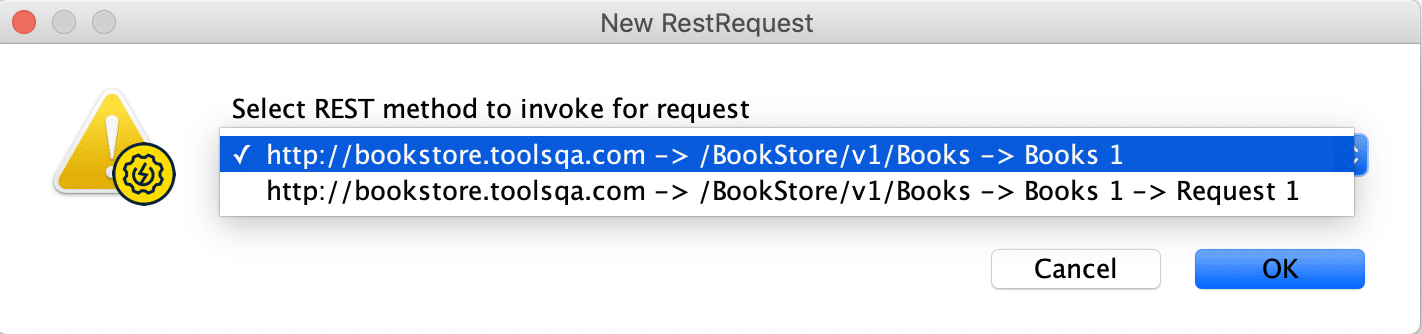
- Sixthly, clicking on the "OK" button will lead you to a dialogue box where you can select the endpoint of the service, which you want to test.
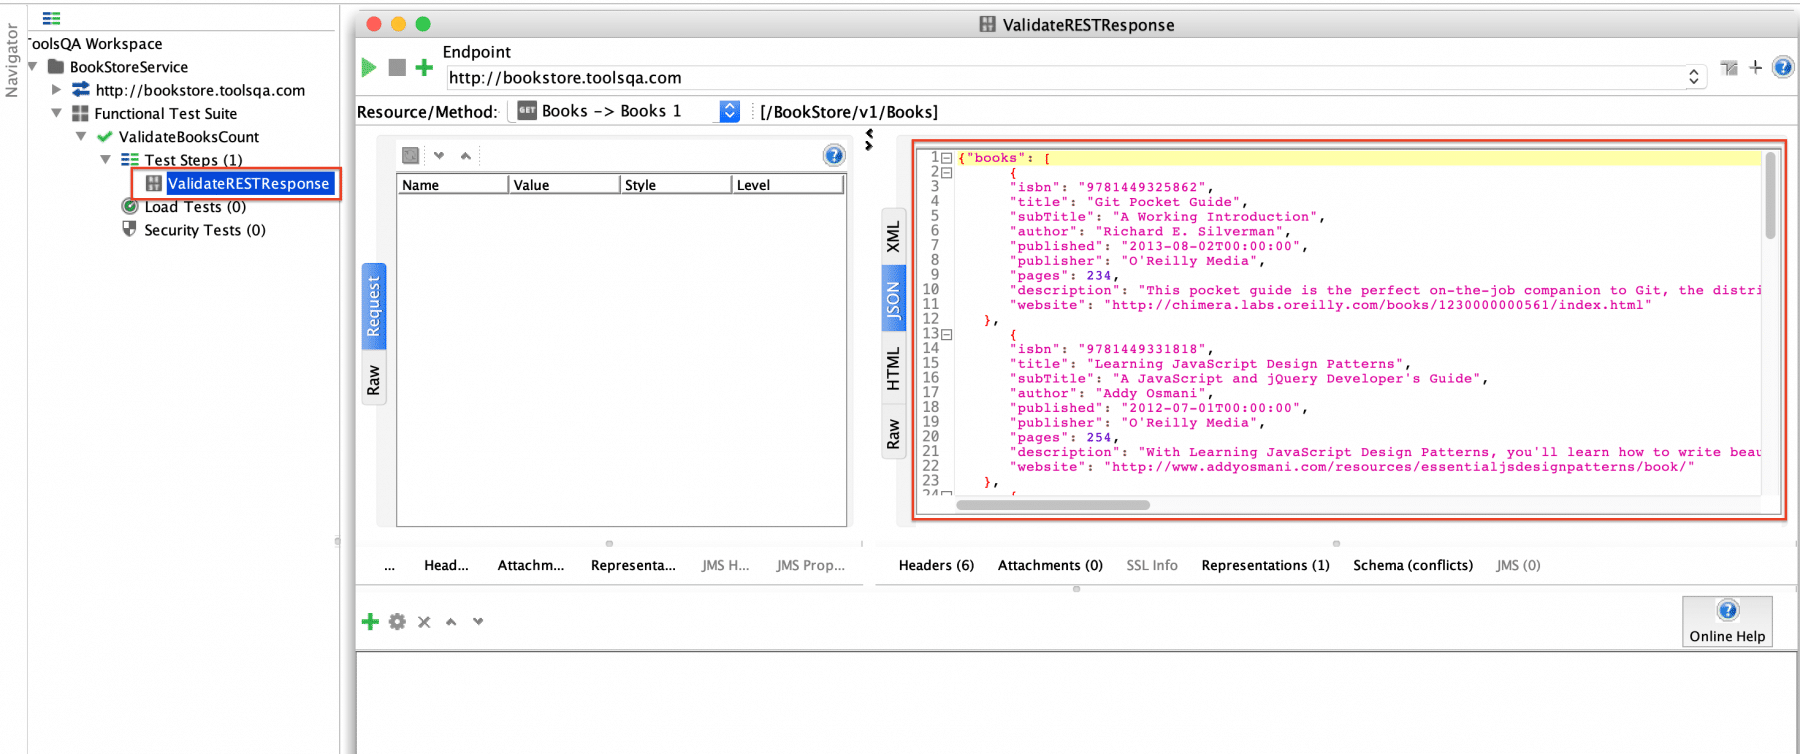
- Finally, select the "REST method" and click "OK", it will add the "TestStep" under the TestCase and open the TestStep Dialogue box in the right panel. Clicking on the "Play" icon will execute the REST service method and will show the response in the right screen of the panel, as shown below:
Note: In the case of REST service, no validation of assertions happened while adding the TestStep. So, ideally, no validations have been added to the test case. We will be covering the addition of assertions in the next articles.
So, by now, we have understood how we can add TestSuites, TestCases, and TestSteps for the SOAP and REST Webservices in SoapUI.
Now, SoapUI provides a way using which we can generate TestSuite for all the methods provided by the WebServices in a single step. Let's understand in the following section, how we can achieve the same:
How to generate a TestSuite for all requests of the WebService?
Instead of adding TestSuites for specific methods of the WebServices, we can add the TestSuites, TestCases, and TestSteps in a single go by auto-generating the same by following the steps mentioned below:
-
Suppose you have already created a SOAP project using the URI: http://bookstore.toolsqa.com/BookStoreService.wsdl
-
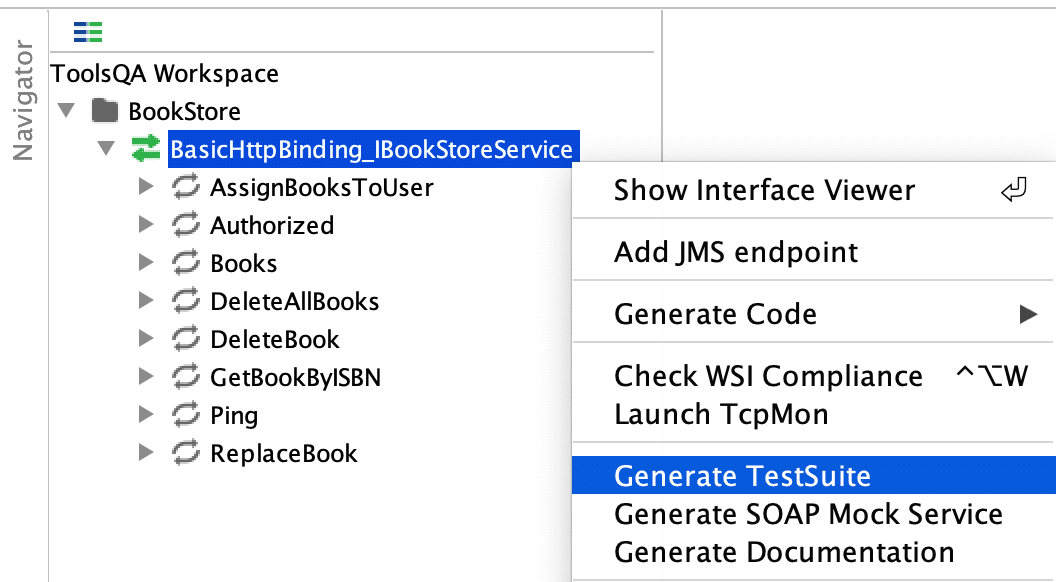
Right-click on the SOAP service and select "Generate TestSuite" as shown below:
- It will open the "Generate TestSuite" dialogue box, as shown below:
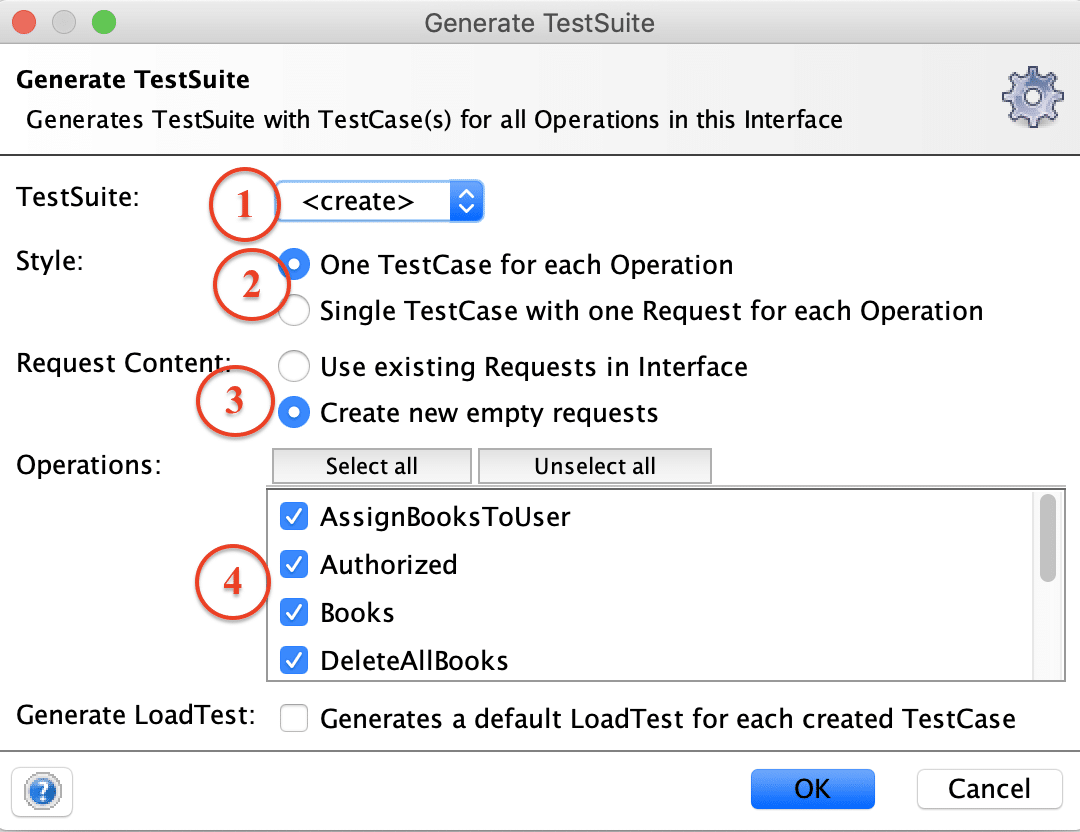
Where,
- Specifies the option to "create" a TestSuite.
- Specifies the style of how the TestCases will organize under the TestSuite.
- Also, it specifies the content of the request, whether to create empty requests or use existing requests.
- Specifies all method of the service for which TestSuite need to generate.
- Clicking on the "OK" button generated the dialogue which asks for the name of the TestSuite:
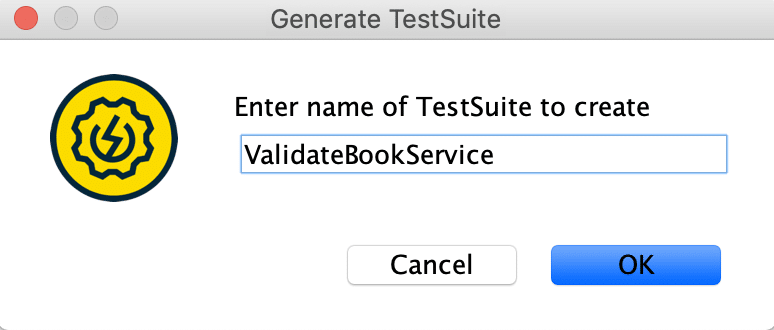
- After specifying the name as "ValidateBookService" and clicking on the "OK" button, it will generate the TestSuite, TestCases, and TestSteps for all the methods of WebService.
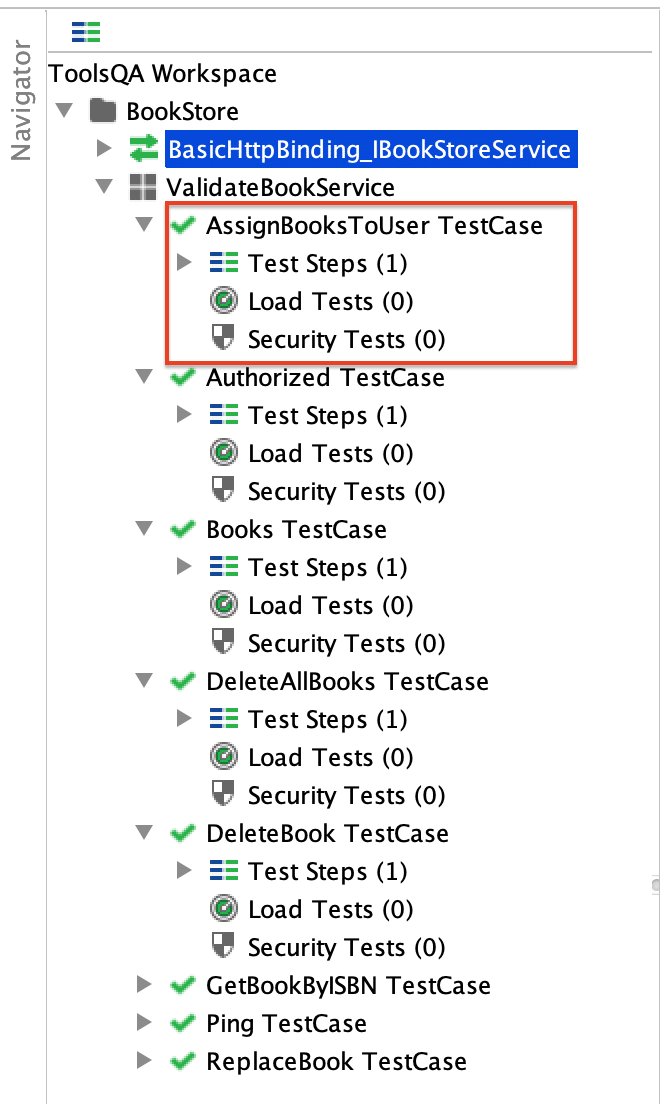
As we can see in the above screenshot, SoapUI has auto-generated the TestSuite named "ValidateBookService". It has generated one TestCase for each of the methods of the WebService. Additionally, it has also generated each of the TestCase has one TestStep for the validations.
Note: We can follow similar steps to generate the TestSuite for a REST service also.
Key Takeaways
- SoapUI follows the hierarchy of TestSuite >> TestCases >> TestSteps for organizing the validation steps.
- Each SoapUI project can have multiple test suites.
- Additionally, each TestSuite can have multiple test cases.
- Each test case can have multiple TestSteps.
- Apart from individually creating TestSuite, TestCase, and TestSteps, SoapUI can auto-generate TestSuite for all the methods of the Webservice in a single step.
As now we are well versed with the concepts of TestCases in SoapUI, let's move to the next article where we will understand what different types of "Assertions in SoapUI", how we can use and apply in SoapUI.