In the test environment, as well as the development environment, we often create functions. We create Functions so that we do not have to run or write the same code again and again, which is similar in structure but passes different values as input. For example, if I want to add 2 and 3, I will write the logic. But what if again at some point I want to add 3 and 5, then again 5 and 8 and so on. Should I write the logic every time? No way!! The same logic applies to TestNG. We do not run a single test only once, like in a lifetime. It's run on different values to give the best results like entering different usernames etc. We use TestNG parameters for this, and they are of various kinds. In this tutorial, we will learn the following concepts in TestNG parameters:
- What are the TestNG Parameters?
- How to run TestNG Parameters?
- How to Define TestNG Parameters at the Suite level?
- Overriding power in TestNG Parameters.
- Optional Parameters.
What are the TestNG parameters?
Parameters in TestNG is similar to annotations in TestNG in their declaration. Similar to parameters in any other programming language, they are declared to pass some values onto the function. A simple reason to use parameters is that they let us run a function many times with different values or to run different functions with the same values. Parameters pass the values in the runtime. An example of using the parameters in TestNG can be entering different values in an input box. Although you might think that you can change the variable name that is entering the value in the input box, but the test source codes are so long that you would prefer using parameters on any day.
Syntax:
@Parameters ({"a", "b"})
where a and b are the values that pass to the function.
As we progress into this tutorial, we will see some additional characteristics of parameters in TestNG. For now, let us see how to run TestNG parameters on a simple class.
How To Run TestNG Parameters?
Let's say we want to add two numbers using the TestNG parameters. Observe the below-given code for the same.
import org.testng.annotations.Parameters;
import org.testng.annotations.Test;

public class Params
{
    @Test
    @Parameters ({"val1", "val2"})
    public void Sum(int v1, int v2) {
    	int finalsum = v1 + v2;
        System.out.println("The final sum of the given values is " + finalsum);
    }
}
Can we run it directly using Rus As -> TestNG Test? Try to run it like this. I am sure it won't.
Note: TestNG Parameters are run through the TestNG XML file and not from the test case files directly.
Head over to the XML file and write the following XML code in it.
<?xml version="1.0" encoding="UTF-8"?>
<!DOCTYPE suite SYSTEM "https://testng.org/testng-1.0.dtd">
<suite name="TestNG Parameters Suite">
   <test name="Params">
      <parameter name="val1" value="2" />
      <parameter name="val2" value="3" />
      <classes>
         <class name="Params" />
      </classes>
   </test>
</suite>
In the above XML file, we have defined a tag called parameters which work as follows:
- name: Name of the variable that you declared in the test case file like val1 and val2 in the above example.
- value: The value of the variable you want to insert.
Note: If you are confused with the suite and test element in the TestNG XML, I request you to refer to the previous tutorials of the TestNG Test Suite & TestNG Test.
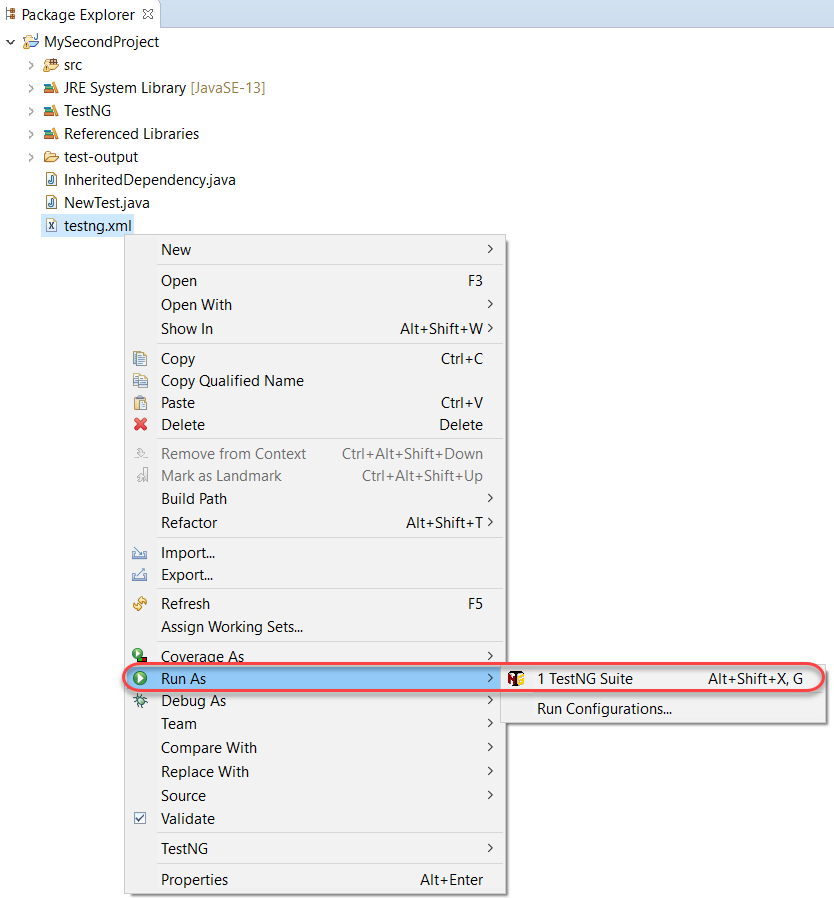
Run the XML file by Rus As -> TestNG Suite.

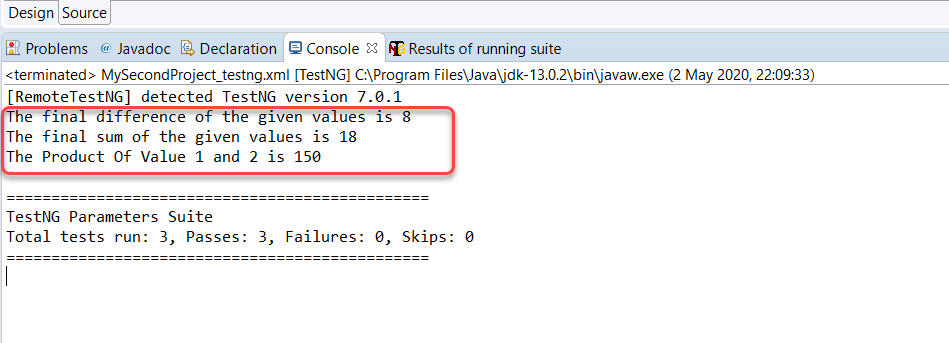
The output will be visible in the console.

Now it is so easy just to run this file to see the changes in the test cases.
How to Define Parameters in TestNG at the Suite Level?
We can provide the parameters in TestNG at both suite and test levels. In the above test run, we declared parameters at the test case level. In the following code, we will be declaring them on the suite level. To observe this behavior, we will define two different tests along with the parameters.
import org.testng.annotations.Parameters;
import org.testng.annotations.Test;

public class Params
{
    @Test
    @Parameters ({"val1", "val2"})
    public void Sum(int v1, int v2) {
    	int finalsum = v1 + v2;
        System.out.println("The final sum of the given values is " + finalsum);
    }

    @Test
    @Parameters ({"val1", "val2"})
    public void Diff (int v1, int v2) {
    	int finaldiff = v1 - v2;
    	System.out.println("The final difference of the given values is " + finaldiff);
    }
}
In the above file, the Sum function adds the numbers and Diff function to show the difference between them.
See that we have used the same variable value in both the methods. When we define the parameters at the suite level, our XML file looks as follows:
<?xml version="1.0" encoding="UTF-8"?>
<!DOCTYPE suite SYSTEM "https://testng.org/testng-1.0.dtd">
<suite name="TestNG Parameters Suite">
   <parameter name="val1" value="3" />
   <parameter name="val2" value="50" />
   <test name="Params">
      <classes>
         <class name="Params" />
      </classes>
   </test>
</suite>
Note: The parameter tag has moved from being under the <test> to <suite>.
Run this XML file and see that both of the methods would have executed taking the values as 3 and 50, respectively.

As you see, we achieved this by defining the values just once. By defining the parameters in the suite level, you can not only pass the same values in the different methods of the same class but also on different methods in different classes.
Below I have created another file that contains another method called 'Multiply' to multiply two numbers.
import org.testng.annotations.Parameters;
import org.testng.annotations.Test;

public class Multiply
{

    @Test
    @Parameters ({"val1", "val2"})
    public void mul(int v1, int v2) {
    	int prod = v1*v2;
        System.out.println("The Product Of Value 1 and 2 is " + prod);
    }

}
Note: that this class also contains the same parameters variable names as in the TestNG class we declared above.
Since we want to run all the three functions (Sum, Diff, and Mul) using the same set of variables, our XML file will look like this:
<?xml version="1.0" encoding="UTF-8"?>
<!DOCTYPE suite SYSTEM "https://testng.org/testng-1.0.dtd">
<suite name="TestNG Parameters Suite">
   <parameter name="val1" value="3" />
   <parameter name="val2" value="50" />
   <test name="Params">
      <classes>
         <class name="Params" />
      </classes>
   </test>
   <test name="Multiply">
      <classes>
         <class name="Multiply" />
      </classes>
   </test>
</suite>
Execute this TestNG suite to see that all the three methods have run even though being in different classes.

So, we can just declare, pass, and execute variables at a single place only once to run it over any number of files we want. It is convenient. But, you might be wondering what if we declare the same variables at both the levels?
Order Of Execution In TestNG XML
A tester can declare the variables at the suite level, and test level both, but that would make one of them trivial. Let's see how does TestNG gives us the results when we encounter such a situation.
<?xml version="1.0" encoding="UTF-8"?>
<!DOCTYPE suite SYSTEM "https://testng.org/testng-1.0.dtd">
<suite name="TestNG Parameters Suite">
   <parameter name="val1" value="3" />
   <parameter name="val2" value="50" />
   <test name="Params">
      <parameter name="val1" value="13" />
      <parameter name="val2" value="5" />
      <classes>
         <class name="Params" />
      </classes>
   </test>
</suite>
Execute the TestNG suite and observe the results:

By this result, you can already guess which test took preference. TestNG gives preference to the Parameters defined at the test level over the parameters set at the suite level.
Optional Parameters In TestNG
Optional parameters are yet another type of parameter which kind of acts like the "default" attribute of the switch case in programming languages. So, if no parameter value is specified, the optional parameter value is taken. Optional parameters are defined similarly to Parameters (with annotations), but the place they occupy is different.
In the following code, I have set a method OP that has an optional parameter notation with the message "Operational Parameter Selected". So, if this method gets nothing passed onto the @Parameters, this message will be saved inside the string variable message.
import org.testng.annotations.Optional;
import org.testng.annotations.Parameters;
import org.testng.annotations.Test;

public class Params
{
    @Test
    @Parameters ("message")
    public void OP( @Optional("Optional Parameter Selected") String message) {
        System.out.println(message);
    }
}
In the XML file, I have passed the parameters only in the second method.
<?xml version="1.0" encoding="UTF-8"?>
<!DOCTYPE suite SYSTEM "https://testng.org/testng-1.0.dtd">
<suite name="TestNG Parameters Suite">
   <test name="Params">
      <parameter name="message" value="Normal Parameter Selected" />
      <classes>
         <class name="Params" />
      </classes>
   </test>
   <test name="Params 2">
      <classes>
         <class name="Params" />
      </classes>
   </test>
</suite>
Run the above TestNG test suite and see how the output comes onto the console.

As expected, the second test executed with the optional parameters as I declared no parameters in the XML file.
It brings us to the end of this tutorial about a very comfortable topic that is very easy to understand. @Parameters gives us the power to execute a large number of varying tests by declaring the variable values just once. It makes our testing part easy and efficient. Remember that you can use @Parameters annotation with any method that has a @Test, @Before / @After, or @Factory annotation. With this note, we will move onto another type of similar concept called "Data Provider in TestNG".


