In the previous tutorial, we installed TestNG in Eclipse and IntelliJ. Additionally, we also added the TestNG Jar file to Eclipse and IntelliJ and have it all set up on our system. Now, after the completion of the set-up, its time for some hands-on experience of writing our first TestNG Test in Eclipse. Subsequently, in this tutorial, we will cover the following:
- Setting Up A TestNG Project In Eclipse?
- First Test Case With TestNG
- Downloading Selenium Jar Files For TestNG
- How To Create A TestNG Test Class In TestNG?
- How To View TestNG Reports?
Let's start by setting up a TestNG project.
How To Set Up A TestNG Test Project In Eclipse?
To set up a new TestNG project in Eclipse, open your Eclipse and follow the given steps:
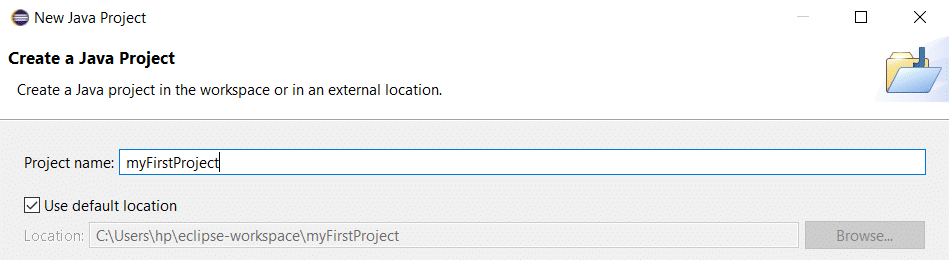
Firstly, navigate To File -> New -> Java Project.
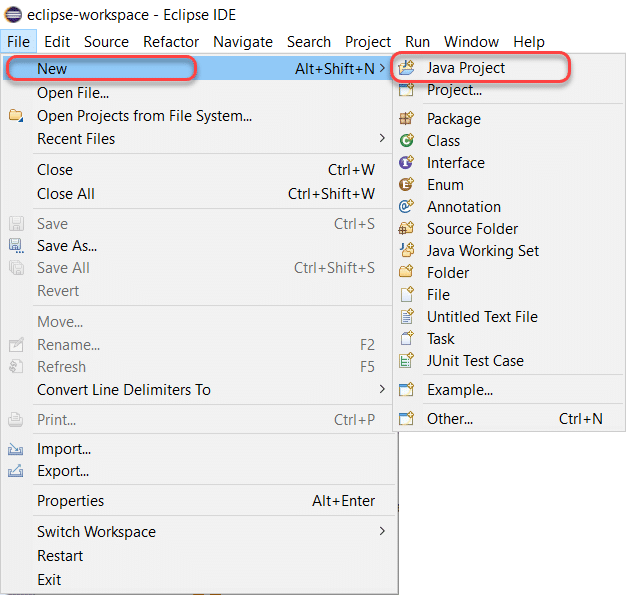
Give it a name of your choice.
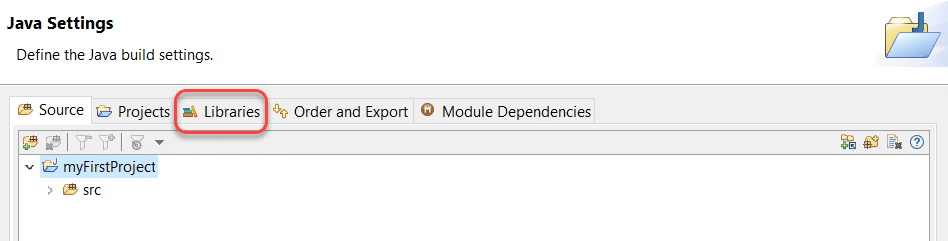
Secondly, click Next to move to the next panel.

Thirdly, click on Libraries to add TestNG Libraries to your project (Only if Eclipse does not automatically add the TestNG Library).
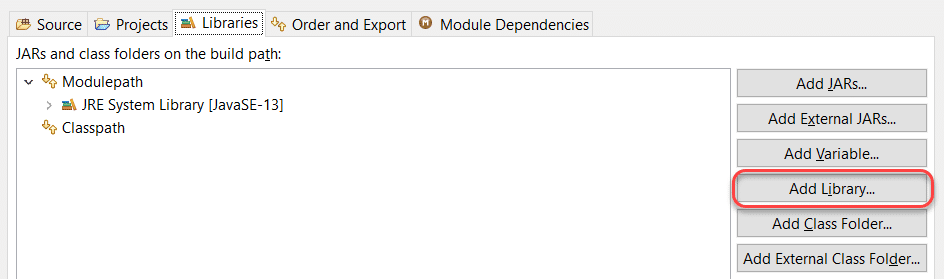
After that, select "Add Library" to add the TestNG Library.
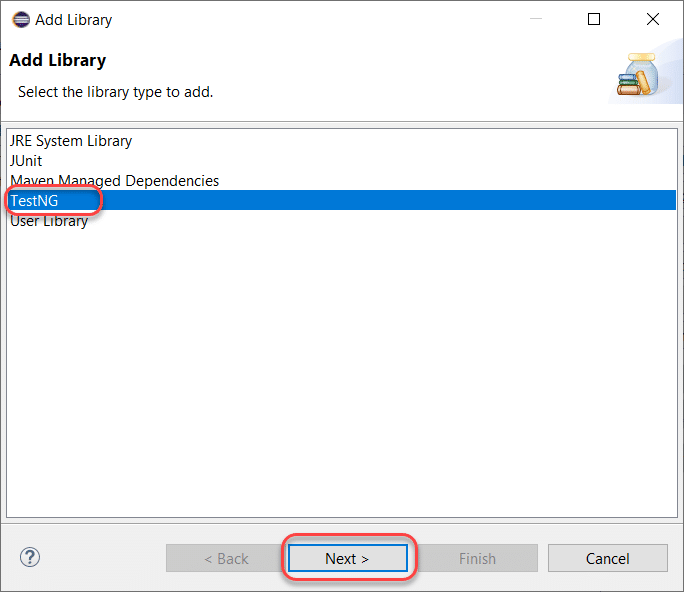
Choose TestNG and click on Next.
Finally, click Finish to finish adding the TestNg Library in the project.
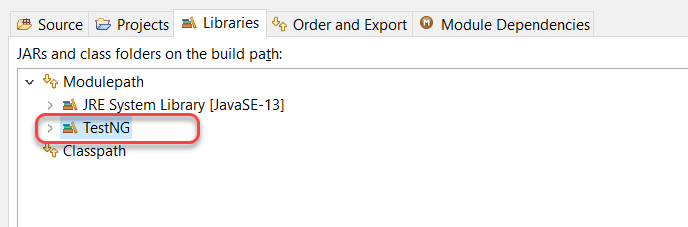
By this, we have added the TestNG Library to the project. As the next step, we need to make sure that we add the Selenium to the project before moving on to code the first test case.
How to write a TestNG Test?
Now that we are all set up with TestNG in Eclipse, we will try to write and run our first TestNG test case. But before coding our way through, we need to download Selenium Jar Files.
Download Selenium Jar Files For TestNG
TestNG is majorly used with the conjunction of Selenium, so we are also going to write a TestNG test with Selenium. For that, we need to make sure that Selenium WebDriver is also set up in our system. Download the jar files from this link Download Selenium Jars.
Extract the zip file and remember the location where you extracted as we require the location in the further steps.
In the next section, we will create a TestNG class in Eclipse.
How To Create A TestNG Class In Eclipse
Follow the given steps to create our first TestNG class.
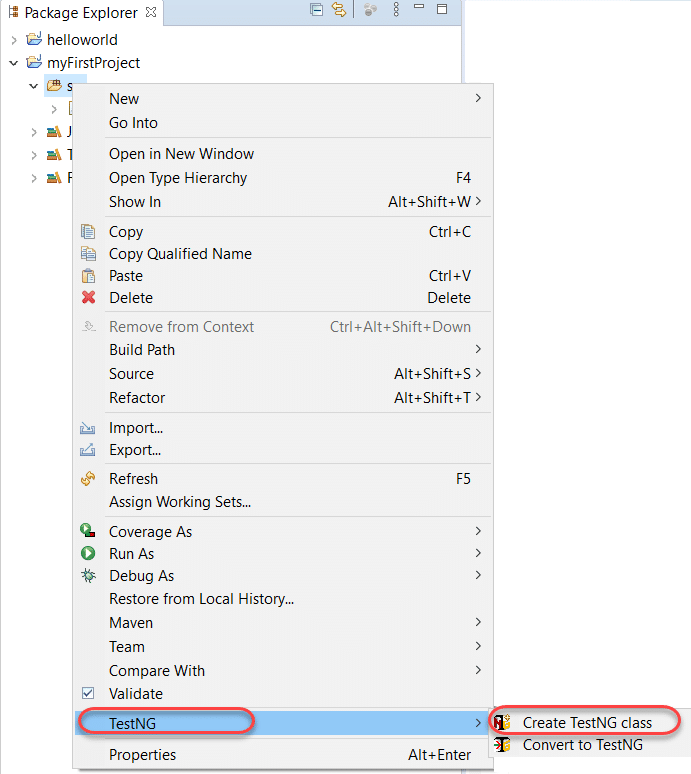
Firstly, press Ctrl+N, then select “TestNG Class” under the TestNG category and click Next.
Or
Right-click on src, go to TestNG, and select "Create TestNG Class".
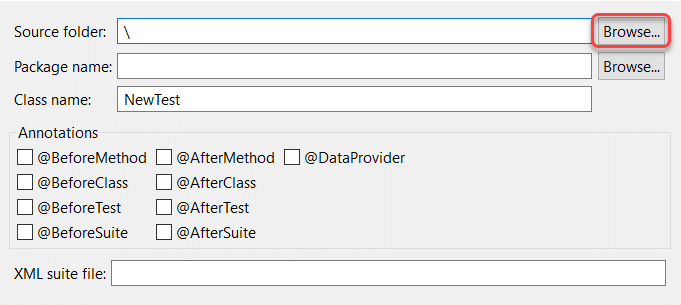
After that, the source folder name will automatically populate in the text field. But if it doesn't, like my system, you can browse your way through the src folder by clicking on the Browse button.
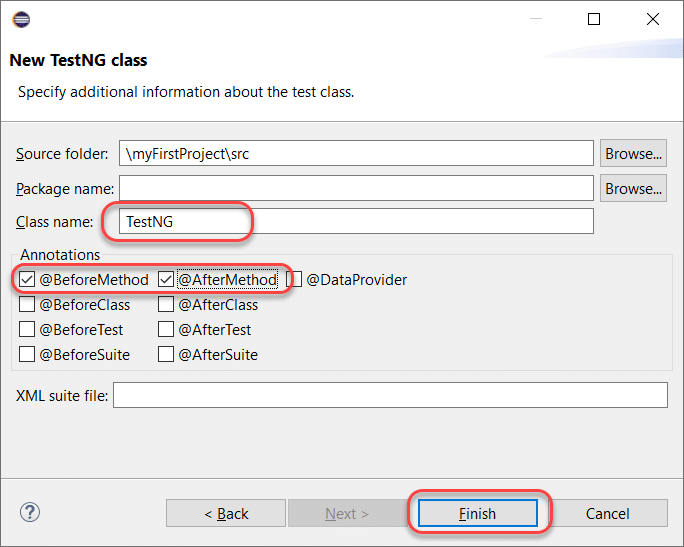
Thirdly, set class name as 'TestNG '
Leave the Annotations part as it is, for now, we will deal with it in the later tutorials.
Note: To know more about the TestNG Annotations, please refer to What Are TestNG Annotations?
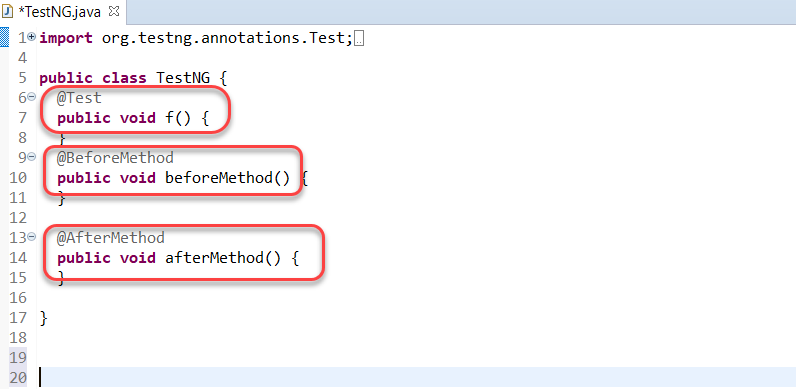
It will display the TestNG.java test file, which is partially created for you. The test case file will contain a default method, f(), along with beforeMethod() and afterMethod() that we checked in the previous step.
Finally, we are all set now by creating our first test class in TestNG. We can now proceed to write the first TestNG test case.
Coding Our First Test Case In TestNG
We wrote a straightforward code as a TestNG test case below for you. For understanding the Selenium part, it is recommendable to follow the Learn Selenium tutorial. Moreover, we will deal with other TestNG complexities later in the course.
You can copy and paste this code in your Eclipse.
import org.openqa.selenium.WebDriver;
import org.testng.annotations.Test;
import org.testng.annotations.BeforeMethod;
import org.testng.annotations.AfterMethod;
import org.openqa.selenium.*;
import org.openqa.selenium.chrome.ChromeDriver;
import org.testng.Assert;
import org.testng.annotations.*;

public class TestNG {
	WebDriver driver ;
	@Test
	public void f() {

	    String baseUrl = "https://www.toolsqa.com/";


	        System.out.println("Launching Google Chrome browser");
	        driver = new ChromeDriver();
	        driver.get(baseUrl);
	        String testTitle = "Free QA Automation Tools For Everyone";
	        String originalTitle = driver.getTitle();
	        Assert.assertEquals(originalTitle, testTitle);
  }

	@BeforeMethod
	public void beforeMethod() {
		System.out.println("Starting Test On Chrome Browser");
	}

	@AfterMethod
	public void afterMethod() {
		 driver.close();
		System.out.println("Finished Test On Chrome Browser");
	}
}
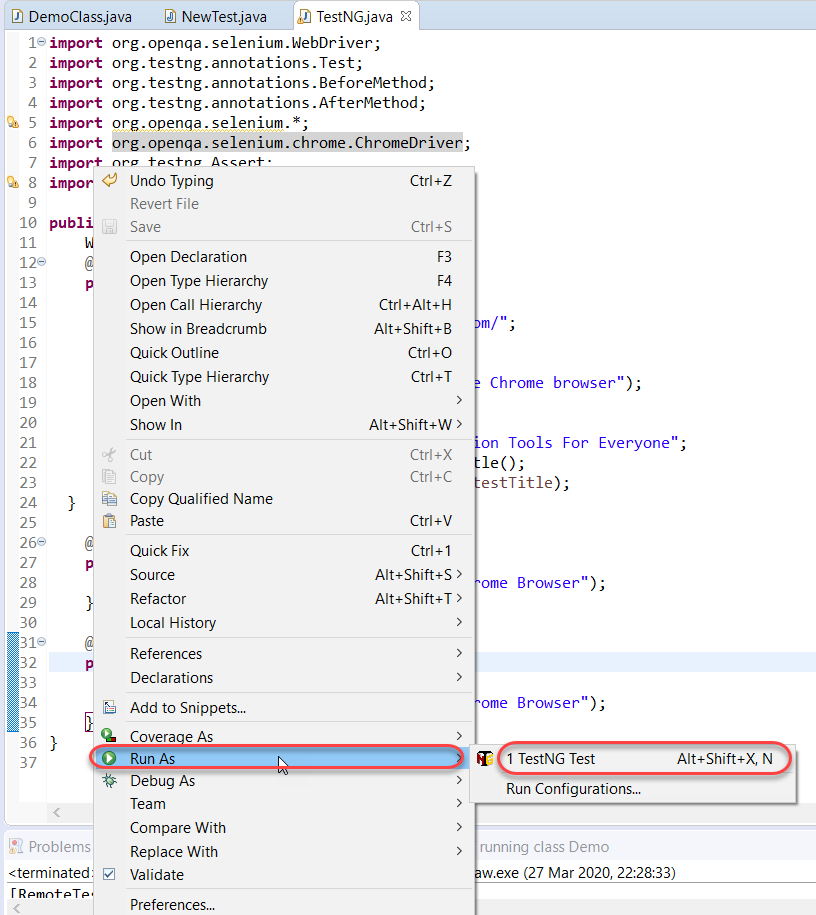
Right-click on the test case script and execute the test. After that, select Run As > TestNG Test.
It will run your tests successfully. We will analyze how those annotations worked in our annotations tutorial. Please note a few points concerning the above-written test case.
- The primary method is not necessary for a TestNG file.
- Moreover, the methods in the TestNG file need not be static in their behavior.
- In addition to the above, @Test annotations tell the underlying methods is a test method.
- Moreover, @BeforeMethod denotes that the underlying method should run before the test method.
- Similarly, @AfterMethod indicates that the underlying method should run after the test method.
How To View TestNG Reports?
TestNG generates the reports as soon as the tests run. TestNG results are available under two sections:
- Console
- TestNG Reports
The bottom half of the screen shows both of the options.

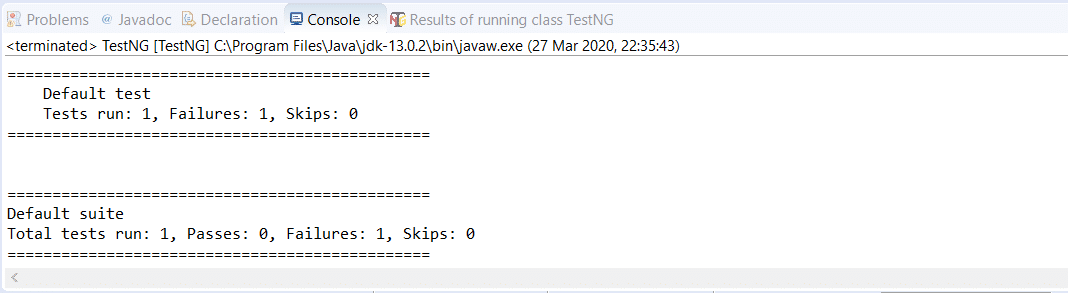
Scrolling down in the console tab will bring the results of the tests to you.
But this is not interesting although it delivers the final aim. Additionally, for a more in-depth view of the tests, we can switch to the TestNG reports section located just beside the console.
This report contains a few elements to analyze. But, we will halt at this point to let you digest the topics as mentioned above and let you code a little around the TestNG test case. Subsequently, in the next section, we shall continue from this point and study how we can generate TestNG reports and different ways of its generation.