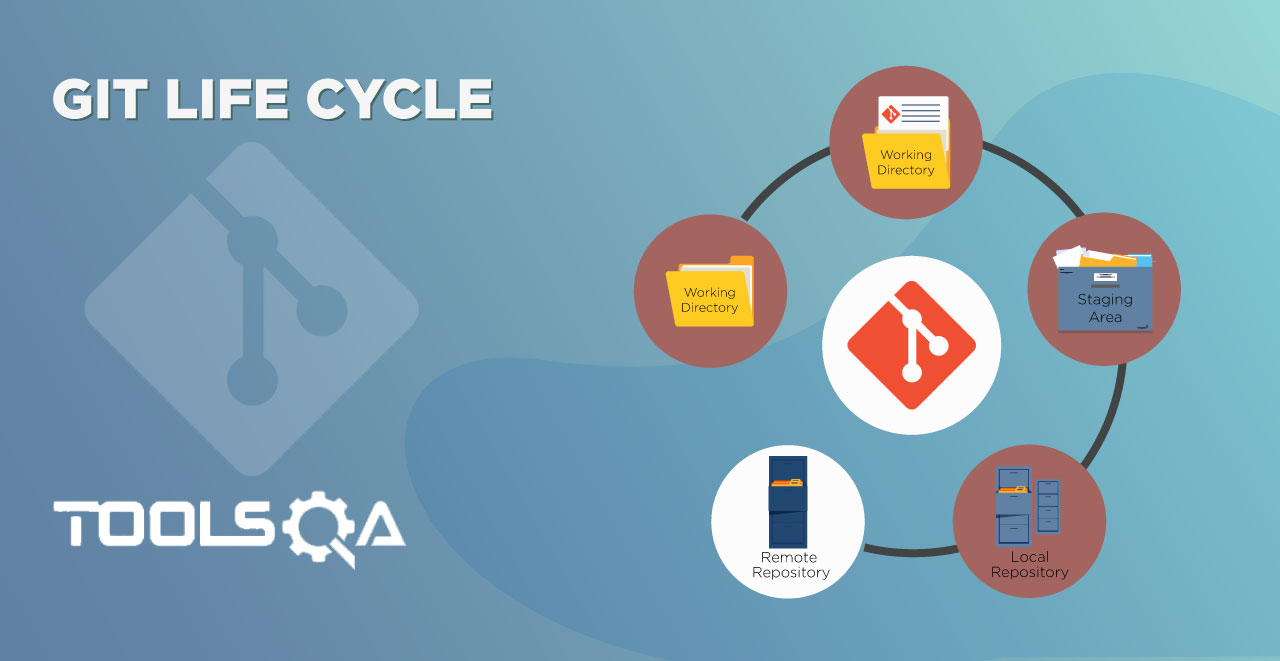
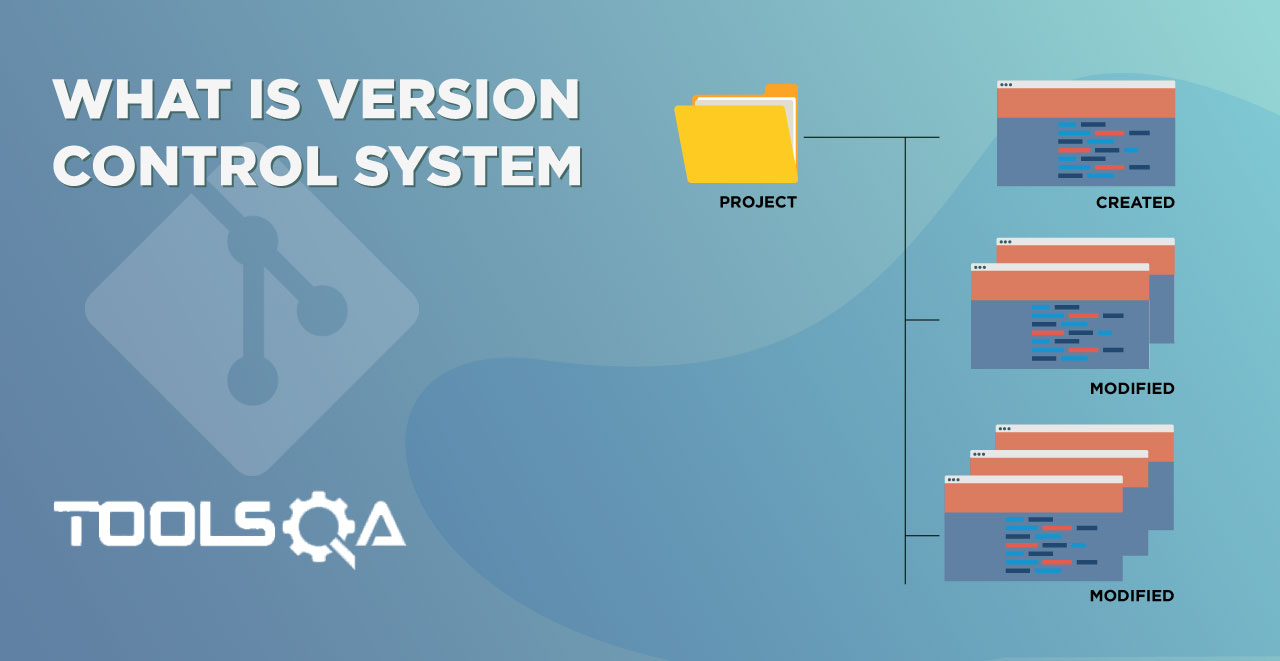
In the previous tutorial of Create a Git Repository, we learned to create a new git repository for the project. Now that we have a Git project, it is time to start working with it too. A Git project can be thought of as having three parts:
- Working Directory: Local Repository, where you'll be doing all the work like creating, editing, deleting and organizing project files
- Staging Area: Tracked Local Repository, where you'll list changes you make to the working directory
- Repository: Remote Repository, where Git permanently stores changes as different versions of the project
This tutorial is all about working with a local repository and tracked/untracked changes. We will be covering the following git commands:
- Git Add Command
- Git Status Command
- Git Remove Command
Before using the above commands, we should have some files in the git repository project. Download the following files and copy those into the project folder. Each file contains the data of only two customers(Name, Email, etc.)
CustomerData_IND CustomerData_UK CustomerData_US
Once done, the git repository will look like the below image:

Git Status Command
The git status is another must-know command that returns information about the current state of the repository. For e.g. a list of files changed, list of tracked changes on staging, untracked changes on local, and information about current branch & commits.
- Staging Area: Git has the concept of a staging area, where all the updates/changes are tracked. This holds the changes which you would like to commit. Changes can be a single line, files, or parts of files.
- Untracked Changes: Changes/files on the local directory and which are not pushed to staging are known as untracked changes.
- Tracked Changes: Changes/files on staging are known as tracked changes.
A lot of talk right! let's move forward and use the command in the command prompt.
- Now, open the command prompt and navigate to the git repository, in our case, it is at C:/Git Tutorial
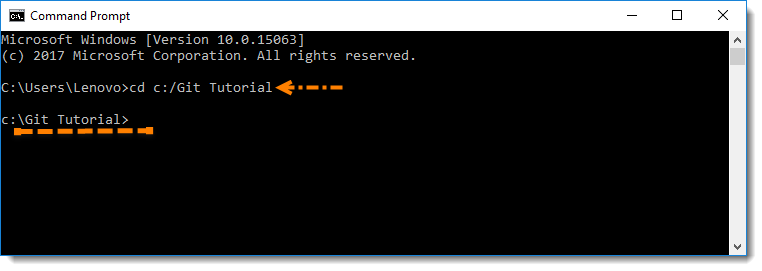
- Just type
git statusin the command prompt. This will now list which files are staged, unstaged, and untracked.
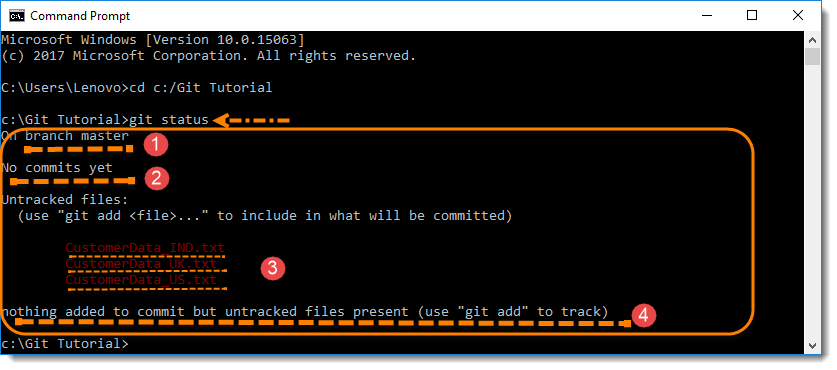
Notice the Output:
- branch master: This says that the working tree is a master branch. We will learn more about branching in later tutorials.
- no commits yet: This gives information on the commits, as of now there are no commits yet.
- Untracked files: This says that Git sees the files but has not started tracking changes yet and marked these as red.
- Status messages: This gives relevant instructions for staging/unstaging files.
Git Add Command
The git add command adds a change in the working directory to the Staging Area. It tells Git that there are few updates in the project, which the user wants to commit next. The thing here to note is that git add doesn't affect the remote repository, as changes are not actually recorded until you perform git commit.
- Let's just start with adding a single file to stating. To use the git add command, just type
git add filename. The word filename here refers to the name of the file you edited, such as CustomerData_IND.txt. Also, usegit statuscommand to see what git has now to tell us about the state of the repository.
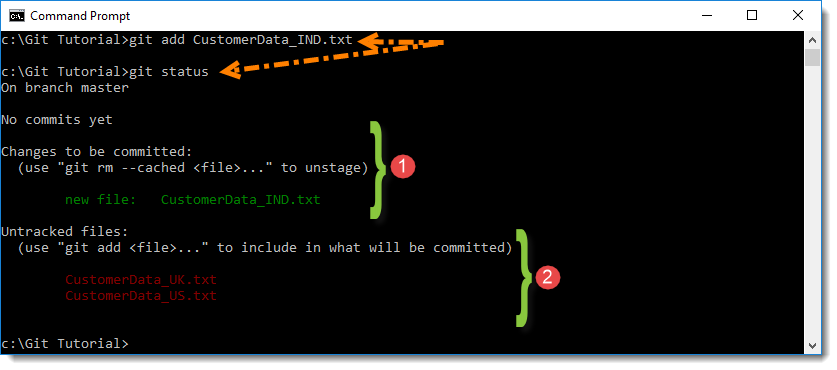
Notice the Output:
- Changes to be committed: This shows the information of tracked files kept on staging. This is the one, which we added using git add command.
- Untracked files: This shows the information of untracked files. These are the ones, which brought to the project earlier but still not pushed to staging.
Add different changed files to Staging
Above we just added a single file to staging, what if there will be multiple files to add. This can be easily achieved by using git add <file> <file>.
To add multiple files, type git add CustomerData_IND.txt CustomerData_UK.txt
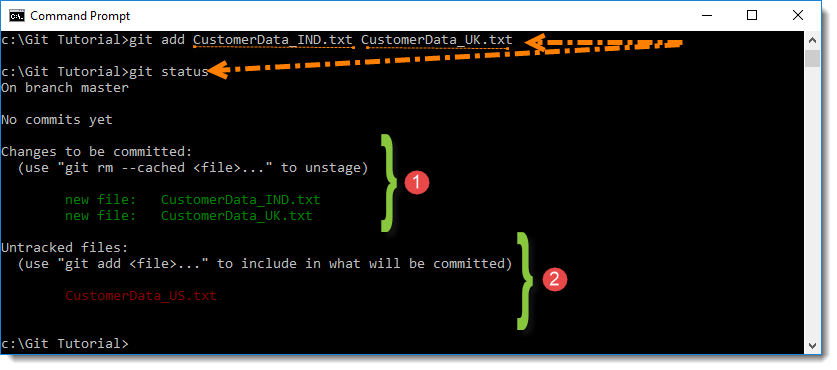
Output: Mentioned two files are now added to staging.
Add all the changed files to Staging
Above we added multiple files to staging, what if there will be many multiple files to add. This can be easily achieved by using git add *.
To add all the changed files, type git add *
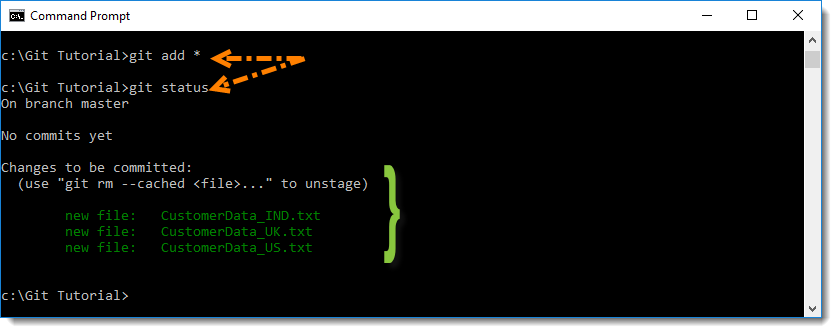
Output: All the changed files are now moved to staging.
Git Remove Command
The git rm command removes tracked changes from the Staging Area. It tells Git that the updates which were pushed to staging earlier with git add command, are not ready to commit. So on running this command, git just removes the changes from the staging. But the changes still exist in Local Repository. If you look carefully at the output of the above image section 1. In this git gives a suggestion to the user that the tracked file on staging can be removed by using git rm --cached <file>.
To practice the command, let's try removing the same CustomerData_IND.txt file, which was added earlier.
- To remove the desired file, type
git rm --cached CustomerData_IND.txtAlso, use thegit statuscommand to check the state of the repository.
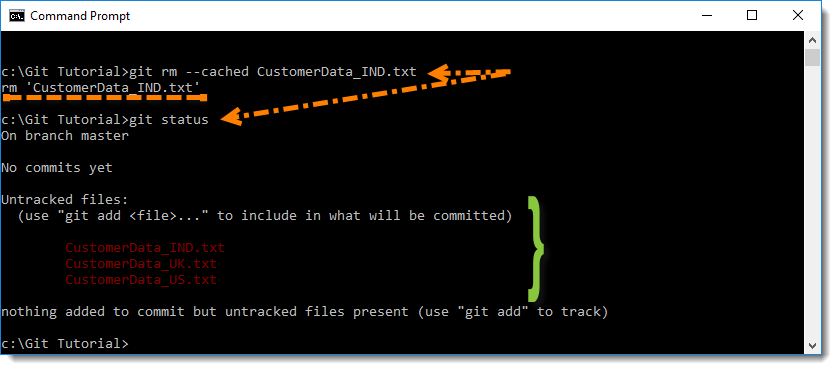
Notice the Output
- Untracked files: CustomerData_IND.txt file is back to the untracked changes list. As git remove this file from staging tracked list.
Remove different files from Staging
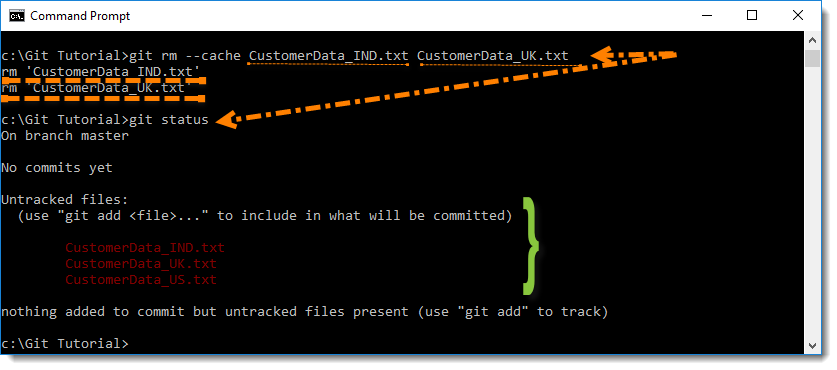
The way you can add multiple files to staging, the same way multiple files can be removed from staging too. the command to remove the multiple files are git rm --cached <file> <file>.
To remove multiple files, type git rm --cached CustomerData_IND.txt CustomerData_UK.txt
Note: It is double hyphen like "- -" but without space before "cached" keyword.
Output: Mentioned two files in the command are now removed from staging and back to the untracked list.


