In the last article regarding Jenkins's overview, we discussed the introductory aspects of Jenkins. Now, let's start with the actual practical implementation of Jenkins. As a part of it, firstly, we need to know the installation process of Jenkins on different operating systems based on our needs. Let's start our journey by understanding how to install Jenkins? by covering the details under the following topics:
- What are the pre-requisites for the installation of Jenkins?
- Hardware Requirements.
- Software Requirements.
- How to install Jenkins?
- How to install Jenkins on Windows?
- And how to install Jenkins on macOS?
- How to install Jenkins on Linux?
What are the pre-requisites for the installation of Jenkins?
As we all know that before the installation of any tool, we need to check some pre-requisite. So, before the installation of Jenkins, let's understand the pre-requirements needed for Jenkins' successful installation and usage:
Hardware Requirements
The below table lists the minimum hardware requirements, which need to be present on a machine on which we are planning to install the Jenkins:
| Resource | Requirement |
|---|---|
| RAM | 256 MB |
| Drive Space | 1 GB (10 GB if Jenkins is running as a Docker container) |
But these are the minimum requirements, which will never suffice when we will be running multiple jobs on Jenkins, so generally following are the minimum recommended hardware configurations, which can work well with a small team:
| Resource | Requirement |
|---|---|
| RAM | 1 GB |
| Drive Space | 50 GB |
Still, the call out is that these requirements will be different for each team depending on the team's size, the parallel users of Jenkins, and the number of jobs running on the Jenkins server.
Software Requirements
The below table lists the minimum software requirements, which need to be present on a machine on which we are planning to install the Jenkins:
| JAVA | Java Development Kit (JDK) or Java Runtime Environment (JRE). Kindly refer to the tutorial How to Install Java. |
| Web Browser | Any of the browsers such as Google Chrome, Mozilla Firefox, Microsoft Internet Explorer, Microsoft Edge, Safari |
| Operating System | Jenkins supports almost all the modern operating systems such as Windows, macOS, Linux flavors such as Red Hat, Ubuntu, OpenSUSE, Gentoo, etc. |
Alright, so after checking the pre-requisite, let's move towards the installation part in the next section.
How to install Jenkins?
So, let's start the installation process of Jenkins. Kindly follow the steps mentioned below:
Step 1: Firstly, go to the official Jenkins website and click on the Download button.
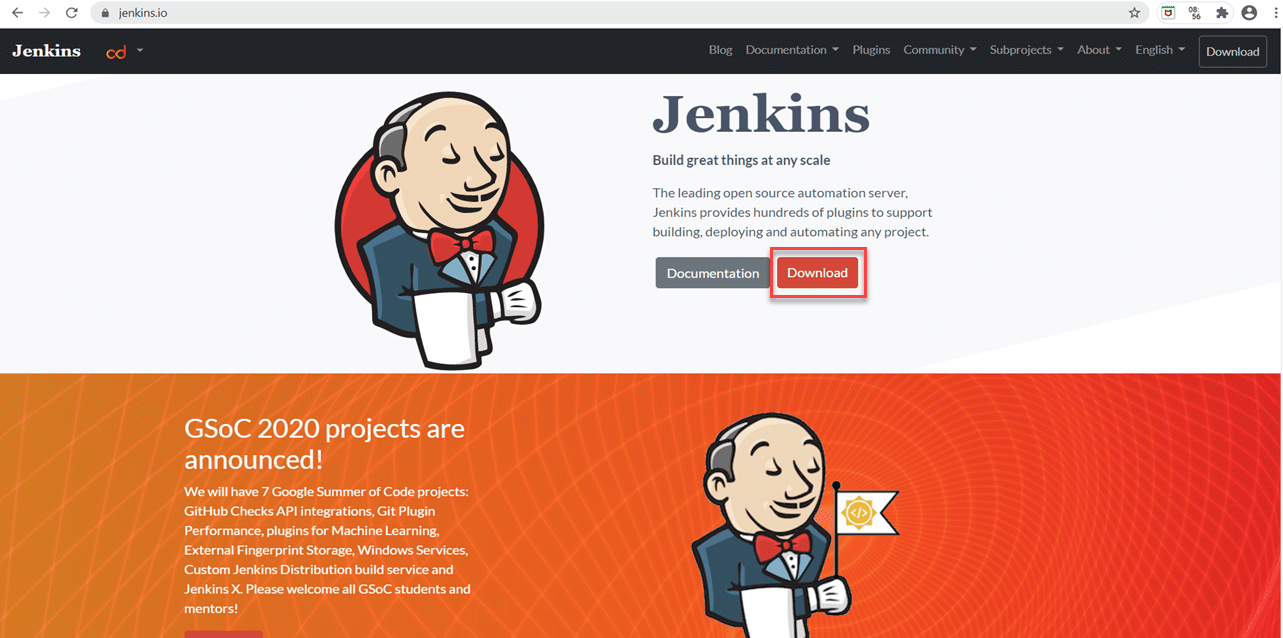
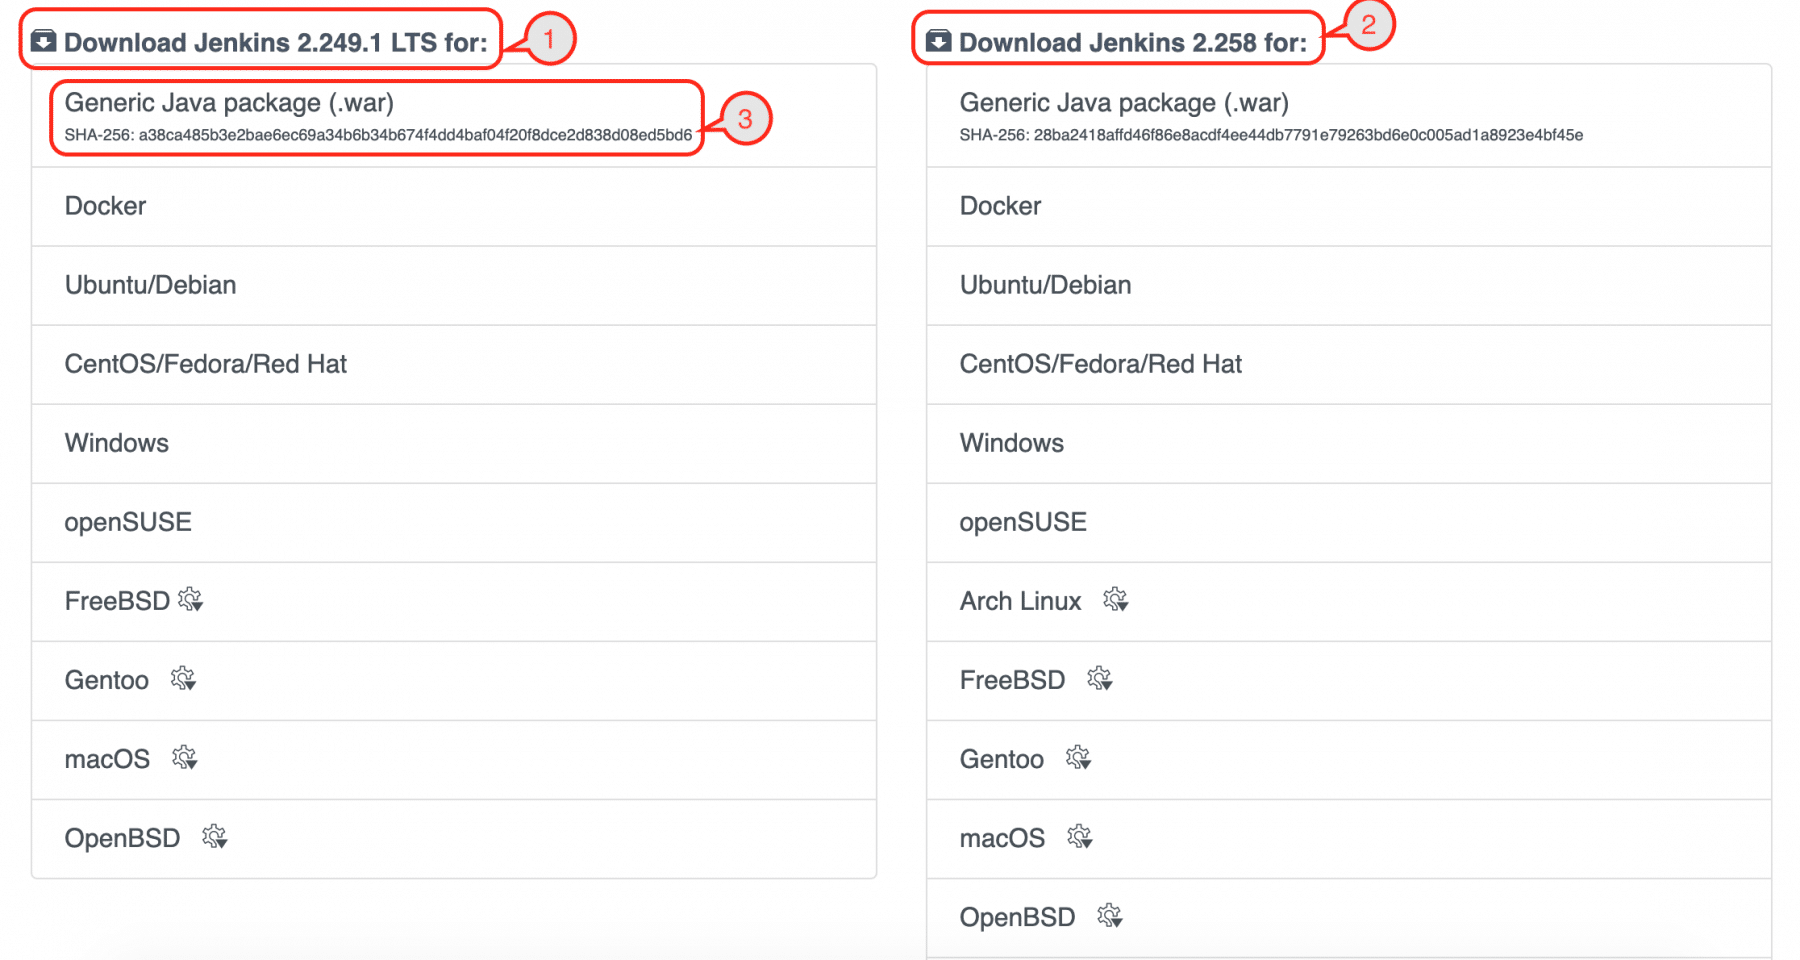
Step 2: Secondly, after clicking on the Download button, we will be redirected to the download page. Additionally, here we can see all the download related information, as shown below:
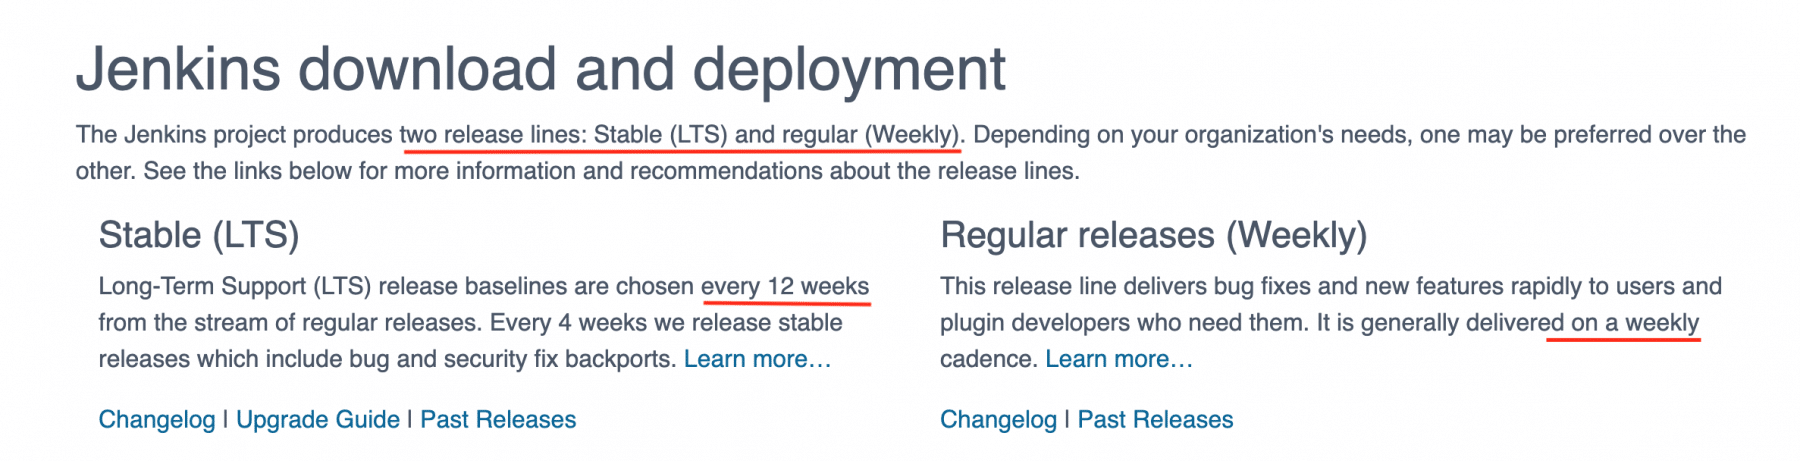
As we can see, Jenkins produces two releases, one is a stable release, and the other ones are the regular bug fixes, which comes every week. Just below the above section, it lists the latest stable (shown by marker 1 ) and the latest hotfix release (shown by marker 2 ) for all the platforms as shown below:
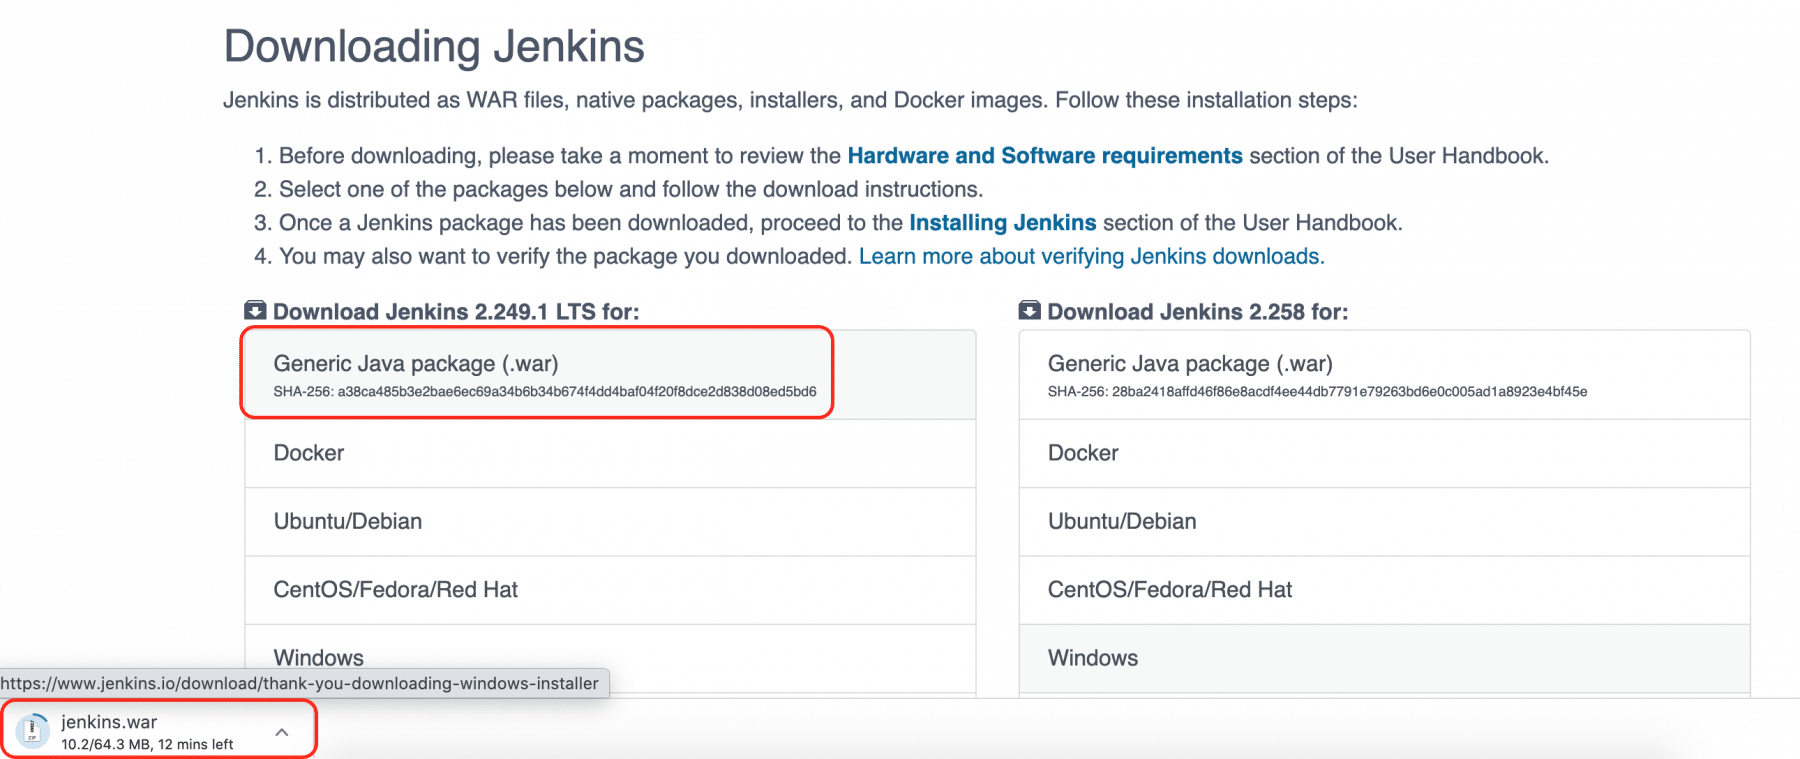
Step 3: Thirdly, we will see the list of operating systems for which Jenkins is available as an installer. Based on the operating system, we can select the corresponding option. Here, we are going with Generic Java Package (.war) file, a generic file that can set up Jenkins on all the operating systems that have JAVA installed. So click on Generic Java Package (.war) link highlighted in the image below. Consequently, it will download the file.
Step 4: Fourthly, place this jenkins.war file in any directory in your machine. Now open the command prompt and go to that directory and type the below command:
Java –jar jenkins.war
Step 5: Fifthly, after typing the above command, press the Enter key. Wait for some time, and you will see the below screen in which you will get the message like “Jenkins Initial setup is required. An admin user creation completes and a password generates ”.
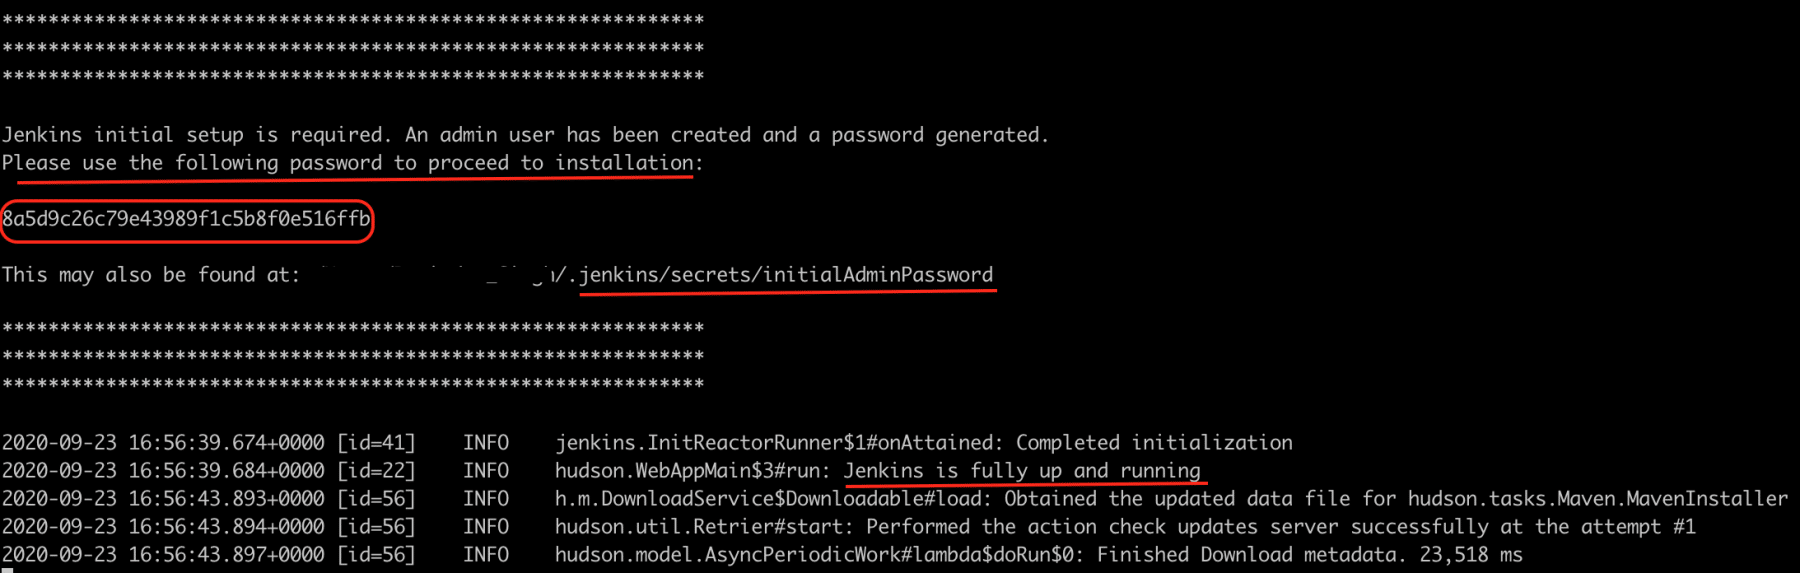
Copy that password and save it somewhere on your machine. Moreover, kindly note that this password is different for everyone, and this is required to enter only once. Finally, you will see a message indicating, “Jenkins is fully up and running”.
Note: Don't close this terminal window till you are working with Jenkins because we are running Jenkins from the command line, and if we close this, the service will be killed.
However, if we want to run the Jenkins service in the background, use the below command, and the process will keep running even if we close the terminal window.
java –jar Jenkins.war &
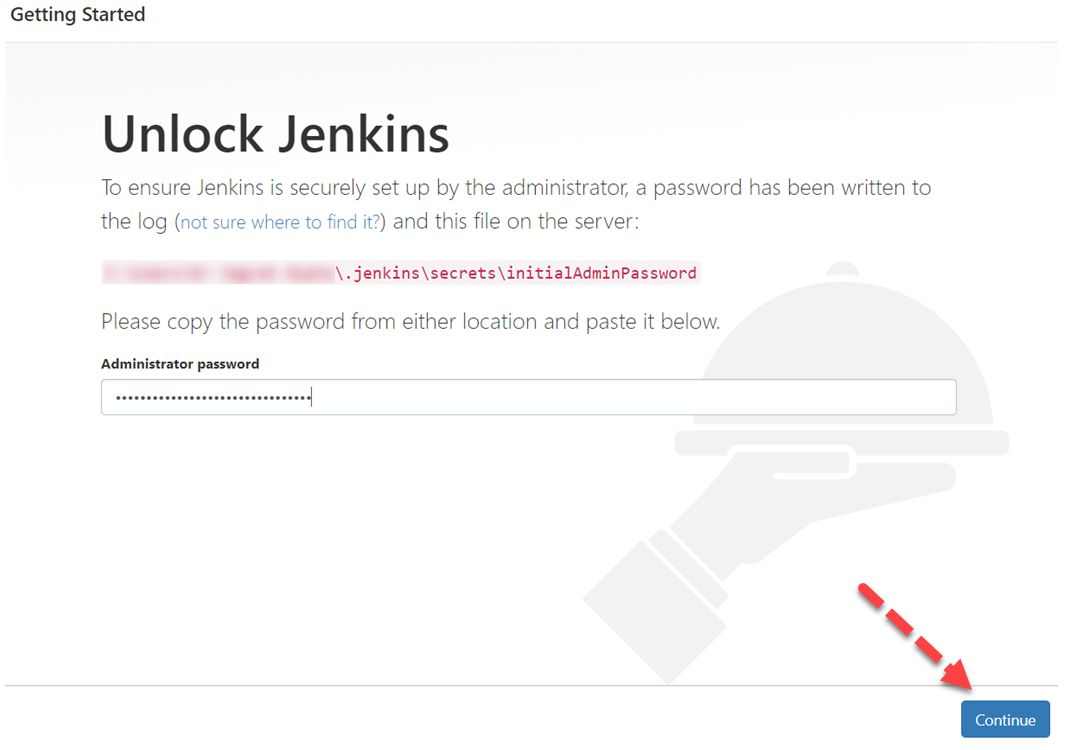
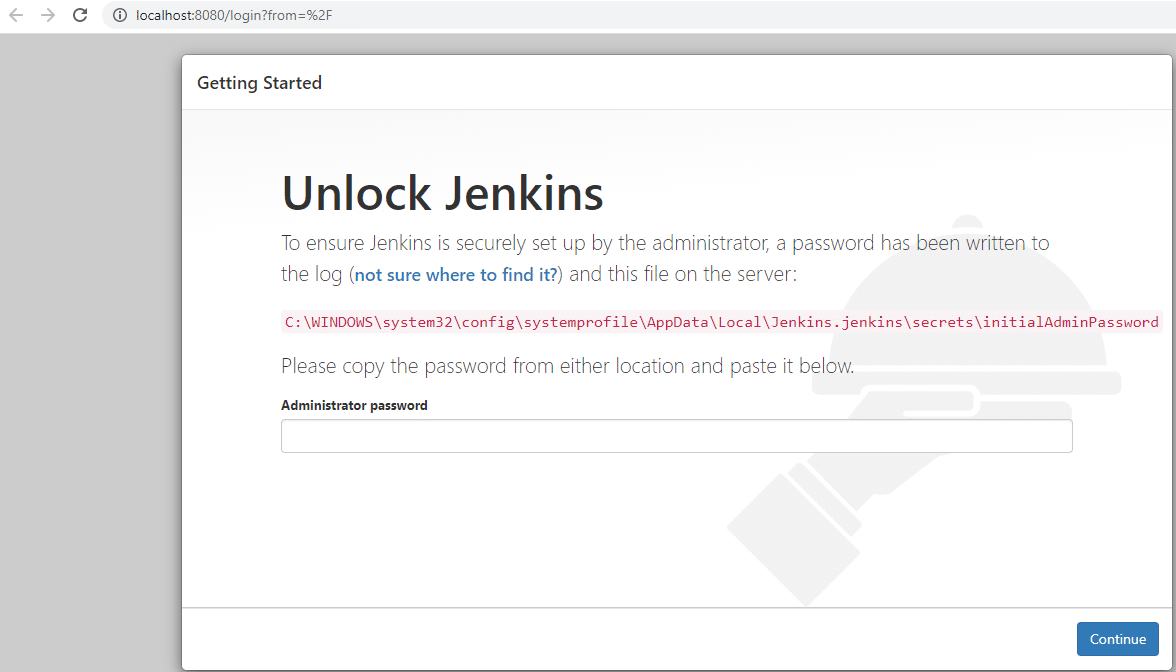
Step 6: Now open the browser and navigate to URL: http://localhost:8080/ After that, press the Enter key, and you will see the below page for the first time by default.
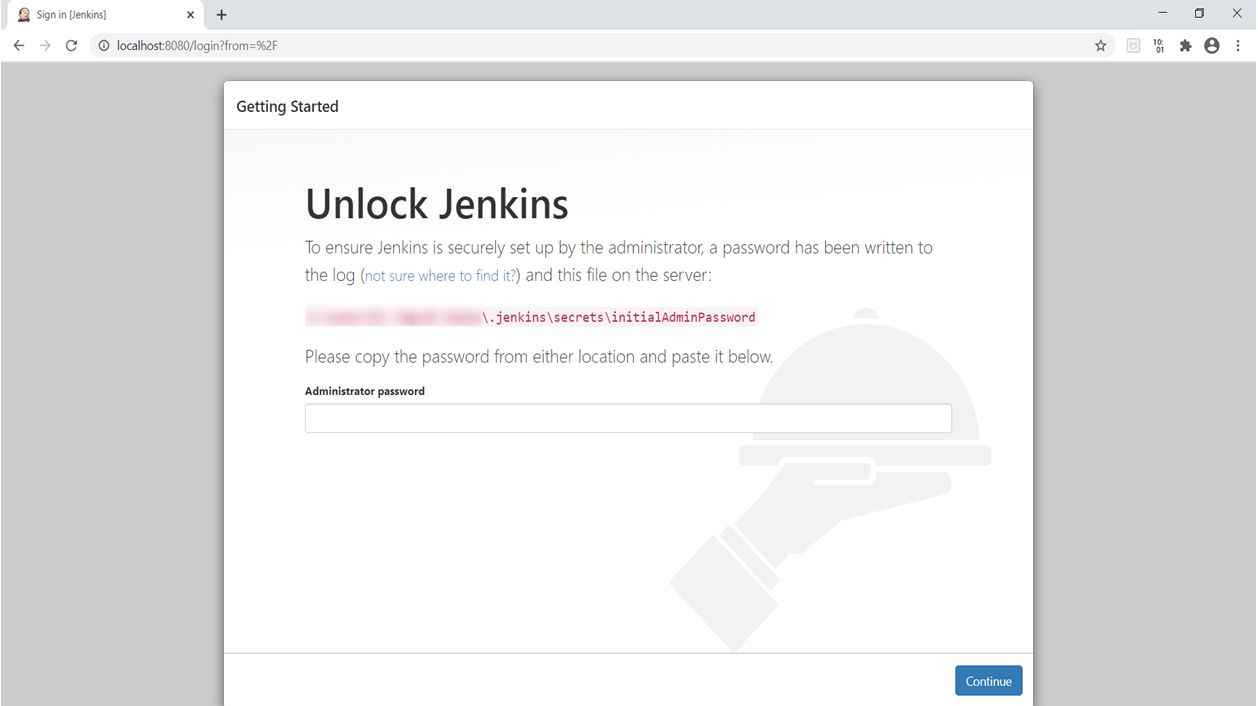
7th Step: Here, we need to put that password that we copied from the previous step and click the continue button.
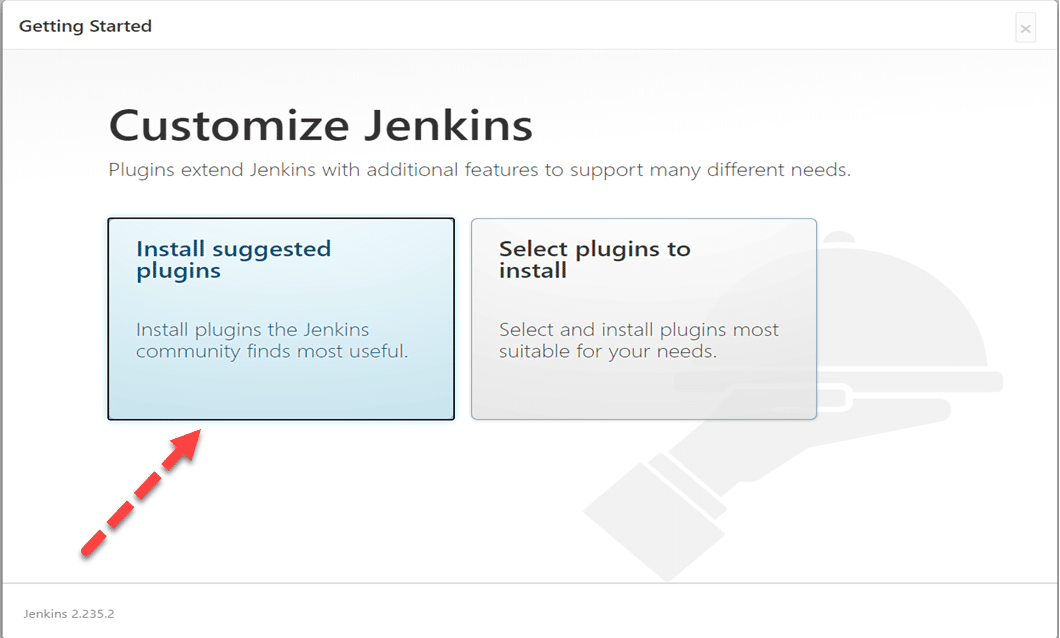
Step 8: As soon as you click on the Continue button, you will be redirected to the page to suggest you install suggested plugins. After that, click on “Install suggested plugins”. Kindly note that if users want to install only selected plugins required, it is recommended to select the option " Select plugins to install".
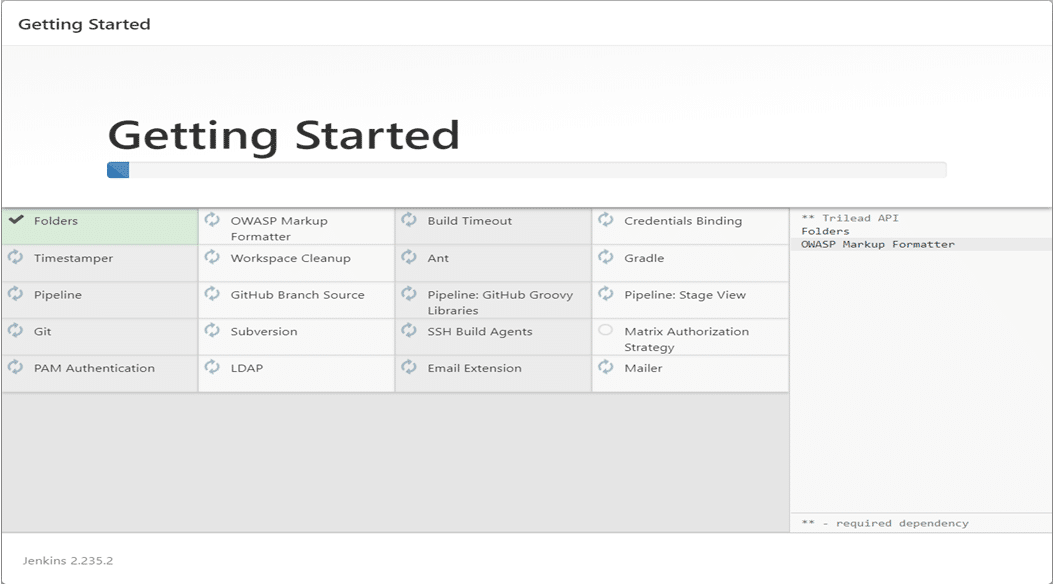
Step 9: After clicking on the suggested plugin button, the standard plugin installation will be started automatically, as displayed in the below screen:
Step 10: Finally, after installation of all suggested plugins, you will be redirected to the User Account Page like below:
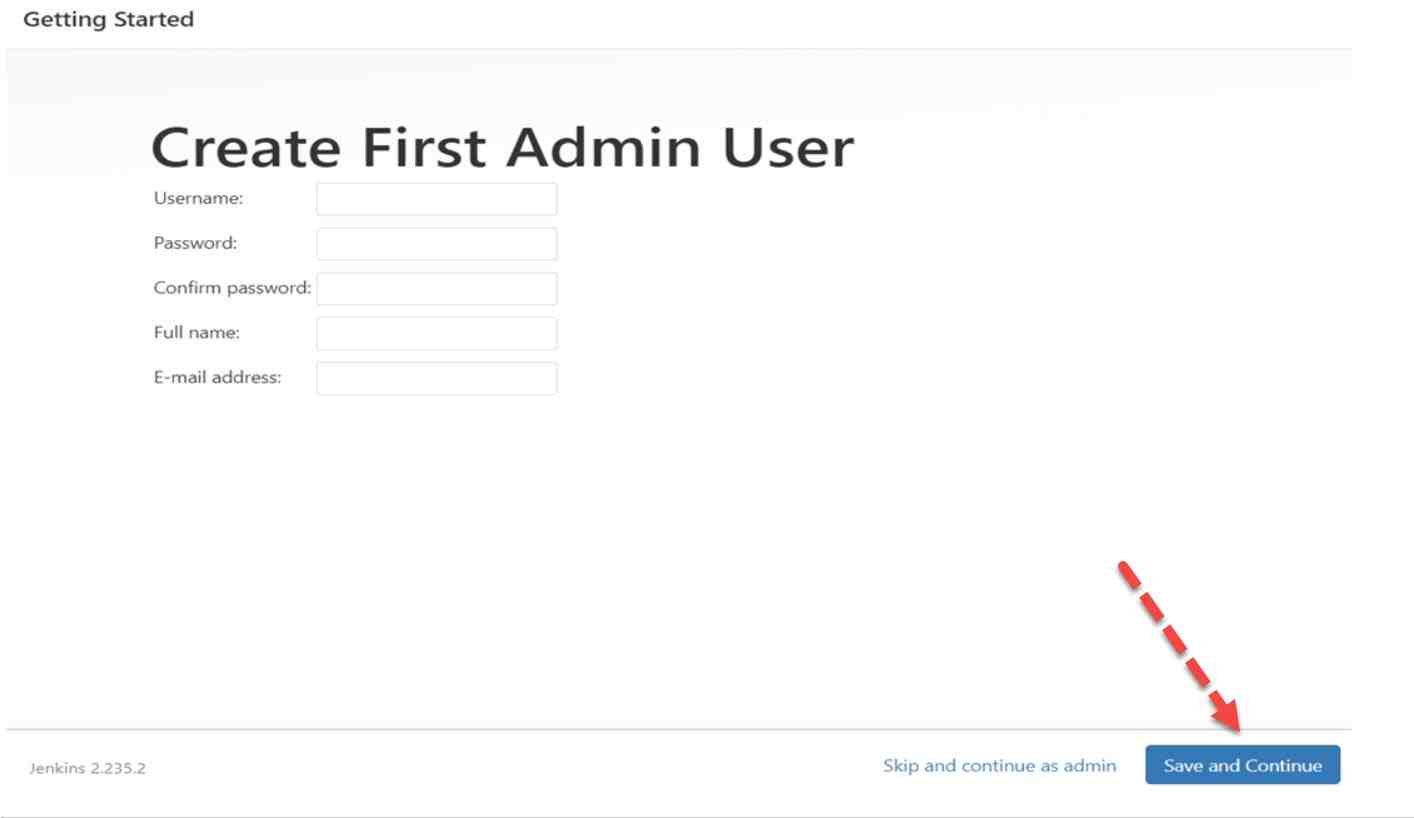
Here we need to do the following things:
- Put username, new password that you want to put.
- Put confirm password, full name, email address, and click on the “Save and Continue” button.
- You can choose the option “Skip and continue as Admin” located beside the "Save and Continue" button, and in this case, you need to put the same password that you put in the previous steps. It is always recommended that you need to put in a new password according to your choice.
Step 11: After clicking on the “Save and Continue Button”, you will be redirected to the instance configuration screen. Here click on the “Save and Finish Button”.

Step 12: After clicking, you will be redirected to a new screen that will display a message like “Jenkins is Ready”. Now click on the “Start using Jenkins” button.
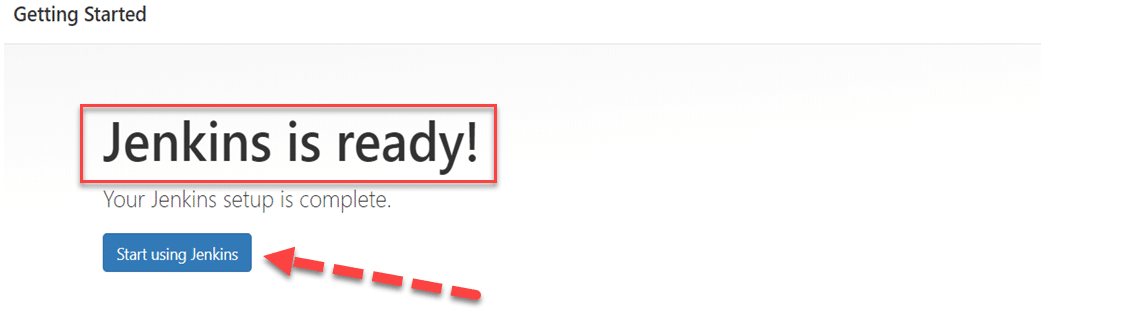
Step 13: After clicking on the “Start using Jenkins ” button, you will be redirected to the Jenkins Dashboard.

Alright, so we successfully installed Jenkins. The above method briefing how to install Jenkins is generic for all the platforms/operating systems. So, no matter which operating system we are planning to install and setup Jenkins, we can download the war file and run it to make Jenkins up and run.
Apart from this generic way, Jenkins also provides installers specific to specific operating systems, which can only install Jenkins on a particular operating system. Let's see a few of them, how we can use the same to install Jenkins on specific platforms/operating systems:
How to install Jenkins on Windows?
As we mentioned above, Jenkins provides installers specific to operating systems also. To install Jenkins on Windows, follow the steps as mentioned below:
-
Firstly, navigate to the Jenkins download page.
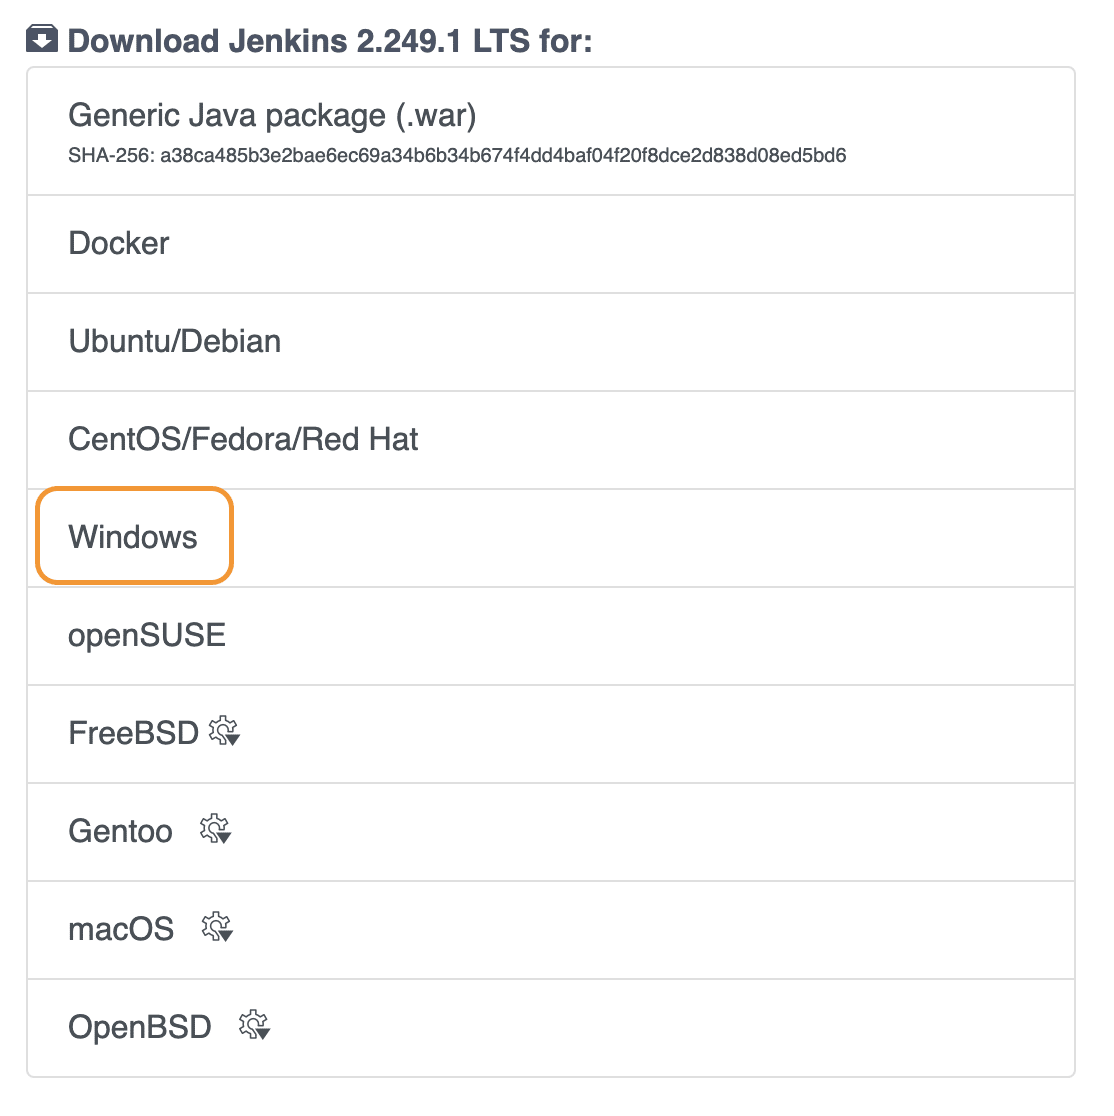
-
Secondly, click on the link to download Jenkins for Windows, as highlighted below:
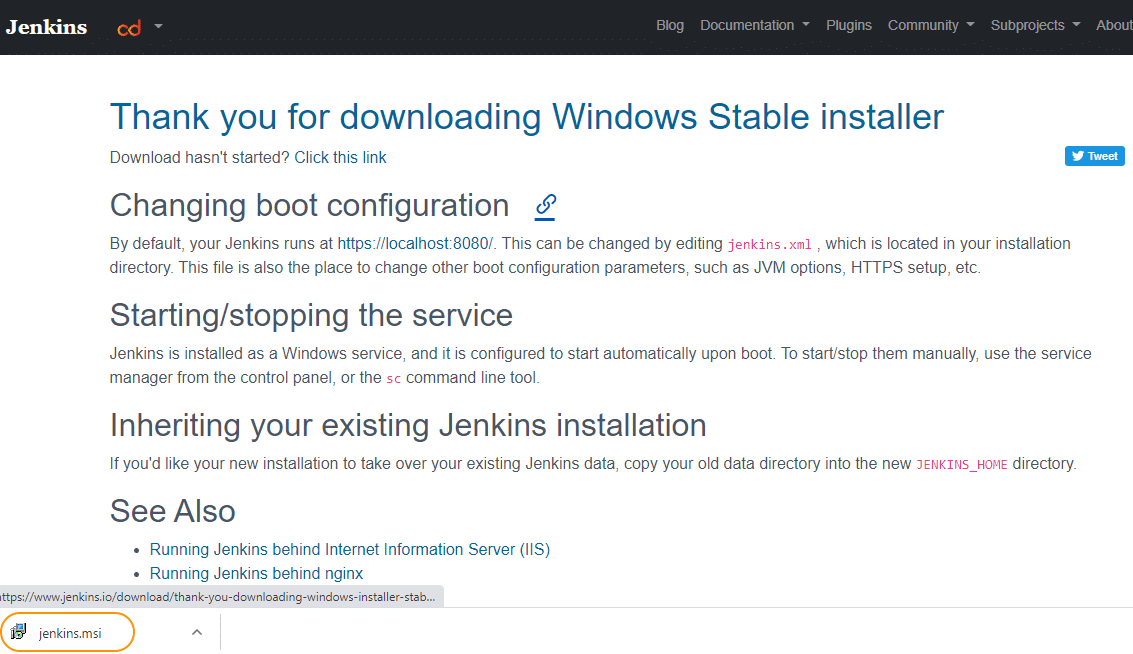
- Thirdly, clicking on the Windows link will download the "msi " installer for Jenkins as shown below:
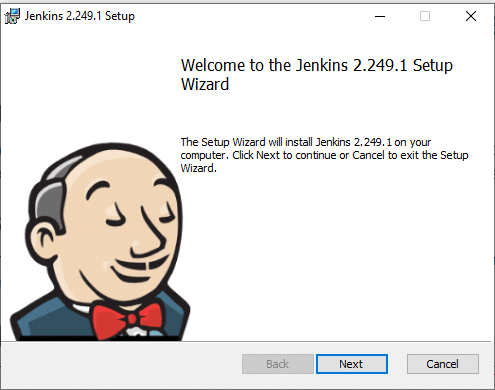
- Fourthly, double-click the installer to start the installation of Jenkins; it will show the first screen, as shown below:
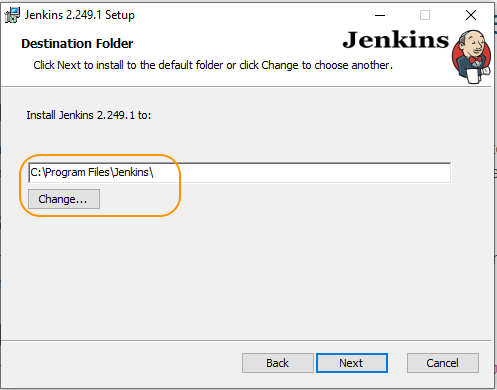
- Fifthly, click on the "Next " button to start the installation and specify the path where Jenkins will be installed, as shown below:
- After that, click on the "Next " button and specify the logon type. As we are installing on a local machine, we have selected the option to "Run service as LocalSyste". Moreover, you can specify/ mention the domain user name and password if you want to run Jenkins using organization credentials:

- Seventhly, click on the "Next " button and specify the port on which Jenkins will be running:
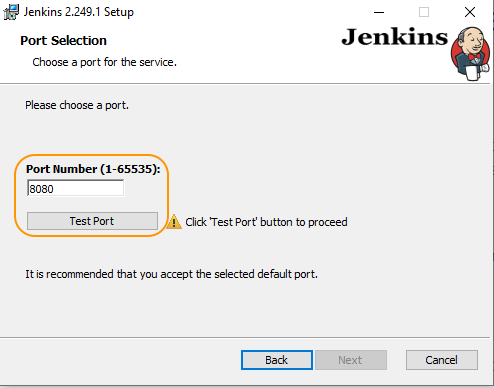
- After that, click on the "Test Port " button to validate whether the specified port if free on your machine or not. Consequently, if the port is free, it will show a green tick mark as shown below:

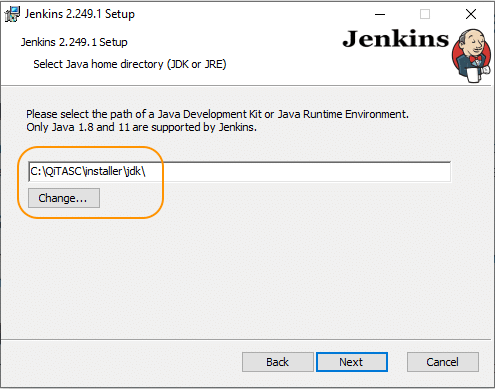
- Ninthly, clicking on the "Next " button will check for "JAVA" on your machine and will ask to install "JDK " if the needed version is not available on your machine:
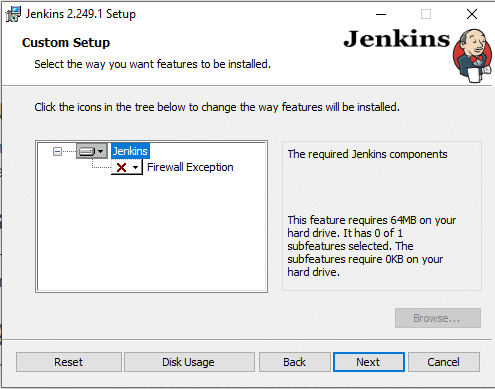
- Click on the "Next " button and Select other services that need to be installed with Jenkins:
- Click on the "Install " button to start the installation of Jenkins:
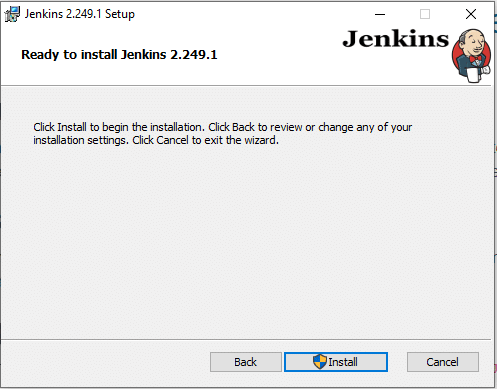
- Additionally, clicking on the "Install " button will show the progress bar of installation, as shown below:

- Once the installation completes, click on the "Finish" button to complete the installation:

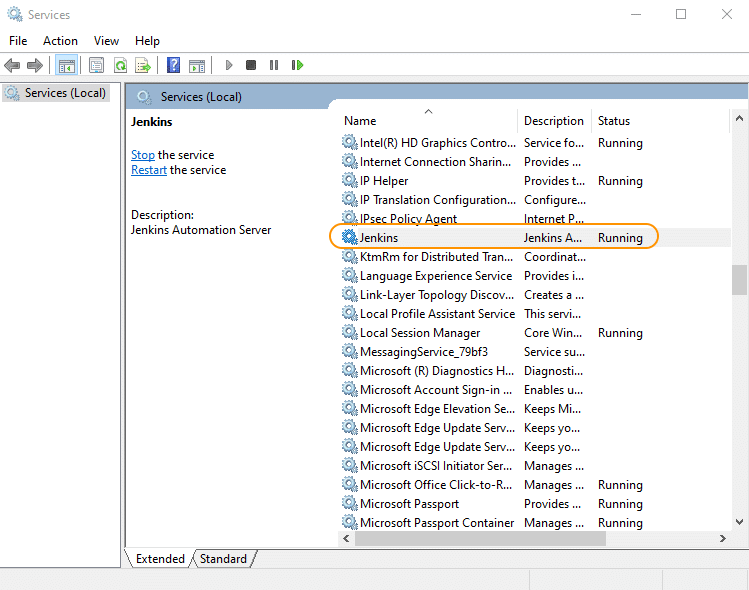
- Jenkins will be installed as a "Windows Service". You can validate the same by browsing the "services " section, as shown below:
- Consequently, once the installation will be done and Jenkins will be up and running, when you browse the link "http://localhost:8080 ", it will show the initial screen, as shown below:
From here, you can follow the same steps as we did while installing Jenkins with the war file.
How to install Jenkins on macOS?
On macOS, apart from installing and running Jenkins using the generic way of the "war " file, we can install Jenkins using the package manager brew. Follow the steps as mentioned below to install Jenkins on macOS:
-
First, navigate to Jenkins download page.
-
Secondly, click on the link to download Jenkins for macOS, as highlighted below:
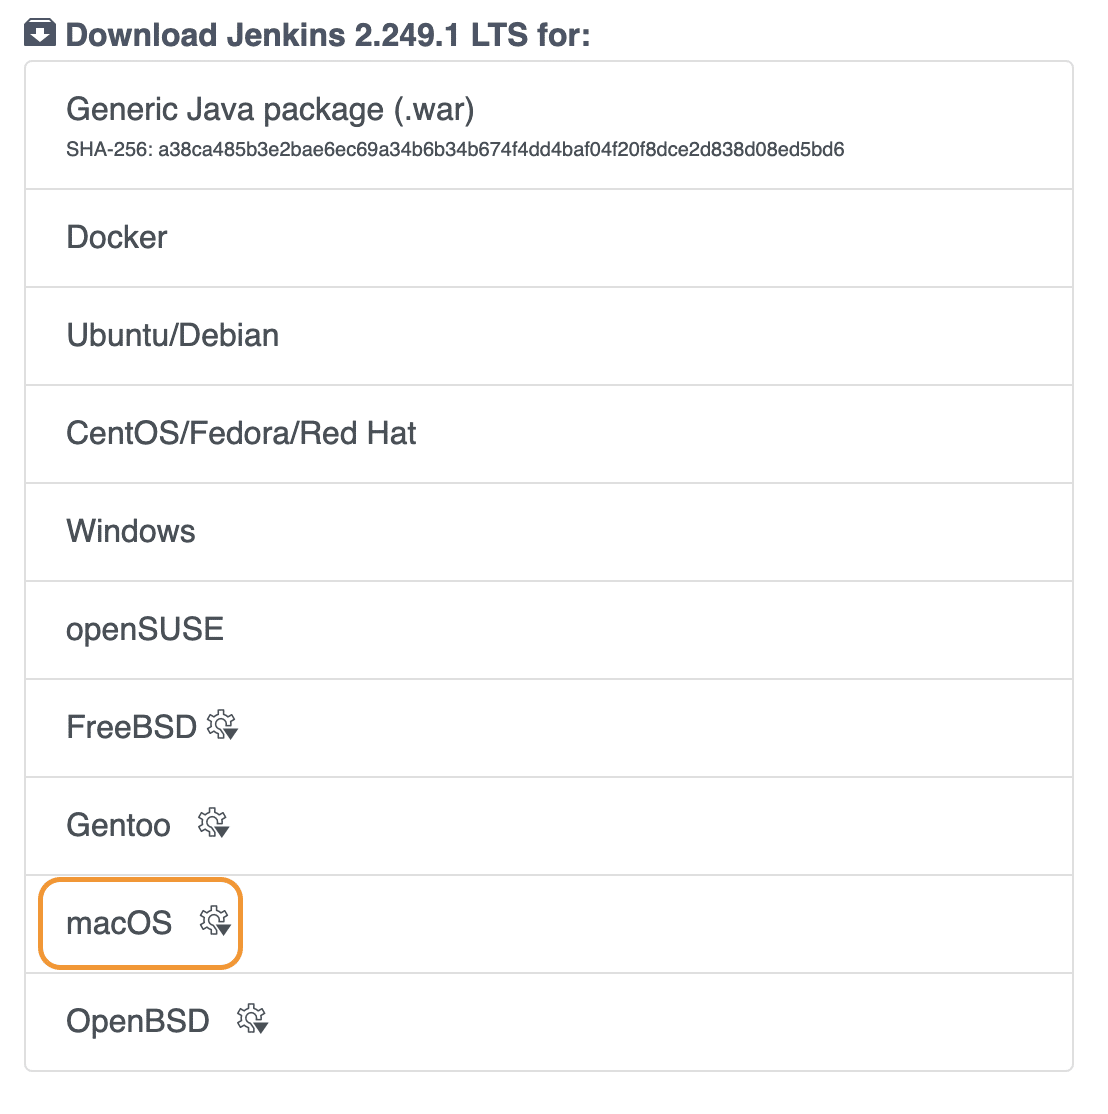
- Thirdly, it will list all the brew command needed to install Jenkins, as shown below:
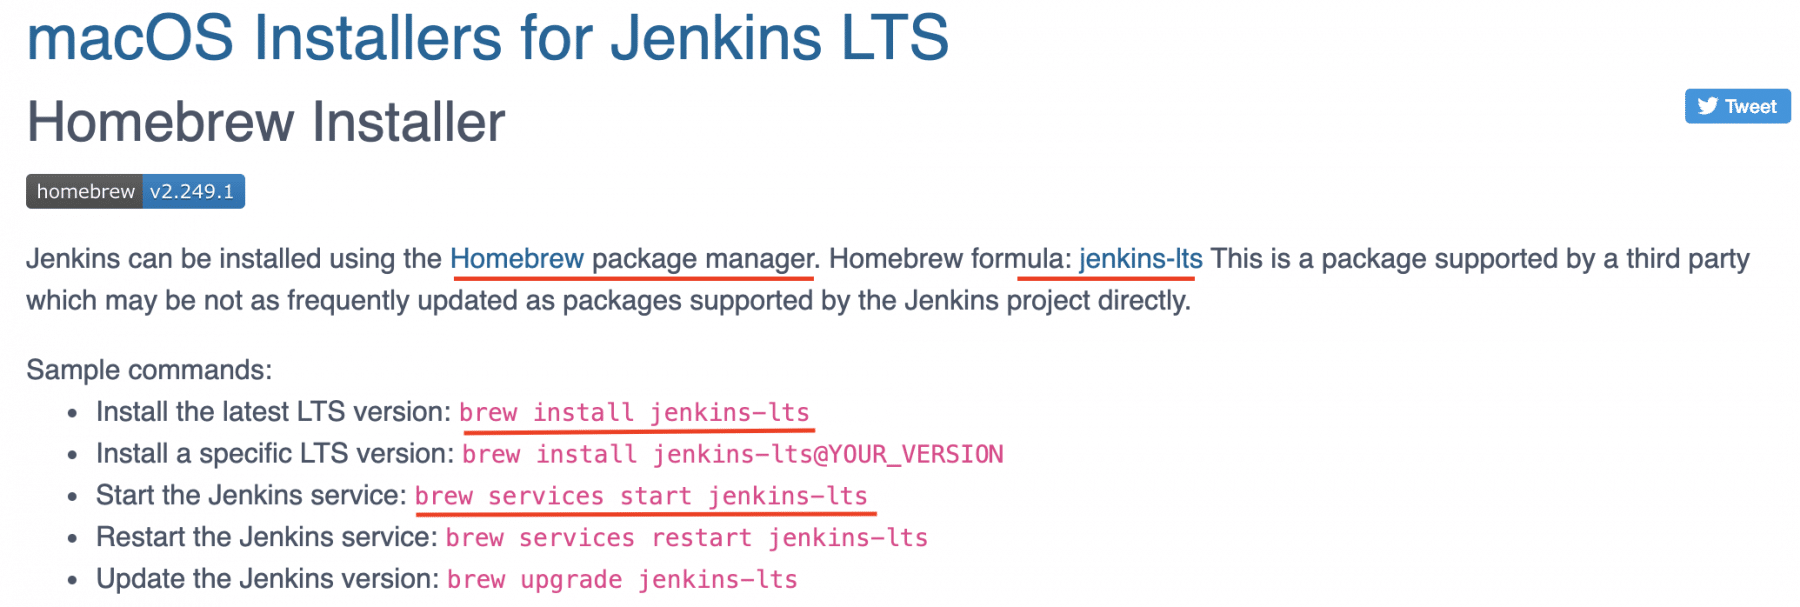
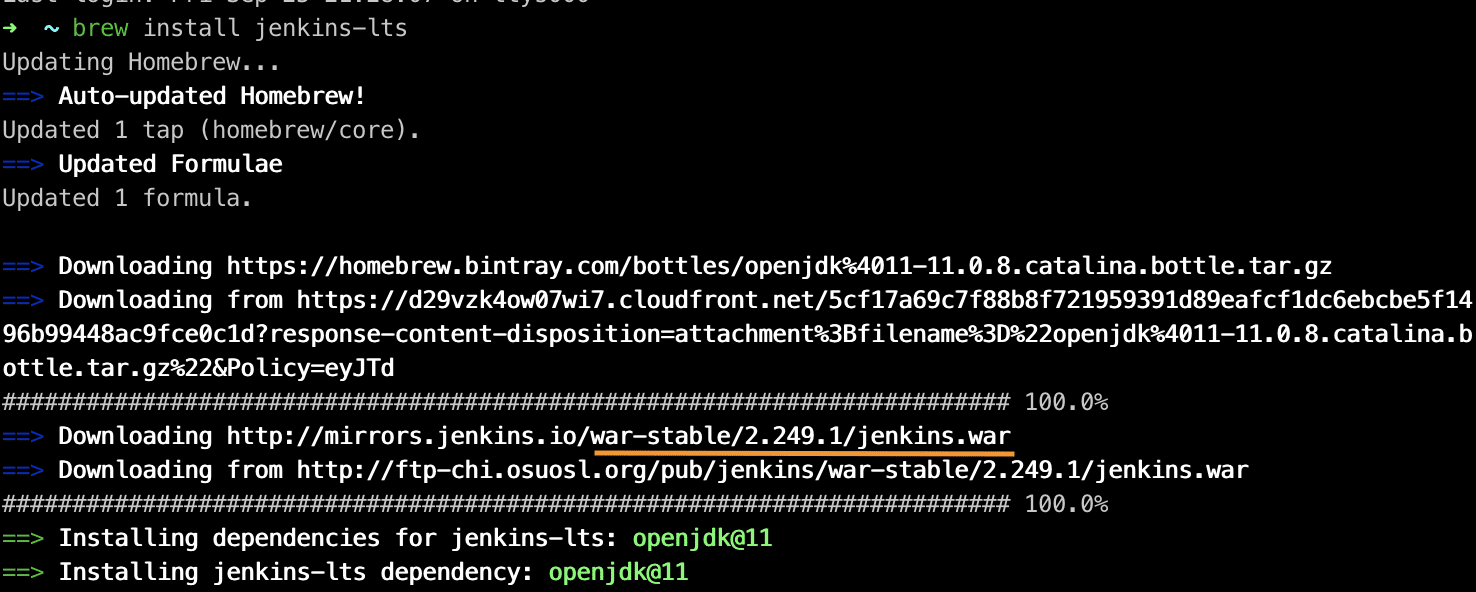
- Consequently, to install Jenkins on macOS, execute the following command on the terminal:
brew install jenkins-lts
- Fifthly, executing the above command will show the output, as shown below:
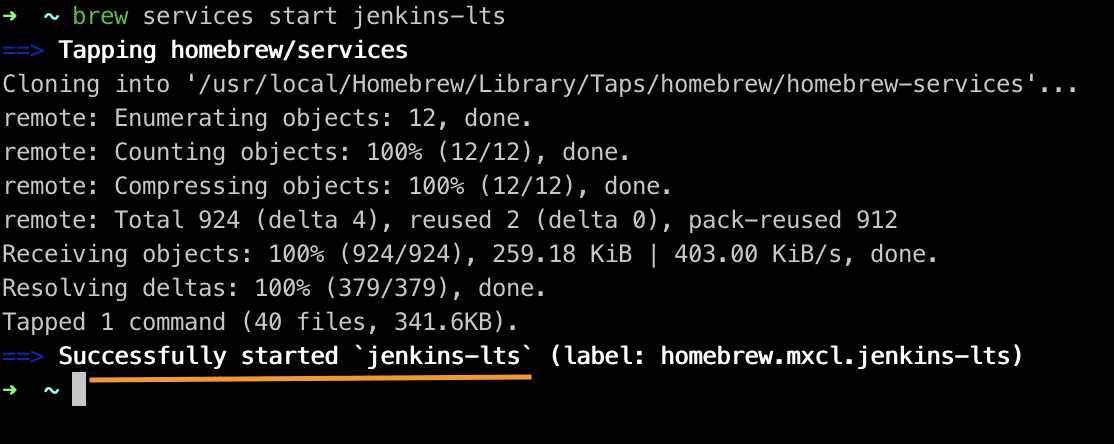
- Sixthly, once the installation completes, you can start Jenkins as a service by typing the following command:
>brew services start jenkins-lts
- After that, it will start Jenkins as a service and will show the output as shown below:
- After the installation completes and Jenkins will be up and running when you browse the link "http://localhost:8080 ", it will show the initial screen, as shown below:
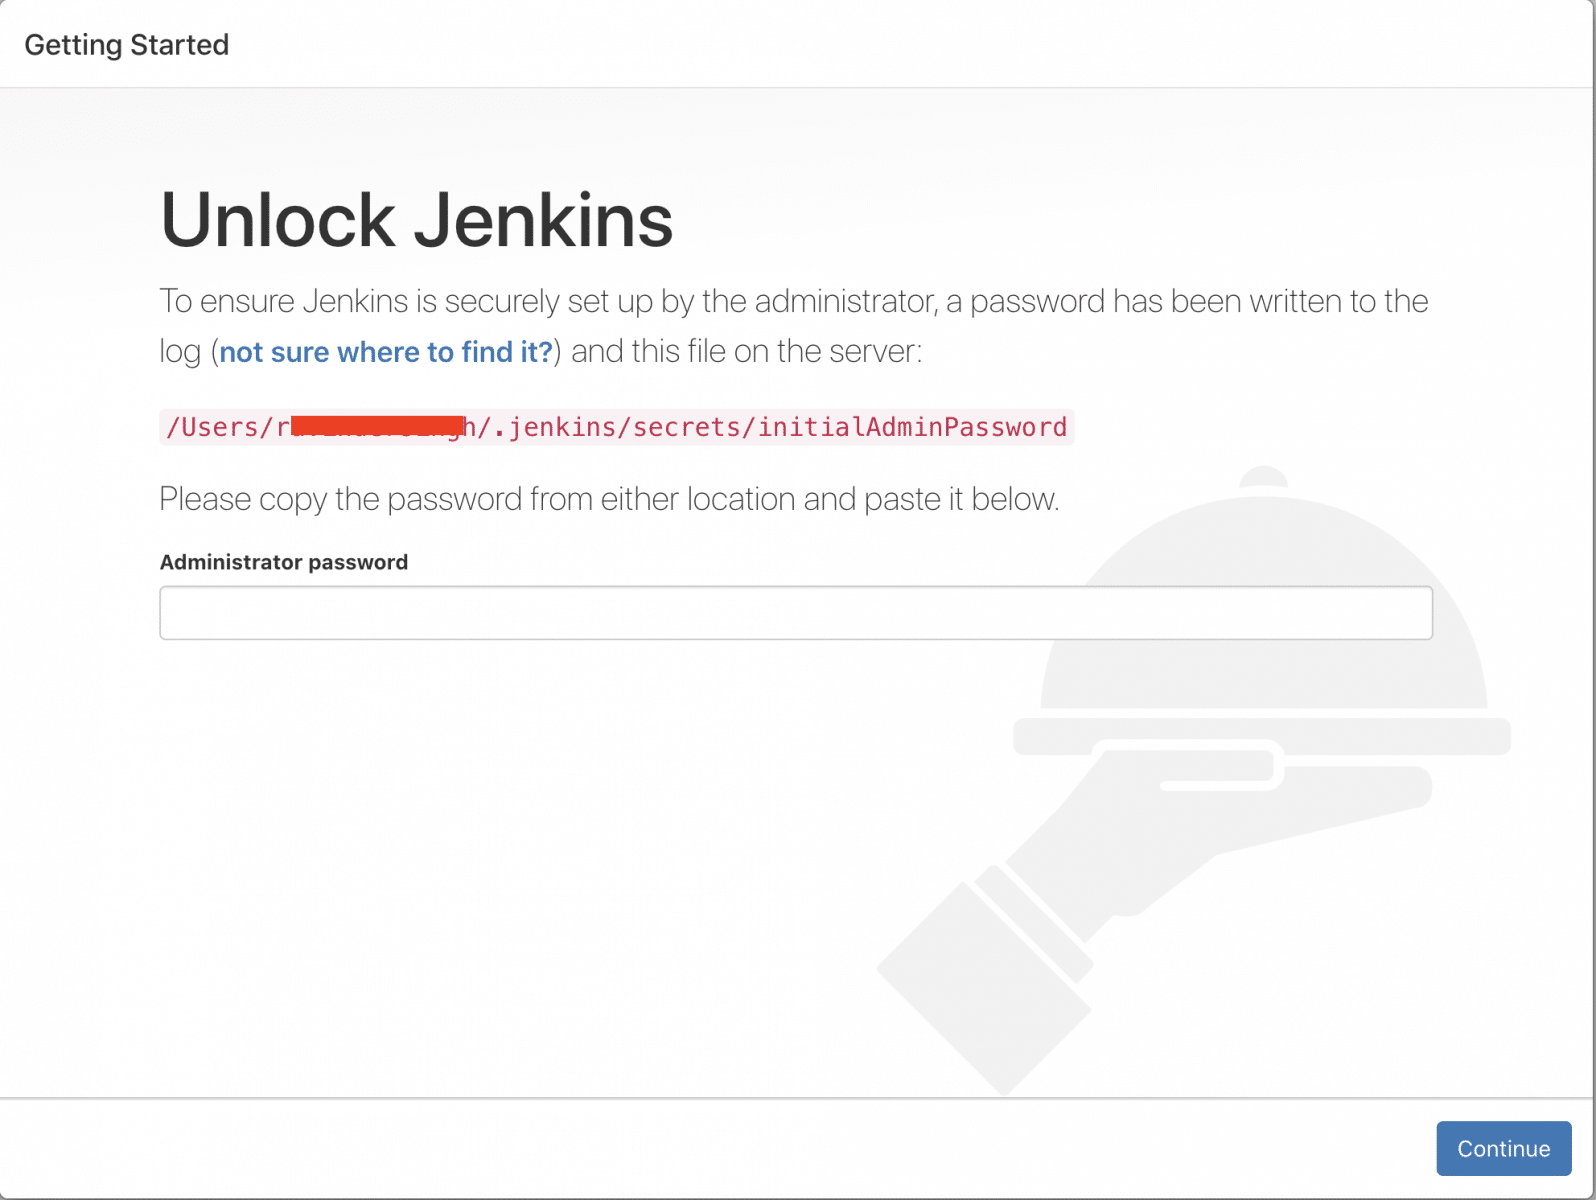
From here, you can follow the same steps as we did while installing Jenkins with the war file.
How to install Jenkins on Linux?
Installation on Linux depends on which flavor of Linux you are using. Depending on the types of Linux, you can use the wget package manager to download Jenkins, as per the steps mentioned below:
-
First, navigate to Jenkins download page.
-
Secondly, click on the link to download Jenkins for Linus, as per the flavor (such as Ubuntu, Centos, etc.), as highlighted below:
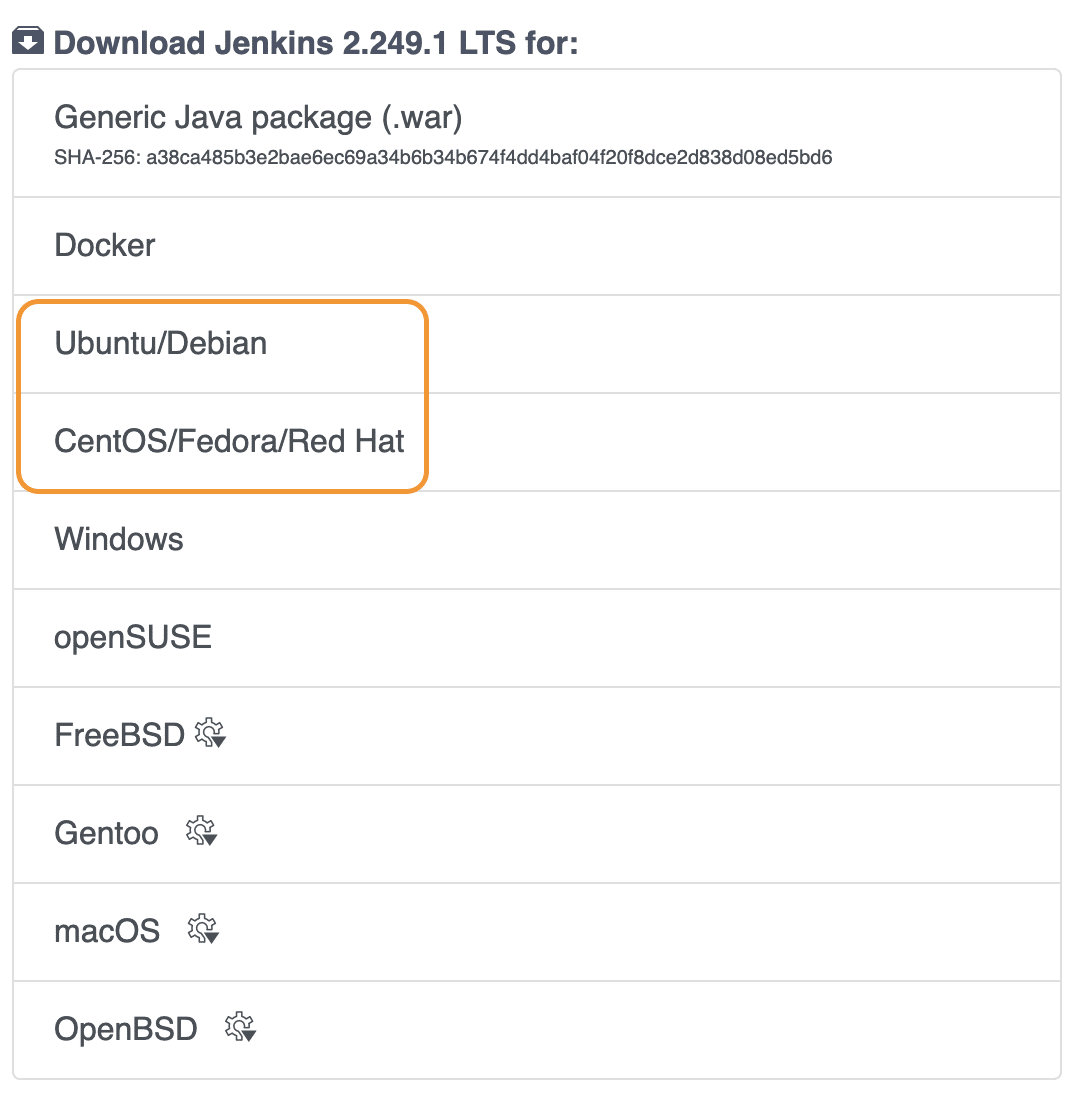
- Thirdly, suppose we click on the Ubuntu option, it will list all the commands to install Jenkins, as shown below:
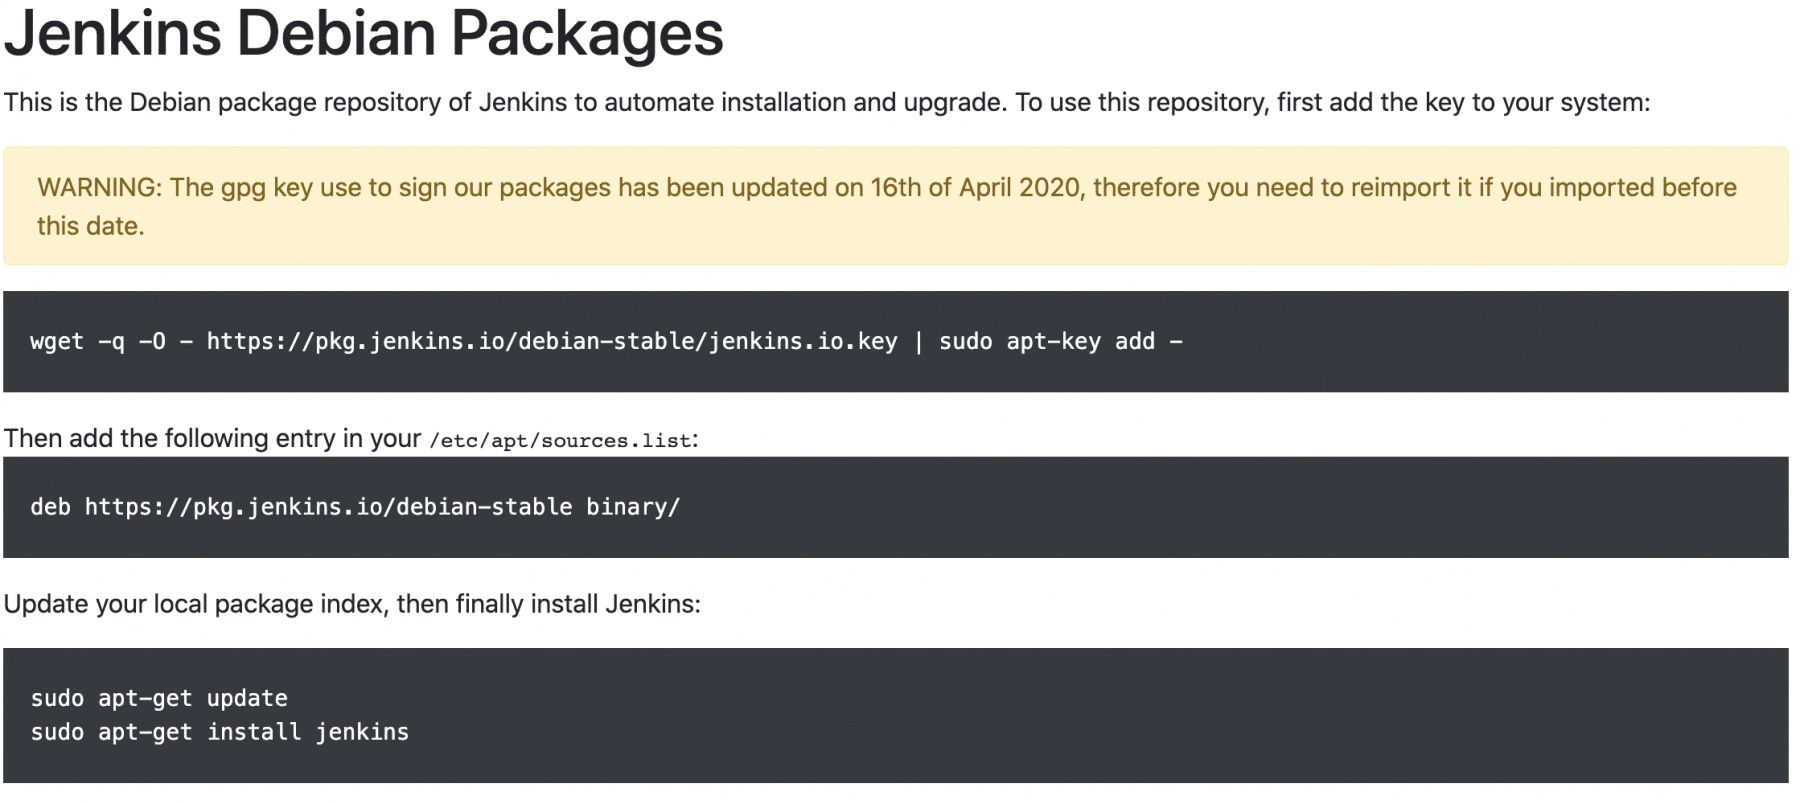
- Fourthly, type the above-mentioned commands on the terminal one by one, as follows: // Download Jenkins package wget -q -O - https://pkg.jenkins.io/debian-stable/jenkins.io.key | sudo apt-key add -
//Add the following entry in your /etc/apt/sources.list: deb https://pkg.jenkins.io/debian-stable binary/
// Update Local Package sudo apt-get update
// Install Jenkins sudo apt-get install jenkins
- Finally, once the installation will be done, Jenkins will be up and running when you browse the link "http://localhost:8080".
Additionally, we can either use the common way of running the "war" file on all the platforms or use the corresponding installers as per the platform/operating system's choice to install Jenkins successfully.
Key Takeaways:
- Before installing Jenkins, kindly check the hardware as well as software requirements mentioned in the above sections.
- Additionally, on the Jenkins' download page, download the Jenkins.war file, and we can use this WAR file to run Jenkins on any OS.
- Lastly, if we want to download installers for specific operating systems, we need to go to Jenkins's download page and then download and install the respective installers according to your OS.