We know that Jenkins is widely used as a Continuous Integration tool across the industry and provides great ease in automating the delivery pipeline. Moreover, we have already understood what Jenkins is? and how we may use it in our previous articles. Now we will go a step ahead and understand what a Jenkins pipeline is? Subsequently, we will dive through its concepts and learn to run a Jenkins Pipeline in this article. The basic concepts that we will cover are:
- What is Jenkins Pipeline?
- Why use Jenkins Pipeline?
- What is Jenkinsfile?
- Understanding Jenkinsfile syntax.
- Understanding Key constructs of Jenkinsfile.
- How to create Jenkins Pipeline?
- How to create a Scripted Jenkins Pipeline?
- And, how to create a Declarative Jenkins Pipeline?
What is Jenkins Pipeline?
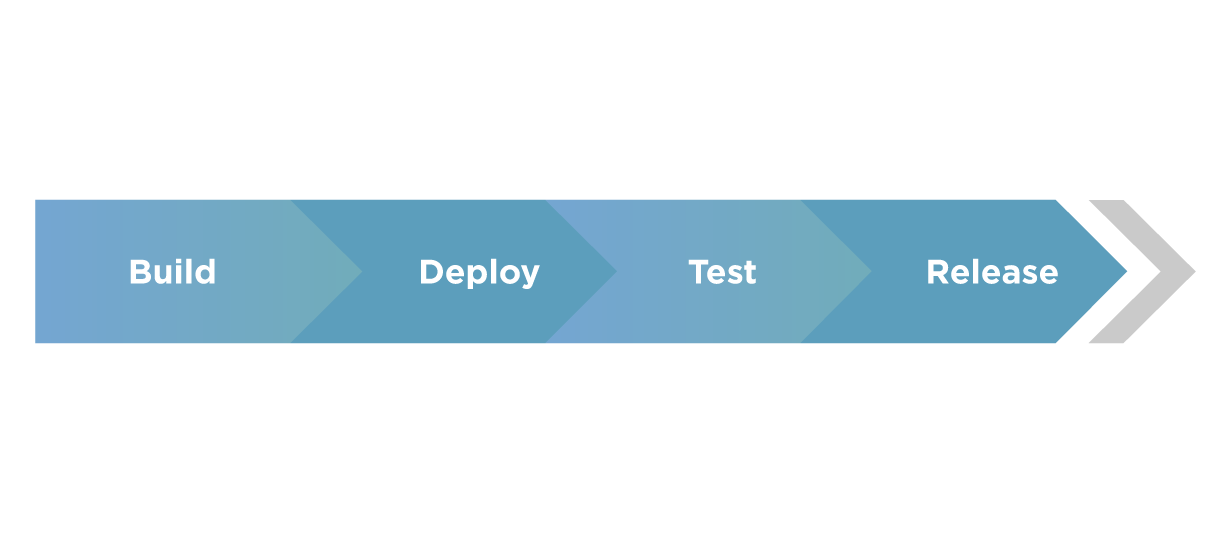
In simple words, a pipeline is a set of interconnected tasks that execute in a specific order. Additionally, Jenkins Pipeline is a suite of plugins that help users implement and integrate continuous delivery pipelines into Jenkins. Moreover, using Pipeline, you can create complex or straightforward delivery pipelines as code via the Pipeline domain-specific language(DSL) syntax. Subsequently, the below states represent a continuous delivery Pipeline:-
Why use Jenkins Pipeline?
We have already discussed how Jenkins has changed the software delivery process in our previous article on Jenkins Overview. Continuous Integration, Testing, and Delivery is a seamless process, and one can achieve all this using the Pipeline concept, which enables the project to be production-ready always. Subsequently, let us now look at the advantages offered by the Jenkins Pipeline.
- As already stated, we implement the Pipeline as a code. Hence multiple users can update and execute the pipeline process.
- Moreover, Pipeline resumes from the point where it went off in case of an interrupt.
- Additionally, the resumption can also happen if the user pauses a Pipeline process.
- Multiple jobs can execute through the pipeline along with support for complex pipelines that use conditional loops, forks, or join operations.
- Additionally, pipelines can integrate multiple plugins.
- Moreover, a text file called the Jenkinsfile stores the code, which can check into source code management(SCM).
Let's now understand how we can create a Pipeline in Jenkins and how to use the same:
What is Jenkinsfile?
As stated in the advantages above, Jenkins Pipeline is defined using a text file called the Jenkinsfile. Additionally, the pipeline implements as code using Groovy Domain-specific language through an editor or the configuration page on Jenkins instance. Moreover, the Jenkinsfile gives leverage to the developer to easily access or edit or check the code anytime.
Understanding Jenkinsfile Syntax:
There are two types of syntax using which we can define a Jenkinsfile:
- Declarative Pipeline syntax
- Scripted Pipeline syntax
Declarative Pipeline Syntax
The declarative syntax is a new feature that used code for the pipeline. It provides a limited pre-defined structure. Thereby, it offers an easy & simple continuous delivery pipeline. Moreover, it uses a pipeline block.
Scripted Pipeline Syntax
Unlike declarative syntax, the scripted pipeline syntax is the old traditional way to write the Jenkinsfile on Jenkins web UI. Moreover, it strictly follows the groovy syntax and helps to develop a complex pipeline as code.
Subsequently, let's quickly understand a few of the significant constructs of Pipelines in Jenkins:
Understanding Key constructs of Jenkinsfile
We will now see some critical concepts used in Pipelines:
- Pipeline - A pipeline is a set of instructions that includes the processes of continuous delivery. For example, creating an application, testing it, and deploying the same. Moreover, it is a critical element in declarative pipeline syntax, which is a collection of all stages in a Jenkinsfile. We declare different stages and steps in this block.
pipeline{

}
- Node - A node is a key element in scripted pipeline syntax. Moreover, it acts as a machine in Jenkins that executes the Pipeline.
node{

}
- Stage - A stage consists of a set of processes that the Pipeline executes. Additionally, the tasks are divided in each stage, implying that there can be multiple stages within a Pipeline. The below snippet shows the different stages that one can define in a Pipeline.
pipeline{
       agent any
       stages{
              stage('Build'){
                 ........
                }
              stage('Test'){
                 ........
                }
              stage('Deploy'){
                 ........
                }
              stage('Monitor'){
                 ........
                }
       }
}
- Steps - A step in Jenkins defines what we have to do at a particular step in the process. There can be a series of steps within the stage. Moreover, whatever step we define in a stage would be executed within it.
pipeline{
     agent any
     stages{
          stage('Stage 1'){
              steps{
                //Perform steps related to this stage
              }
          }
          stage('Stage 2'){
              steps{
                //Perform steps related to this stage
              }
          }
     }

}
-
Agent - An agent is a directive that enables the users to execute multiple projects within the same Jenkins instance by distributing the load. Moreover, we assign an executor to the build through an agent. You can either use a single agent for the entire pipeline or use a distinct agent for the different stages of the pipeline. Subsequently, some of the parameters used with agents are -
- Any- Any of the available agents execute the pipeline.
- None- It is used at the pipeline root and implies no global agent, but each stage must specify its own agent.
- Label- The labeled agent is used to execute the pipeline or the specific stage.
- Docker- One can use the Docker images as the execution environment & specifying the agent as docker.
How to create Jenkins Pipeline?
Now that we have understood the basics of Jenkins Pipeline, we will go ahead and create our very first Pipeline. Additionally, you may refer to our detailed article on Jenkins installation to install Jenkins on your system before executing your first pipeline. As already discussed above, the pipeline can be declared by either using the Scripted or Declarative syntax. Subsequently, let us see how we can do the two, followed by examples for both.
How to create a Scripted Jenkins Pipeline?
Once you have started Jenkins and logged on to its UI, you may follow the below steps to create your first pipeline-
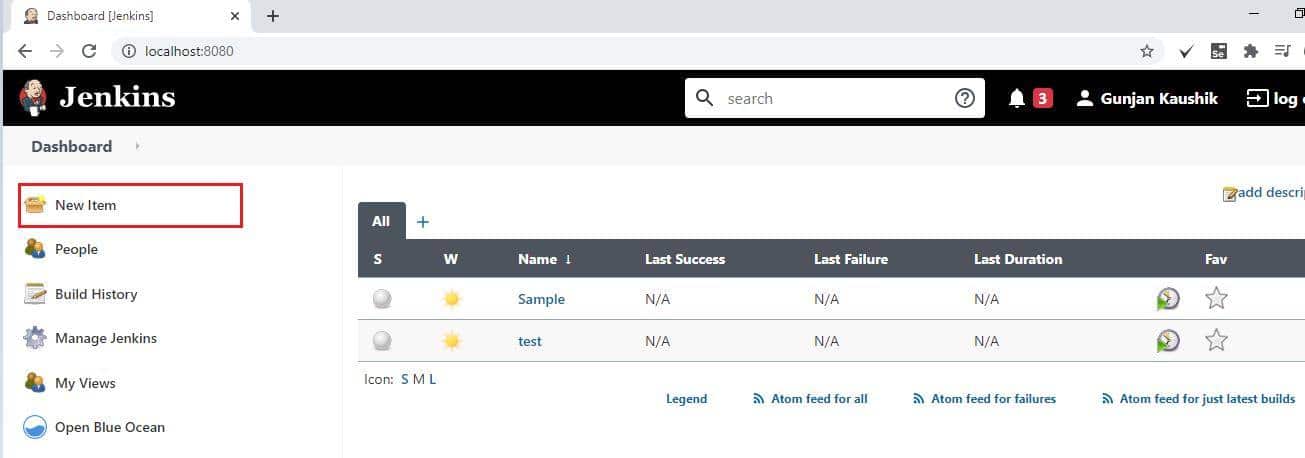
- Firstly, from the Jenkins dashboard, click on New Item on the left panel.
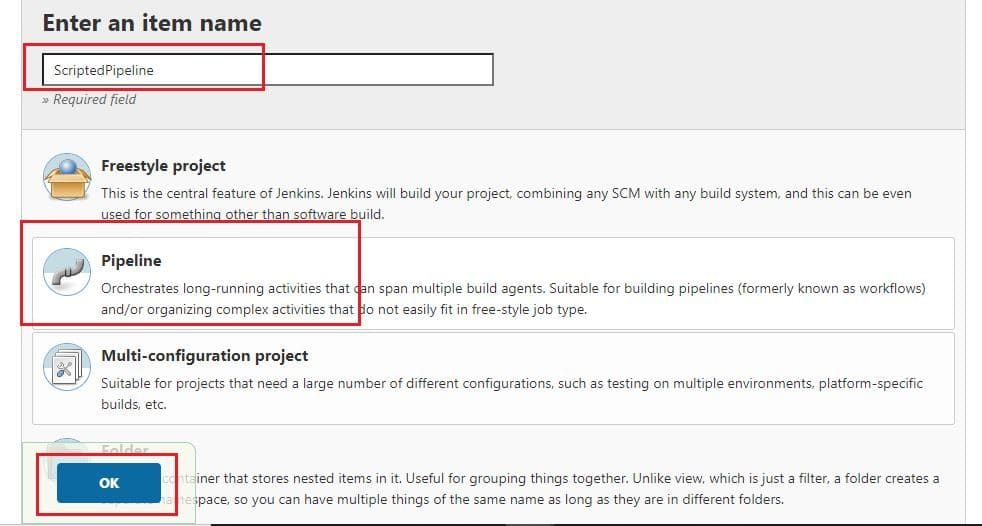
- Secondly, enter the name for your pipeline, select Pipeline from the list. After that, click OK.
- After that, go to the Pipeline tab, and from the Definition, the dropdown selects the Pipeline script.

- The next step is to write your pipeline code in the web UI provided by Jenkins. Let us see a sample pipeline example as available in Jenkins-
pipeline {
         agent any
         stages {
                 stage('One') {
                 steps {
                     echo 'Hi, welcome to pipeline demo...'
                 }
                 }
                 stage('Two') {
                 steps {
                    echo('Sample testing of Stage 2')
                 }
                 }
                 stage('Three') {

                 steps {
                       echo 'Thanks for using Jenkins Pipeline'
                 }
                 }
              }
}
You need to copy and paste the same in UI as shown below-
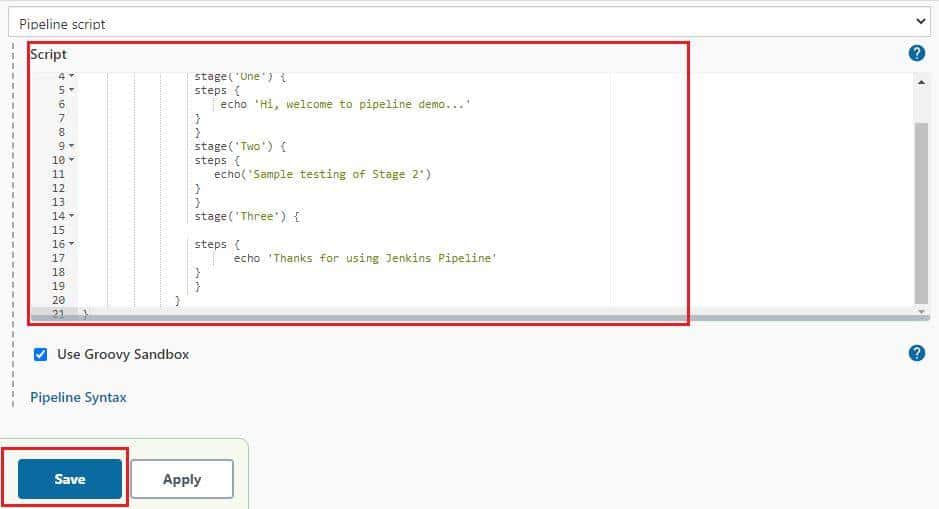
- After that, click on Save. Conclusively, this finishes the process.
We will see running this pipeline in the next section; before that, let us see how to create a Declarative Pipeline in Jenkins.
How to create a Declarative Jenkins Pipeline?
To create a declarative pipeline, you need to have a Jenkinsfile in place. Since I will be using the project from my Github account, I have already placed the Jenkinsfile in my project.
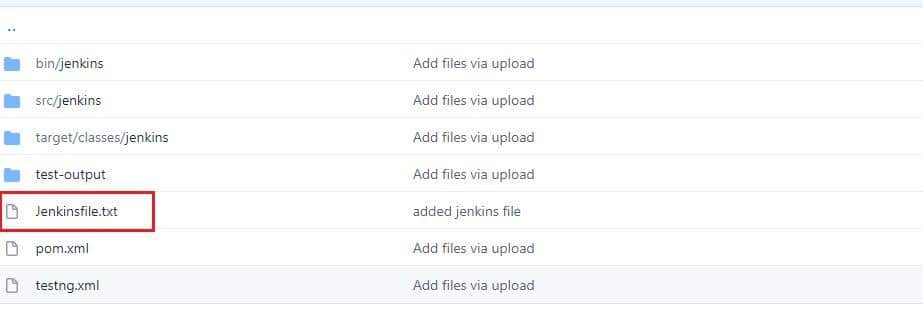
Note: For the tutorial, I am using the same code as used in the scripted pipeline in the Jenkinsfile.
For creating a Declarative Pipeline, you may follow step#1 and Step#2 from the scripted pipeline creation steps stated above and then follow the below steps-
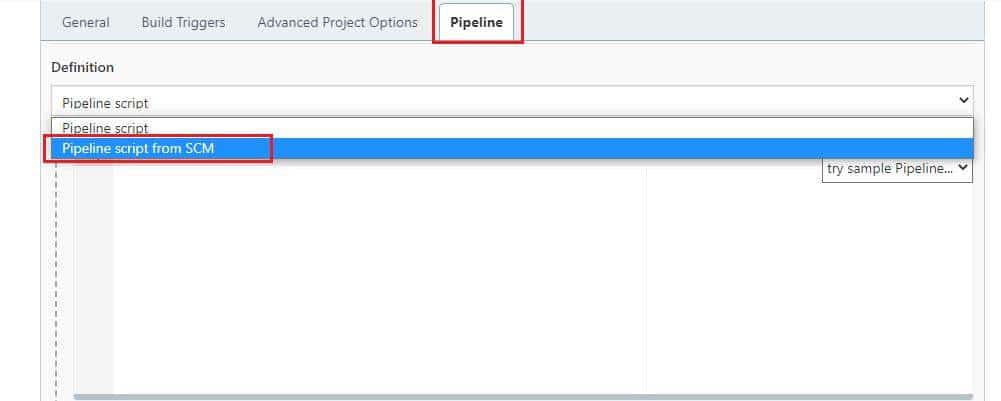
- Go to the Pipeline tab, and from the Definition, the dropdown selects the Pipeline script from SCM.
- You need to select Git from the SCM dropdown now.
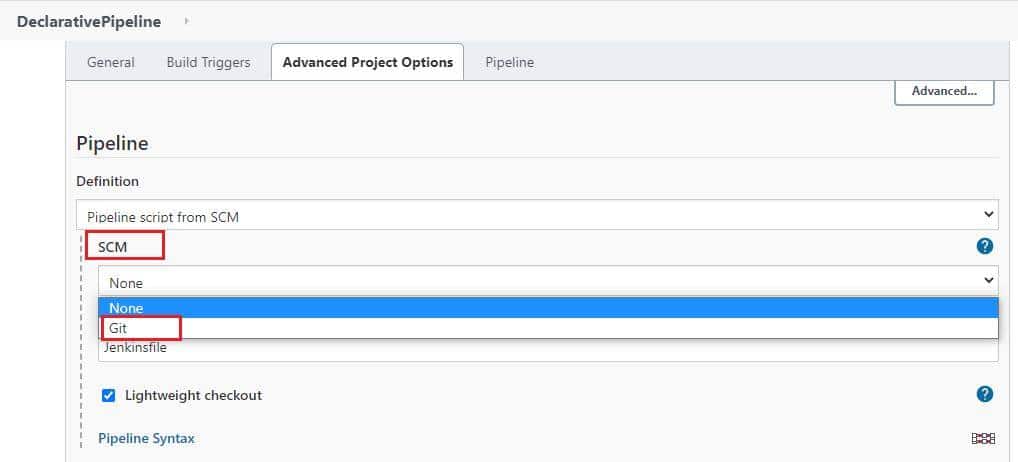
- Now, you will get an option to input your Repository URL and credentials.

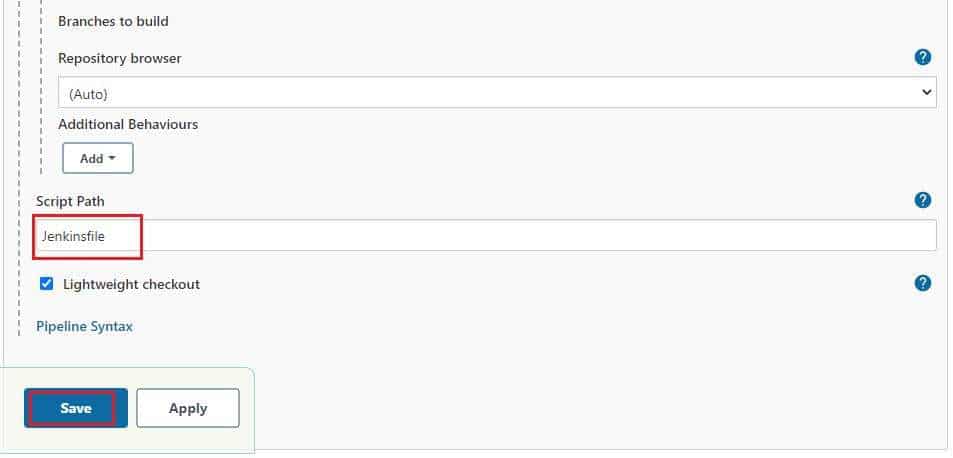
- Next, you may set the branch or let it be blank for any branch. In the script path, you need to write the Jenkinsfile name that exists in your repository. Click on Save, and there you go, your declarative pipeline is ready for use.
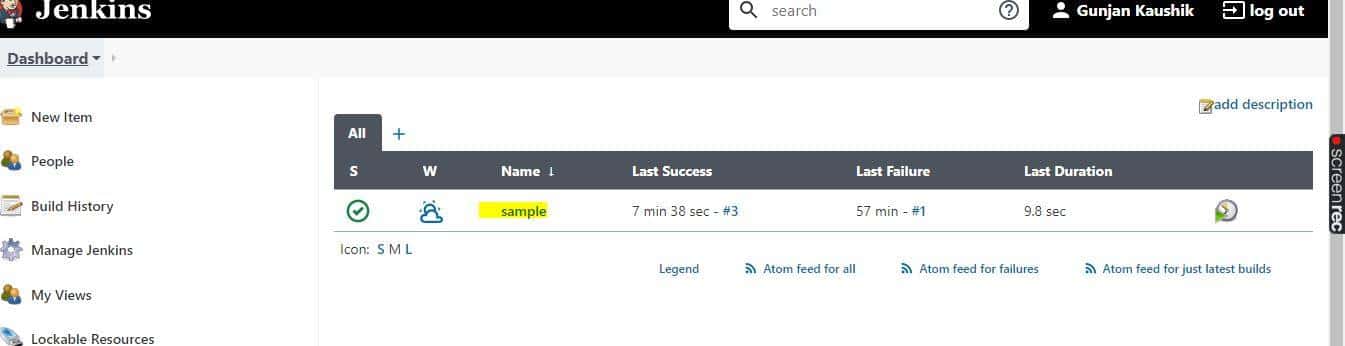
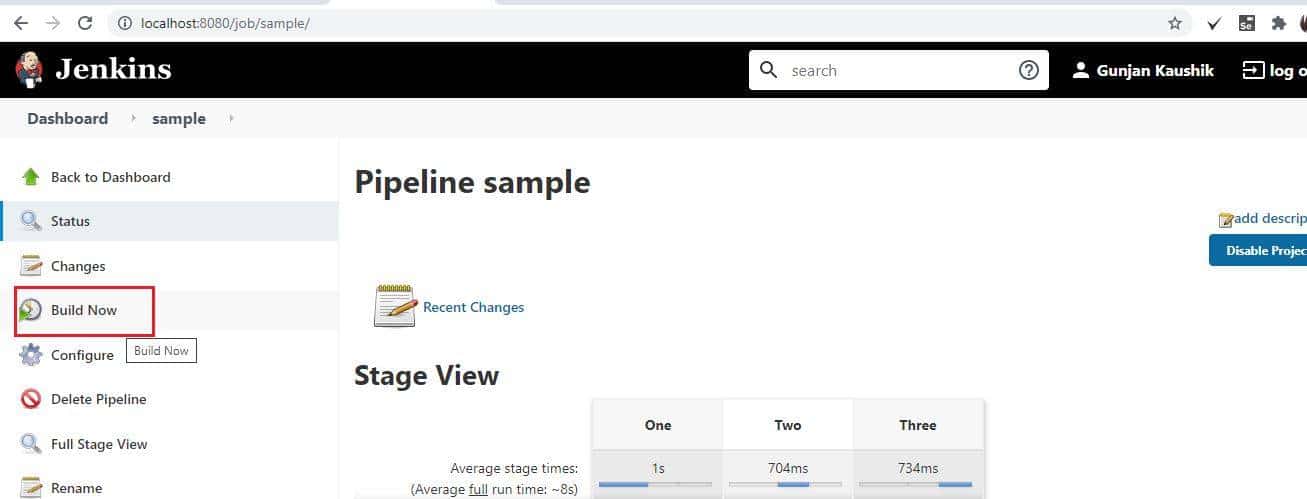
Now that you are all set with your pipelines, you can execute the same from your Jenkins UI. All you need to do is select your pipeline and click on Build Now link on the left panel.
Once you run the pipeline, you will see the results displayed on the stage view as shown below-
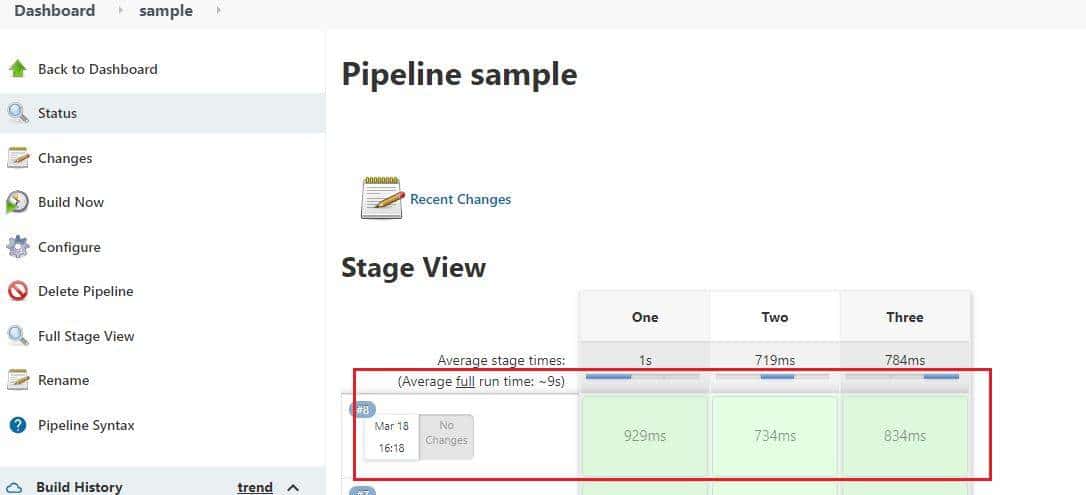
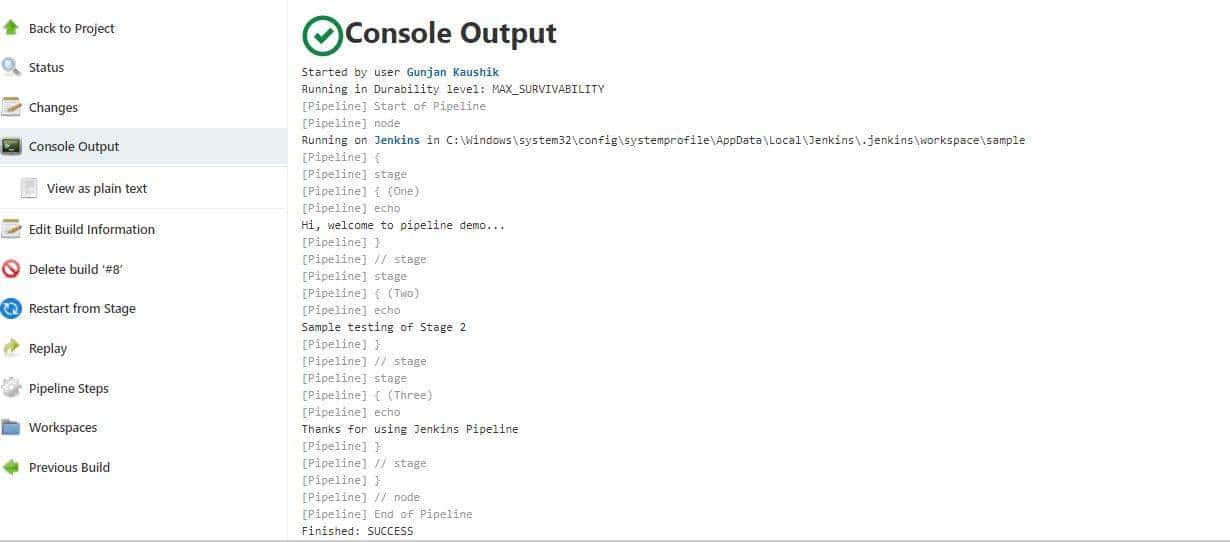
You can view the console output for the build as well, which would display the print statements and errors(if any) that will be helpful for your debugging.
See how easy it is to create and build your pipeline.
Key Takeaways
- Jenkins provides the capability to create a Pipeline as code that can contain all the steps of build, test, and deploy.
- Additionally, Jenkins provides two ways to create pipelines: Scripted and Declarative.
- Finally, the Jenkins pipeline gives the flexibility to define various stages and steps programmatically.