Backup and Restore are the two basic operations that are generally needed in any big organization and followed regularly. This backup and restore process is essential from the security and recovery point of view for any organization. Backup is the process in which any user creates and stores replicas of data so that if data loss or corruption occurs, the user should restore the protected data. The same happens in the case of Jenkins also. In this article, we will discuss that how to take backup in Jenkins with Jenkins Backup Plugin. Let's start our learning with the understanding of the below point:
- What is a backup in Jenkins?
- How to install the ThinBackup plugin in Jenkins?
- How to backup using the ThinBackup plugin?
- And, how to restore using the ThinBackup plugin?
- How to install the Backup plugin in Jenkins?
- How to backup using the Backup plugin?
- And, how to restore using the ThinBackup plugin?
What is a backup in Jenkins?
Whatever we execute via Jenkins or perform any setting in Jenkins, it stores in the form of backup in Jenkins home directory. This backup includes data and configuration-related settings like job configurations, plugins, plugin configurations, build logs, etc. So, it's essential to take the backup of this prominent information to use this backup in the future if required. Jenkins provides different types of plugins to achieve the above objective. In the further sections, let's explore different types of plugins.
How to install the ThinBackup plugin in Jenkins?
If we want to take backup of the most critical global and job-specific configuration files, then the ThinBackup plugin in Jenkins is convenient. Let's see the installation process of this Plugin in further steps:
Step 1: Go to Plugin Manager, and under the "Available" tab, do the following steps:
- Put text "backup" in the search box.
- Check the checkbox against the "ThinBackup" plugin.
- Click on the "Download now and install after restart" button.
Step 2: As soon as we click on the button, the Plugin will start installing shortly, and it will show success status if successfully installed.
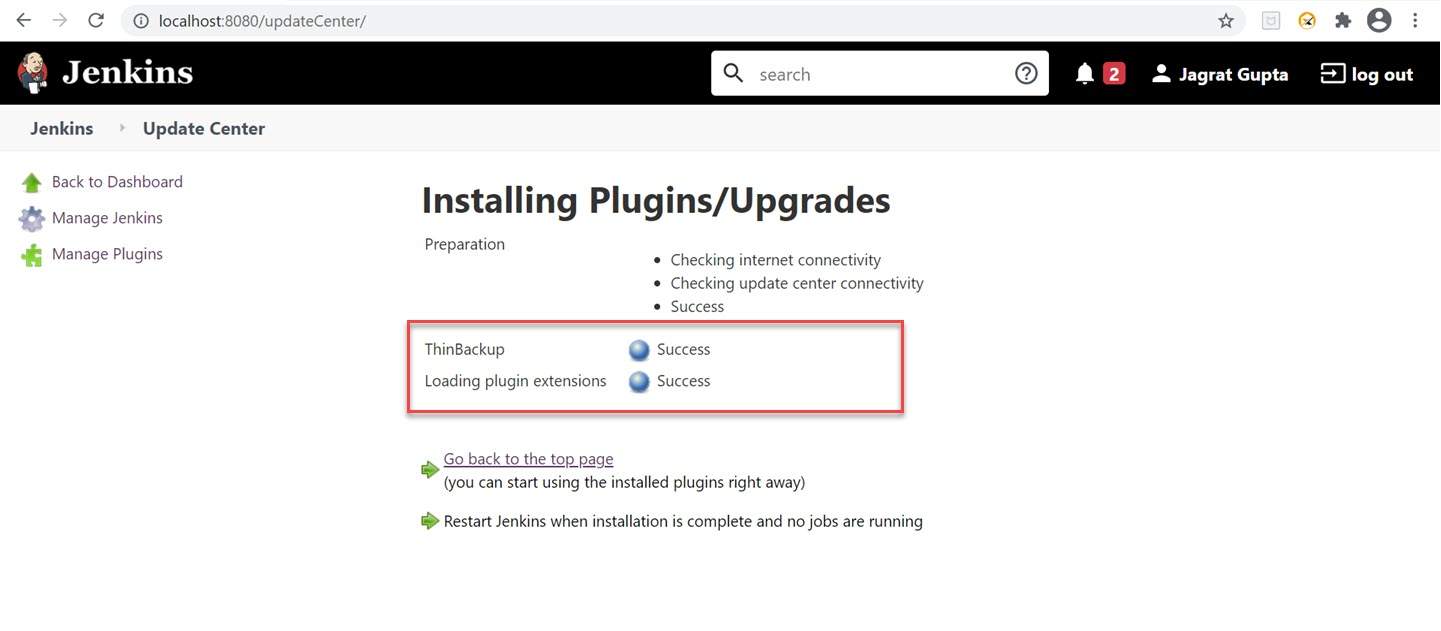
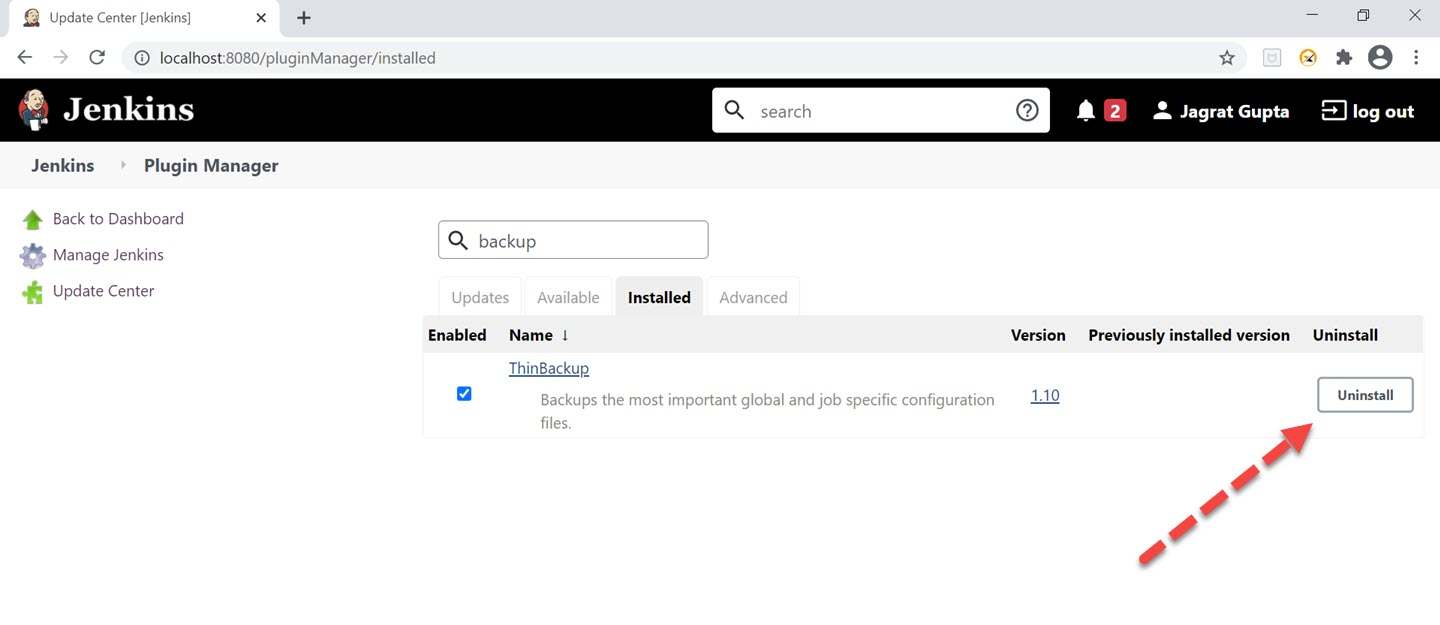
Step 3: After successful installation, we can verify that it should display under the "installed" tab, and uninstall button will display.
So, in this way, we can install the ThinBackup plugin in Jenkins. In the next section, we will see how we can perform backup using the ThinBackup plugin in Jenkins.
How to backup using the ThinBackup plugin?
In the previous section, we saw that how to install the ThinBackup plugin in Jenkins. In this section, we will see how to take backup in Jenkins using the ThinBackup plugin. Please follow the below steps to achieve it:
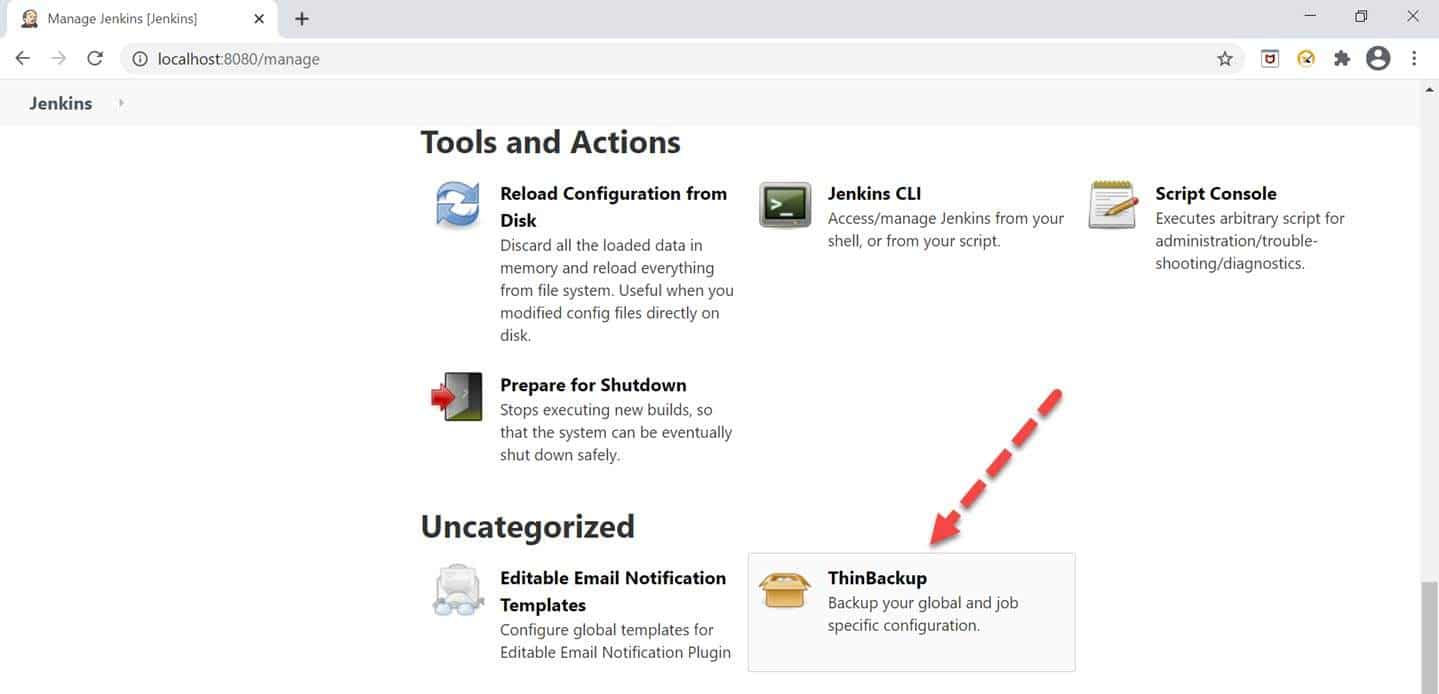
Step 1: Go To Manage Plugin and click on the "ThinBackup" option mentioned under the "Uncategorized" section in Jenkins.
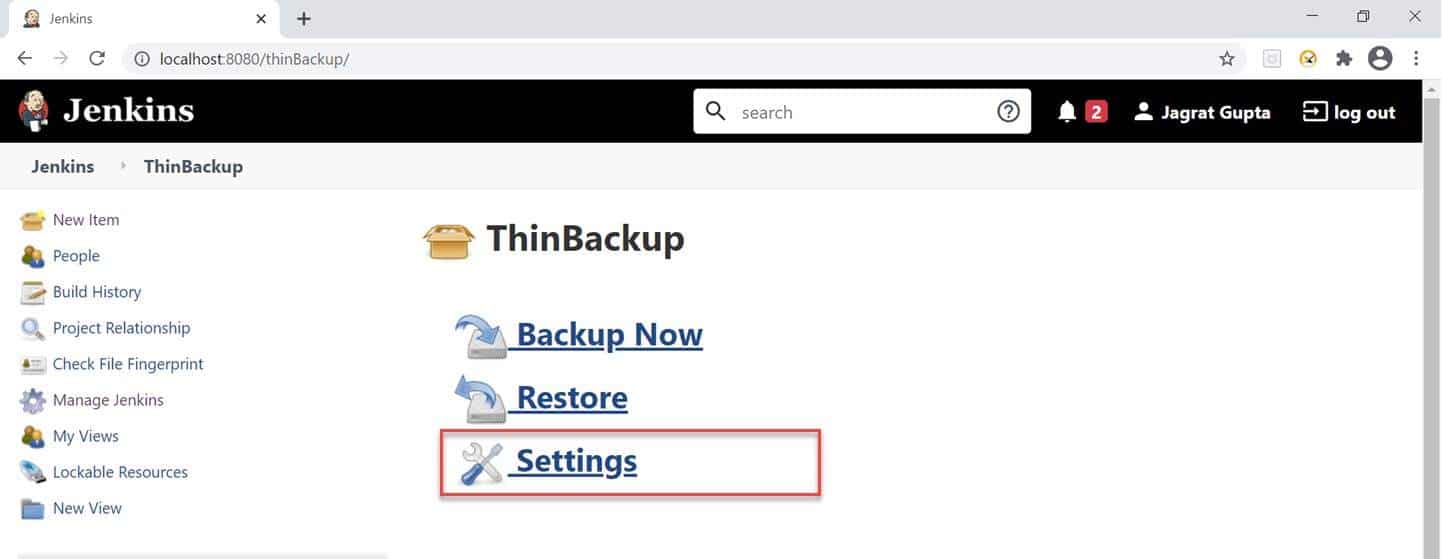
Step 2: As soon as we click on the ThinBackup option, we will redirect towards the ThinBackup plugin page, in which we will see 3 options. As a first step, we need to perform some settings, so click on the "Settings" link.
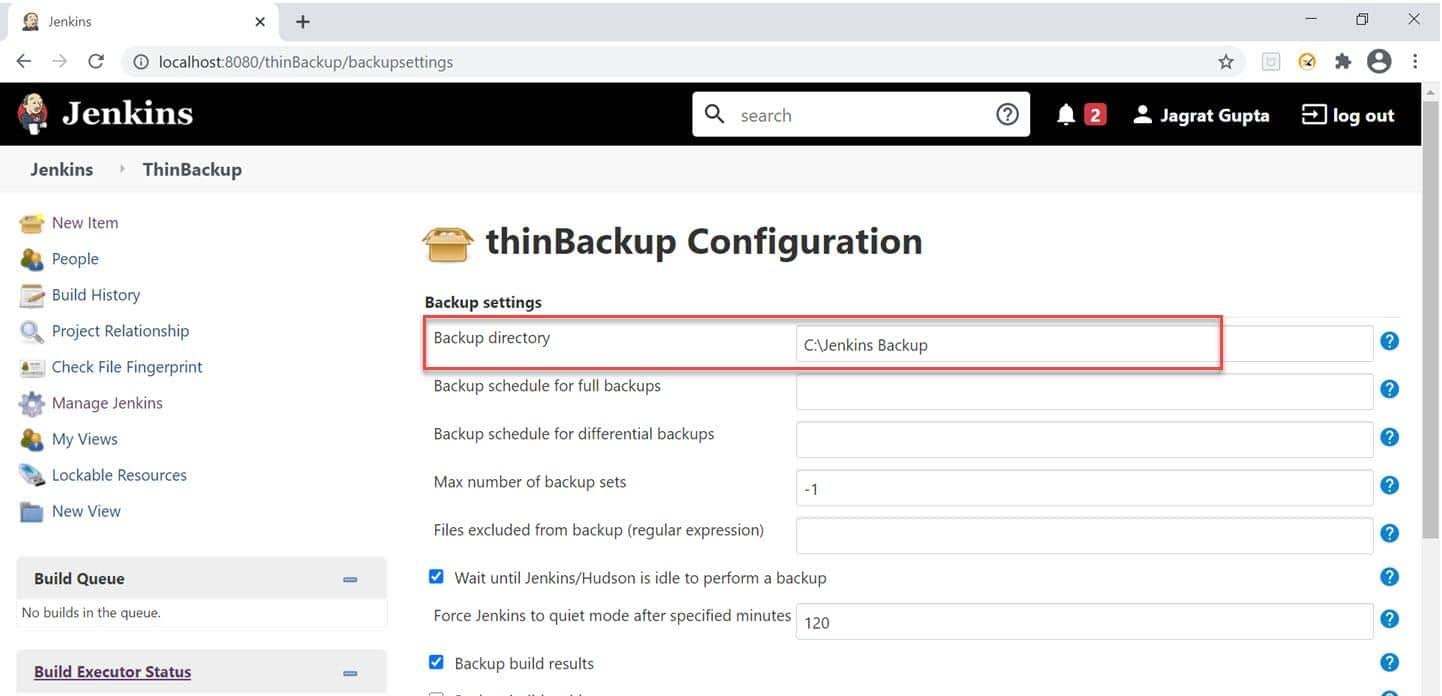
Step 3: As soon as we click on the Settings link, we will redirect towards the ThinBackup configuration page. Here, we need to give the "Backup Directory" in which we want to save backup and then click on the "Save" button. For example, we created a folder named Jenkins Backup under the C directory, and we want to store Jenkins backup here inside this folder.
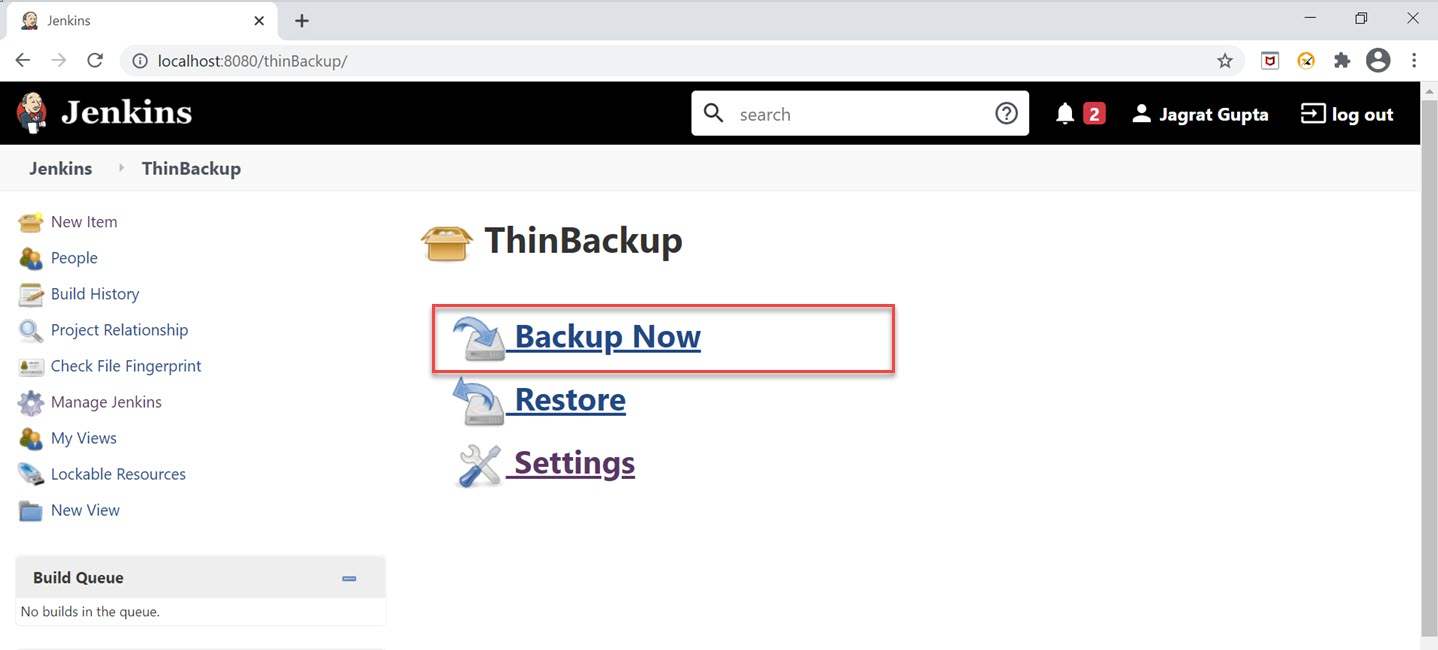
Step 4: As soon as we click on the save button, we again redirected towards the ThinBackup page, and now we are ready to take backup. So, click on the "Backup Now" link.
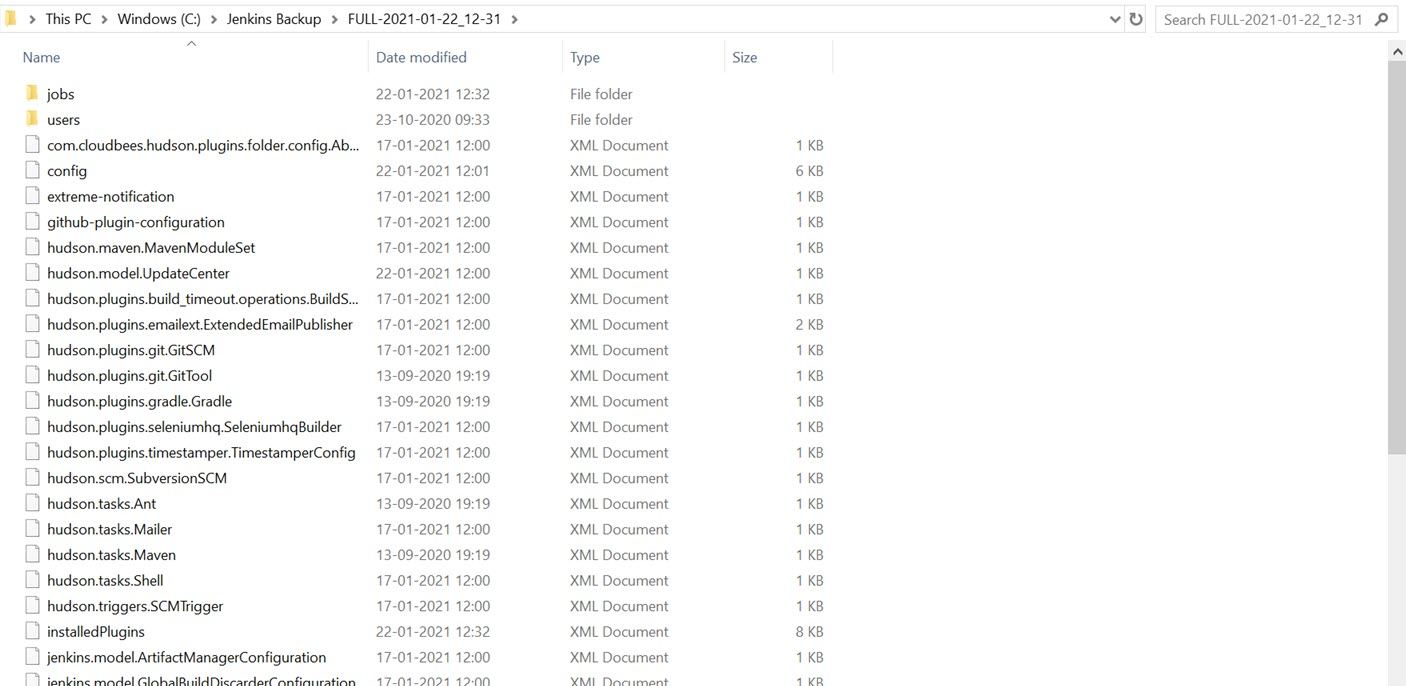
Step 5: After clicking on the Backup now link, the backup process will start, and after the successful operation, we can see the backup in the same directory that we already mentioned in Step 3.
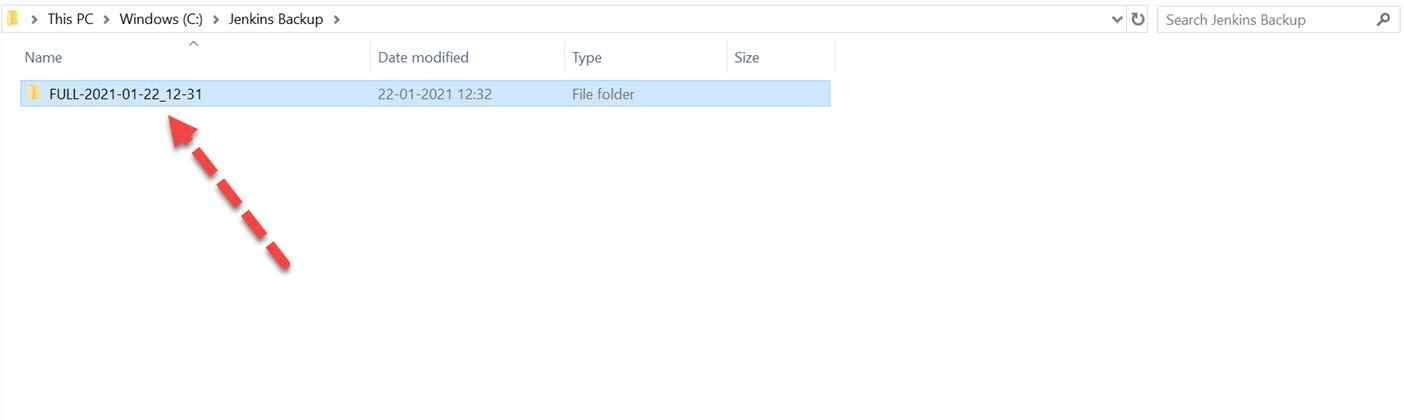
After clicking on the above folder, we can see all files present inside this folder.
So, in this way, we can take the backup in Jenkins using the ThinBackup plugin. Now, for restoring the backup, please follow further steps.
How to restore using the ThinBackup plugin?
Once we do have a backup using the above steps, we can restore the same using the same plugin by following the steps mentioned below:
Step 1: Click on the "Restore" link on the ThinBackup page.
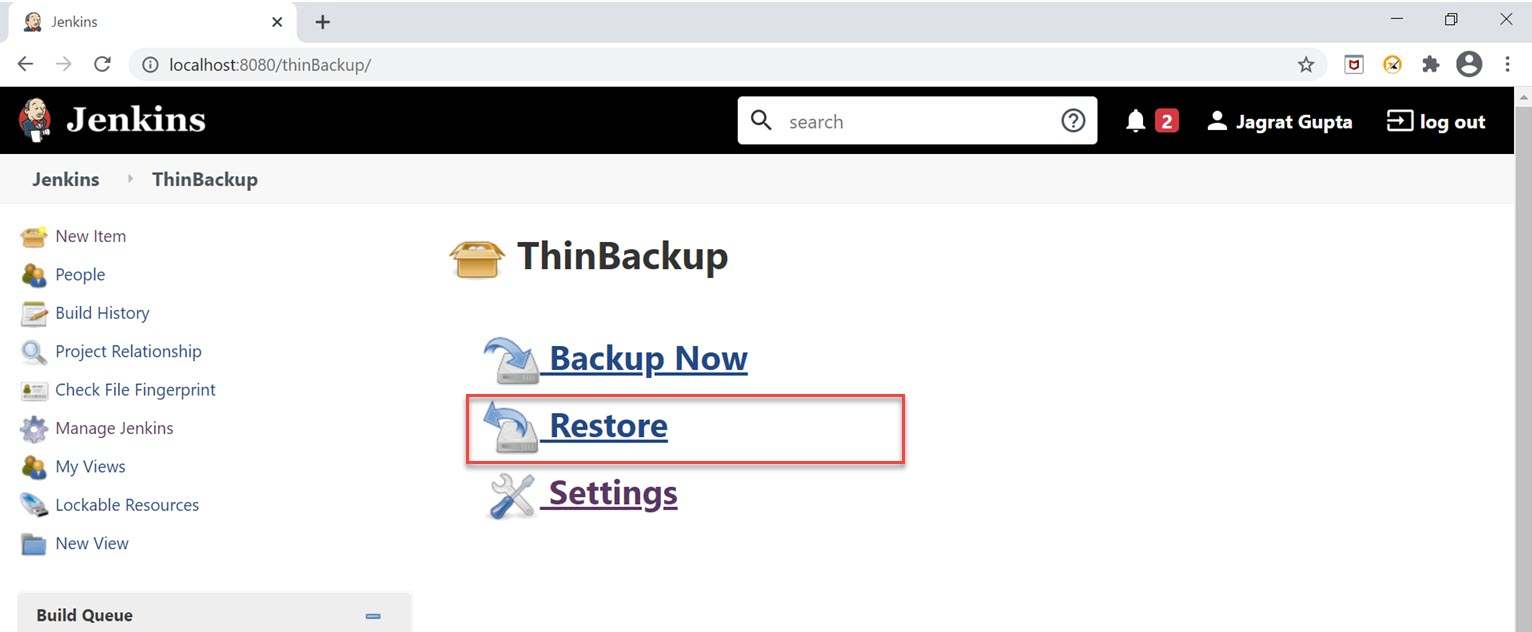
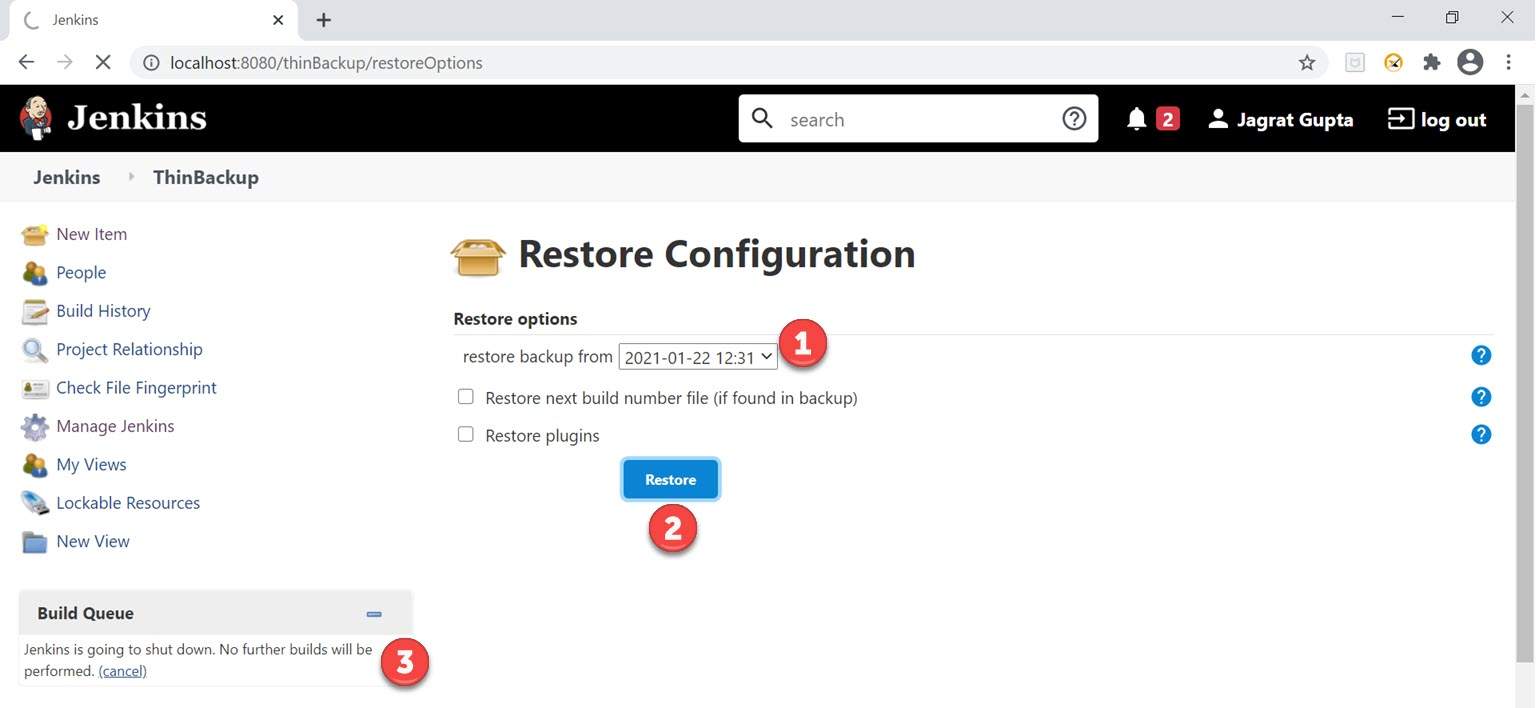
Step 2: As soon as we click on the Restore link, we will redirect towards the "Restore Configuration" page, and here we need to do the following steps:
- Click on the dropdown "restore the backup from" and choose the backup you want to take. We took backup only once, so currently, it is showing only one option.
- Now, click on the "Restore" button.
- As soon as we click on the restore button, the message will display under the Build Queue section. Here Jenkins will restart.
So, in this way, we can restore the backup in Jenkins. In the next section, we will discuss the normal backup strategy in Jenkins.
How to install the Backup plugin in Jenkins?
After completing the ThinBackup plugin, let's move towards a regular backup plugin. If we want to take a backup of Hudson configuration files, then we can use this plugin. But, first, let's see the installation process of this Plugin in further steps:
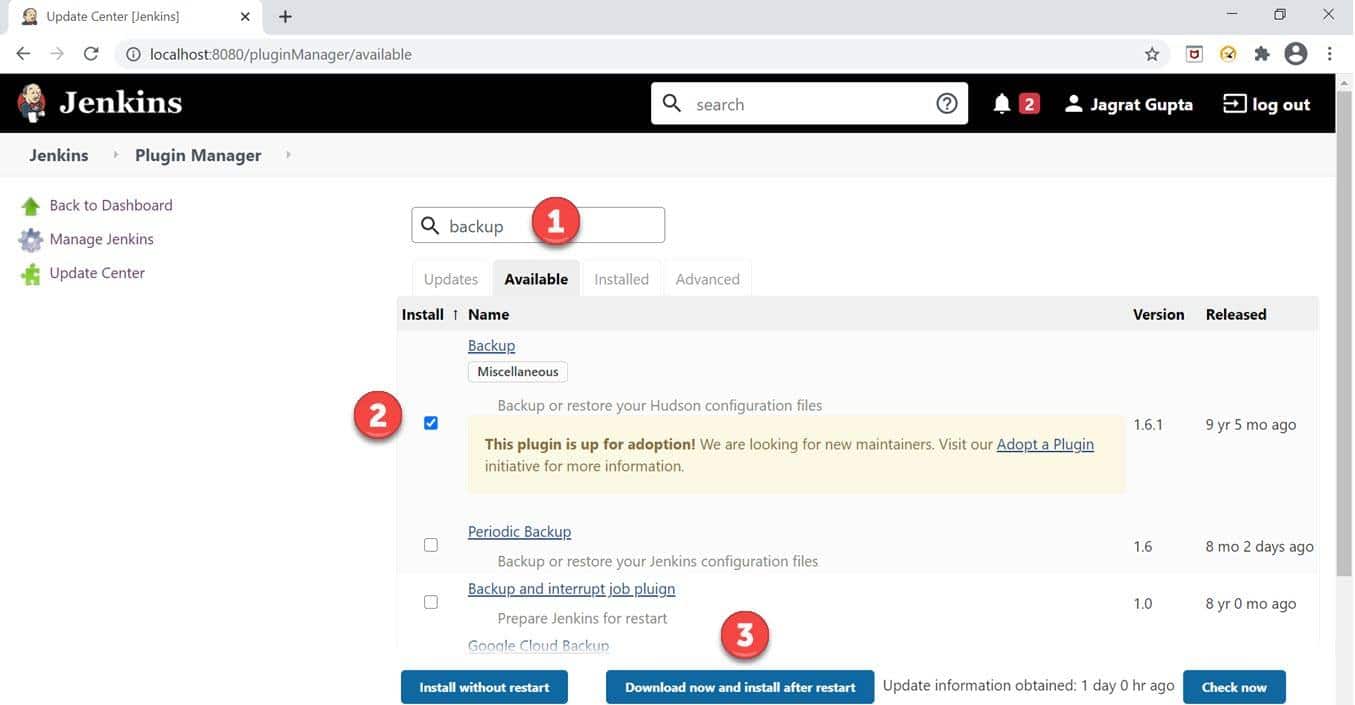
Step 1: Go to Plugin Manager and do the following steps:
- Put text "backup" in the search box.
- Check the checkbox against the "Backup" plugin.
- Click on the "Download now and install after restart" button.
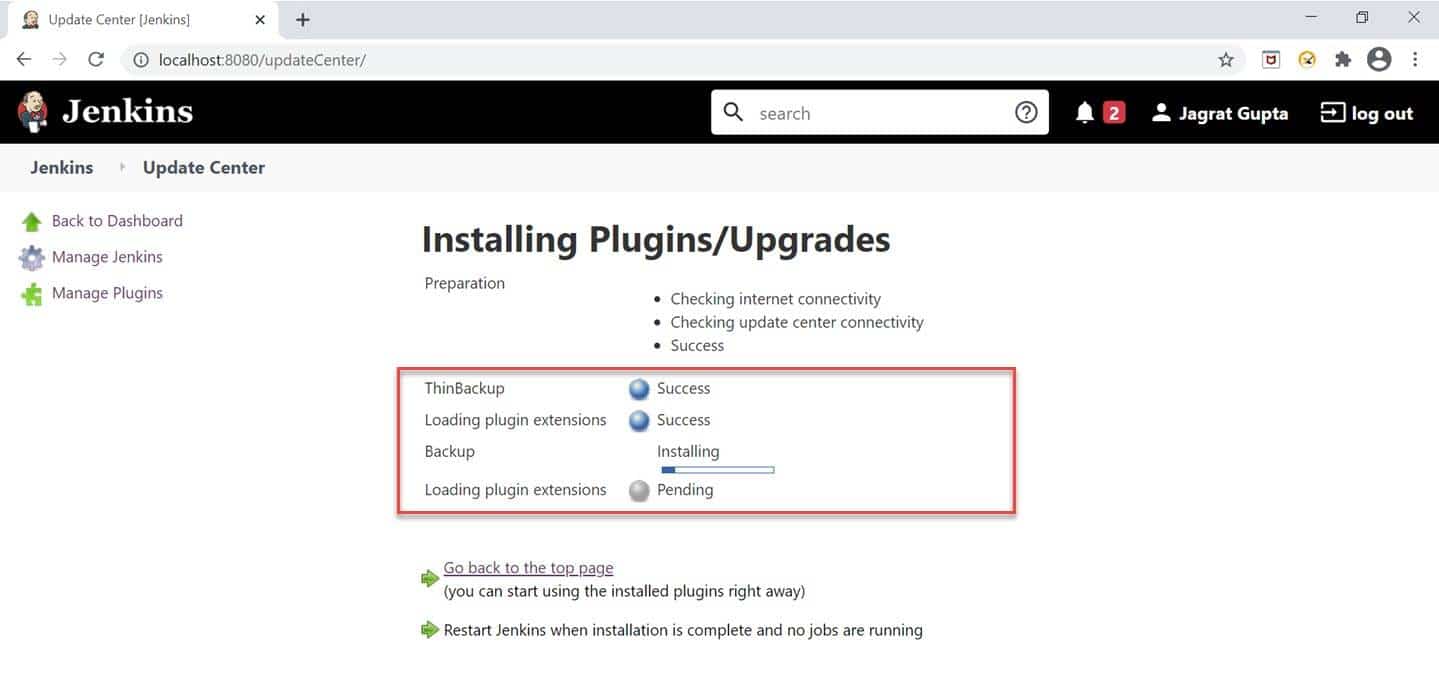
Step 2: After completing the above step, we will see the progress of the installation of the backup plugin. It is essential to see that ThinBackup will automatically show as successful as we already installed it successfully.
Step 3 :
So, in this way, we can install the Backup plugin in Jenkins. In the next section, we will see how we can perform backup using the Backup plugin in Jenkins.
How to backup using the Backup plugin?
In the previous section, we saw that how to install the backup plugin in Jenkins. In this section, we will see how to take backup in Jenkins using the Backup plugin. Please follow the below steps to achieve it:
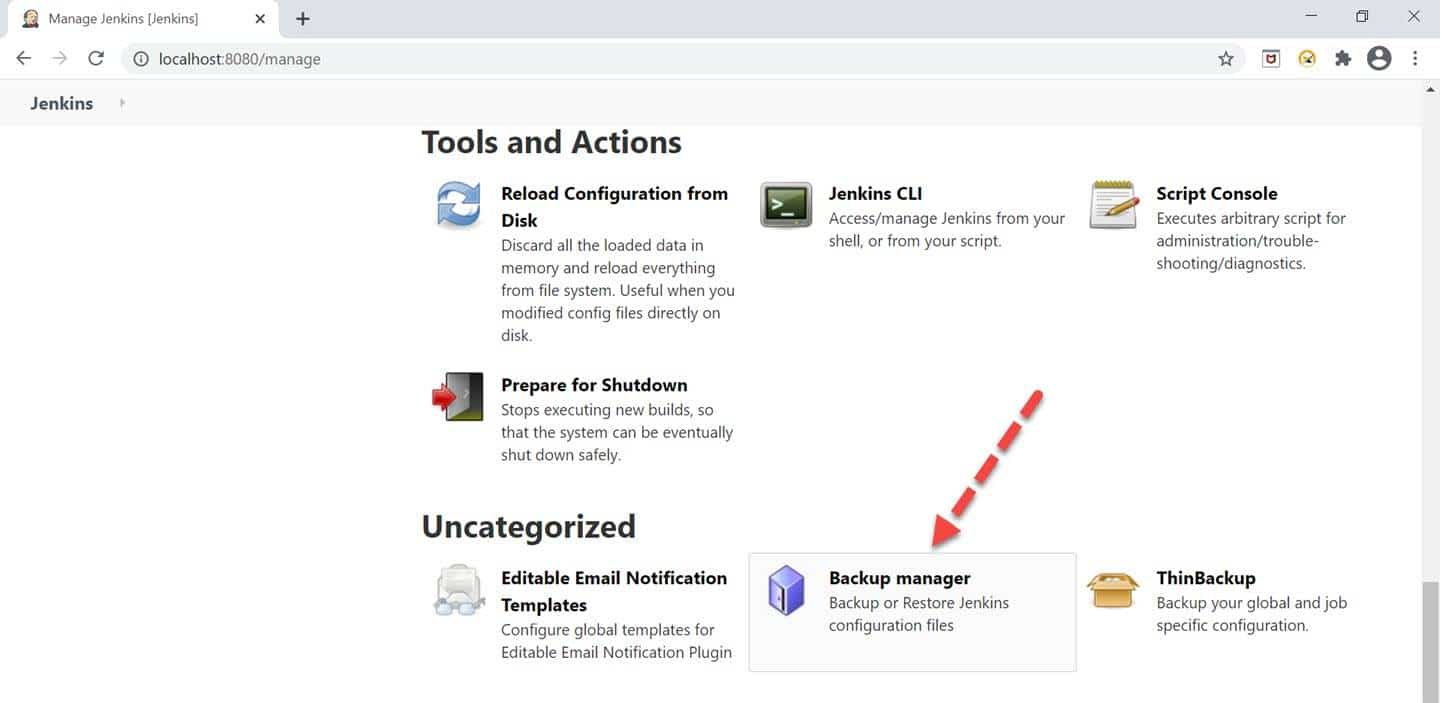
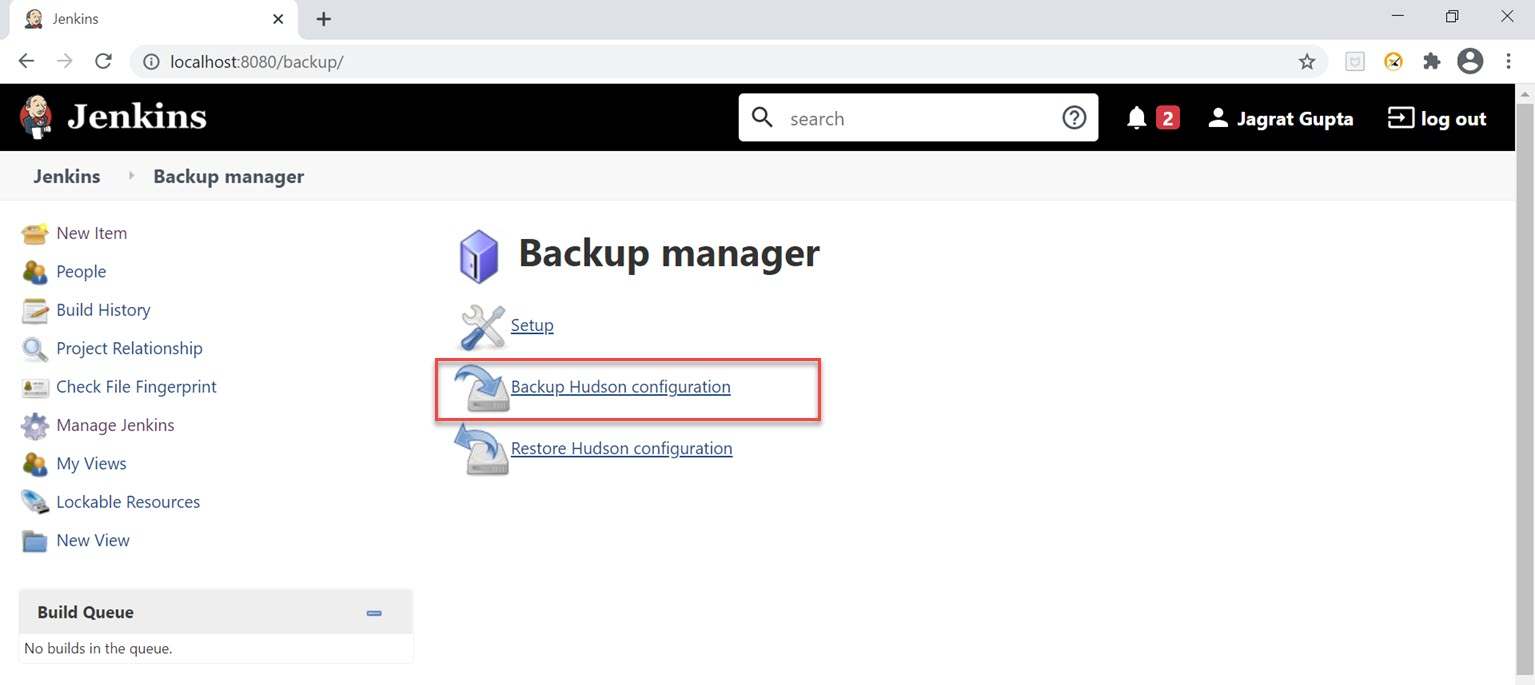
Step 1: Go to Manage Jenkins and click on "Backup Manager" under the uncategorized section.
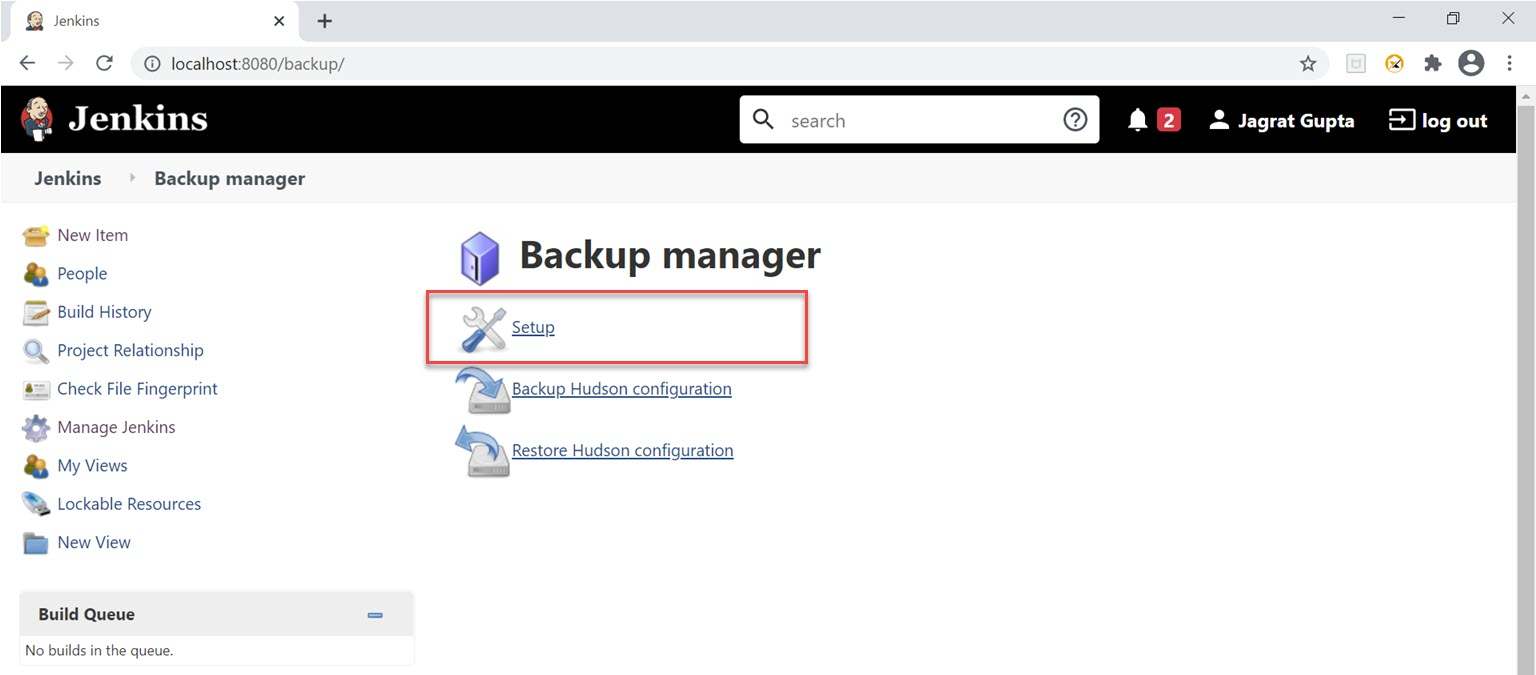
Step 2: After clicking, it will redirect us towards the backup manager screen, and here we will see 3 options but firstly, we need to click on the "Setup" link.
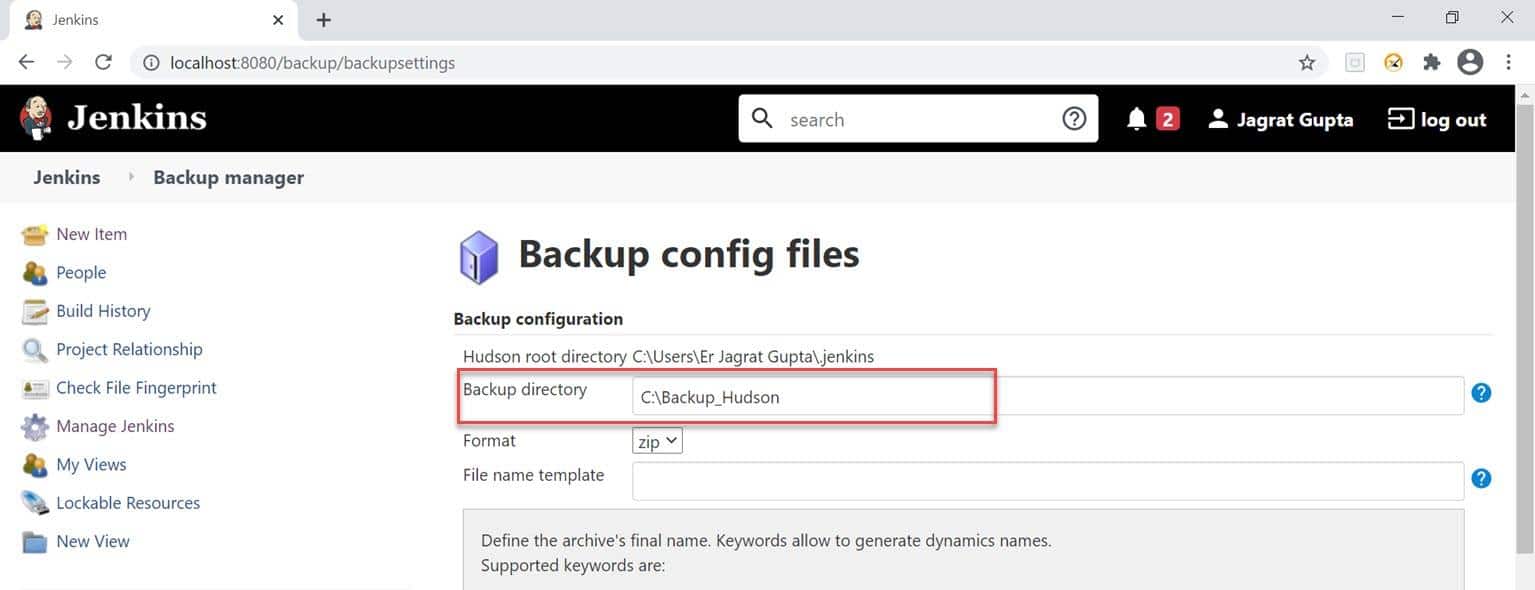
3rd Step: As soon as we click on the Setup link, it will redirect us towards the backup config files page. Here, we need to give the "Backup Directory" in which we want to save backup and then click on the "Save" button. For example, we created a folder named Backup_Hudson under the C directory, and we want to store backup here inside this folder.
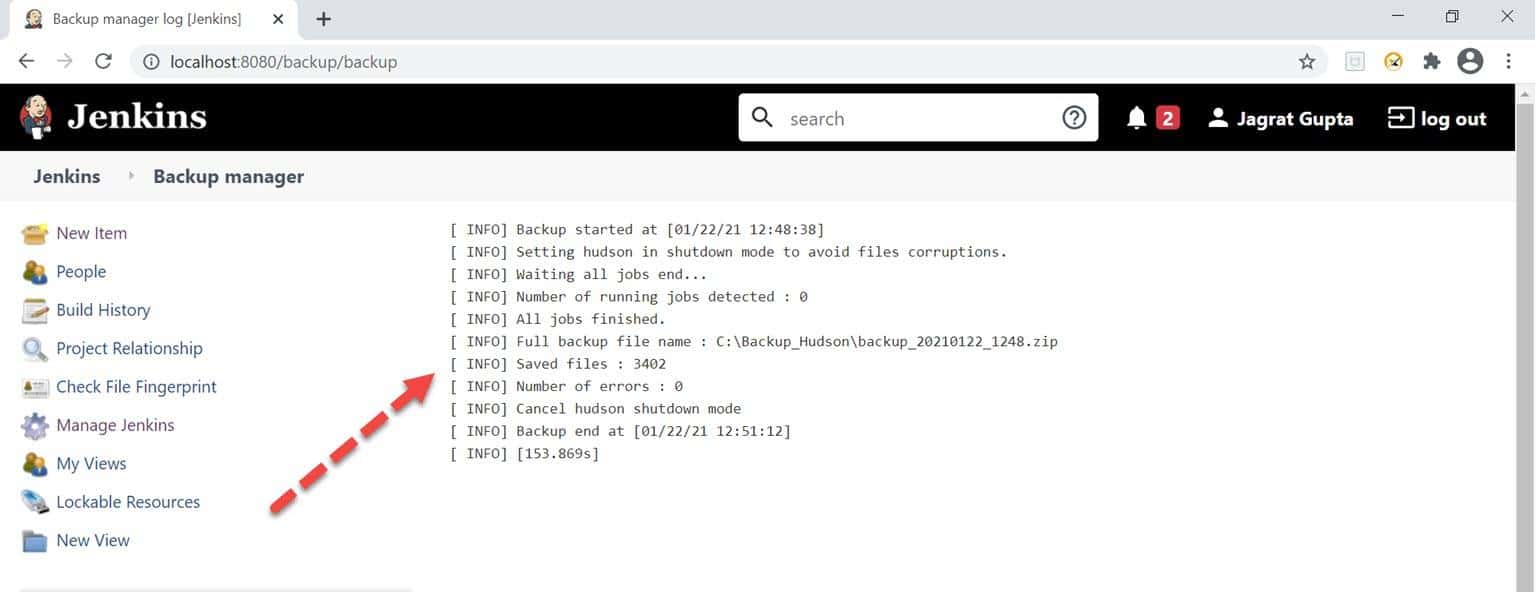
Step 4: As soon as we click on the save button, we gain redirected towards the backup manager page, and now we are ready to take backup. So, click on the "Backup Hudson configuration" link.
Step 5: After clicking, we can see the progress of the backup. Once it completes, a message will display on the screen.
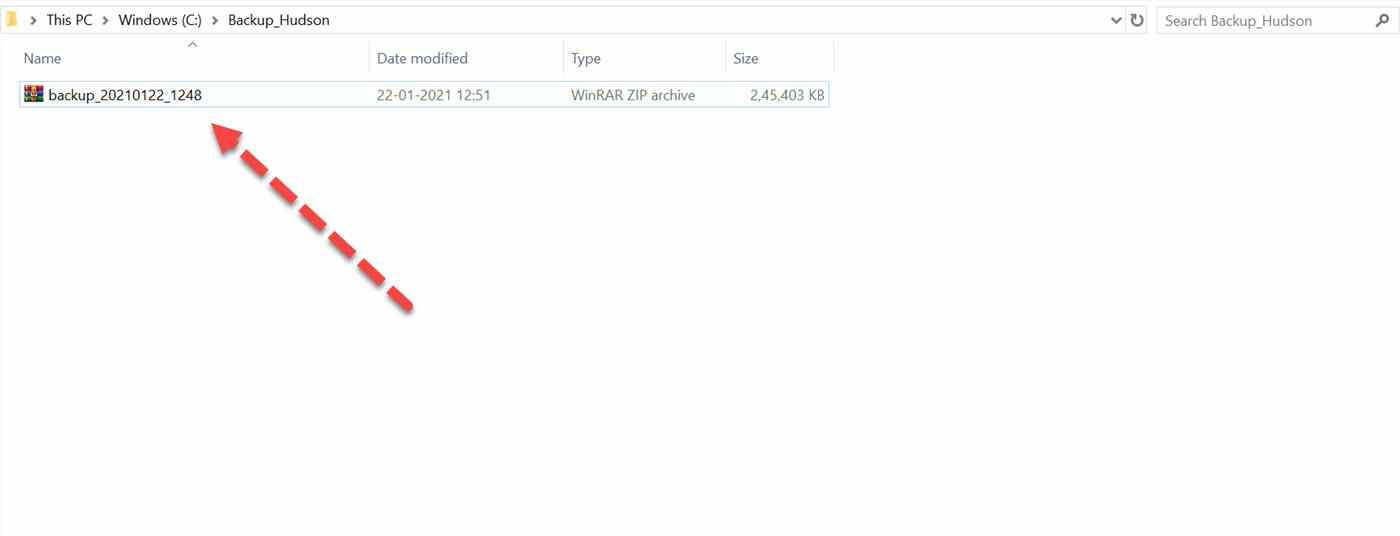
We can see the backup in zip format inside the directory that we mentioned in step 3.
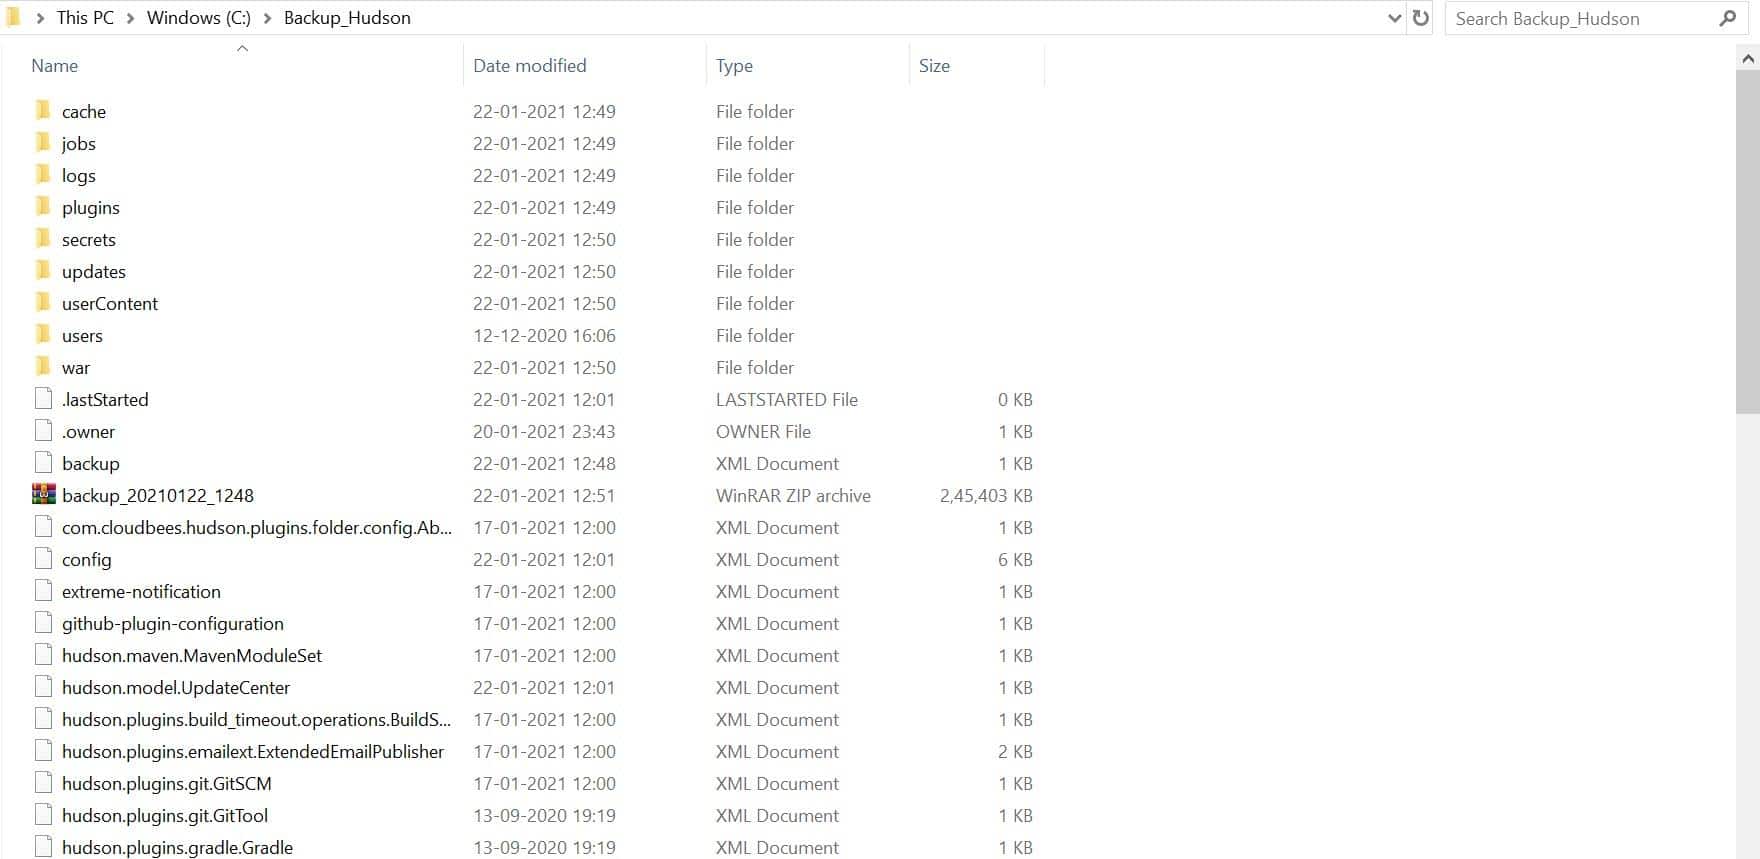
Step 6: We can see the files inside the folder after unzipping it.
So, in this way, we can take the backup in Jenkins using the Backup plugin. Now, for restoring the backup, please follow further steps.
How to restore using the ThinBackup plugin?
Once we do have a backup using the above steps, we can restore the same using the same plugin by following the steps mentioned below:
Step 1: Click on the "Restore Hudson configuration" link on the Backup Manager page.
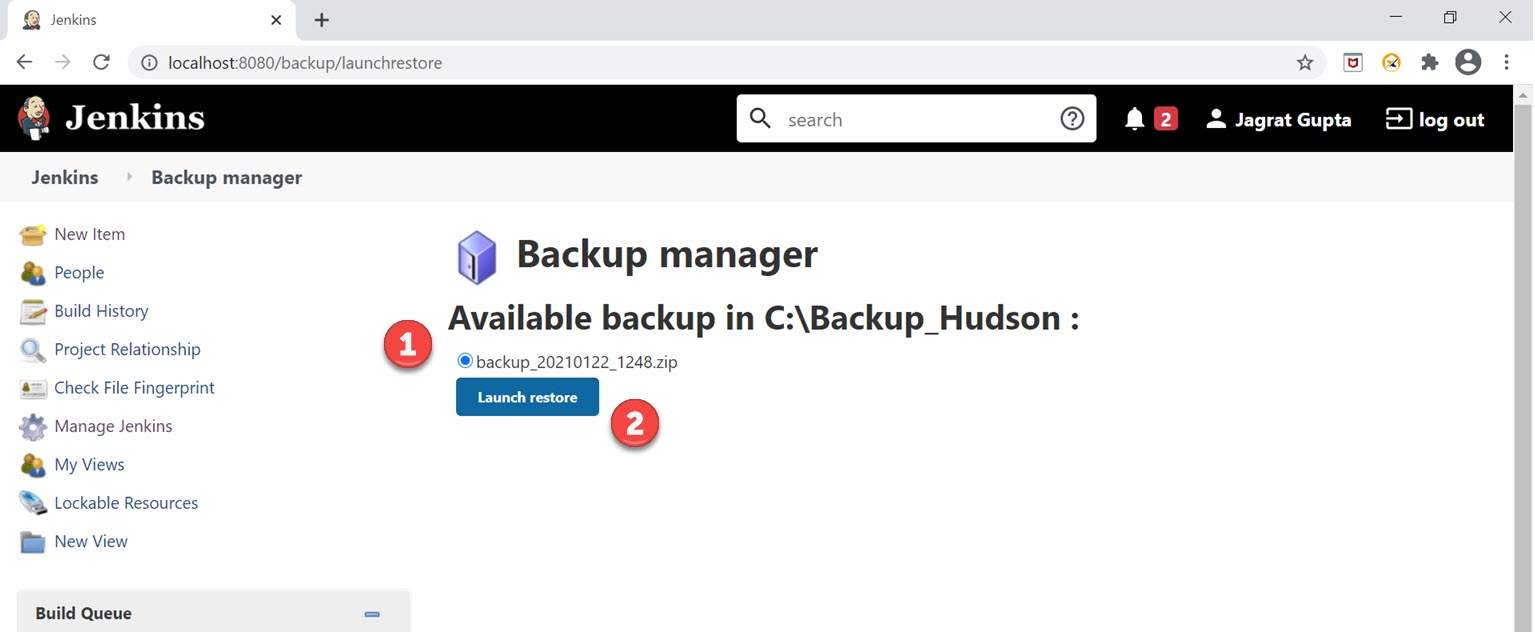
Step 2: As soon as we click on the restore Hudson configuration link, it will redirect us towards the "Restore" page, and here we need to do the following steps:
- Click on the radio button against the backup that you want to take. We took backup only once, so currently, it is showing only one option.
- Now, click on the "Launch restore" button.
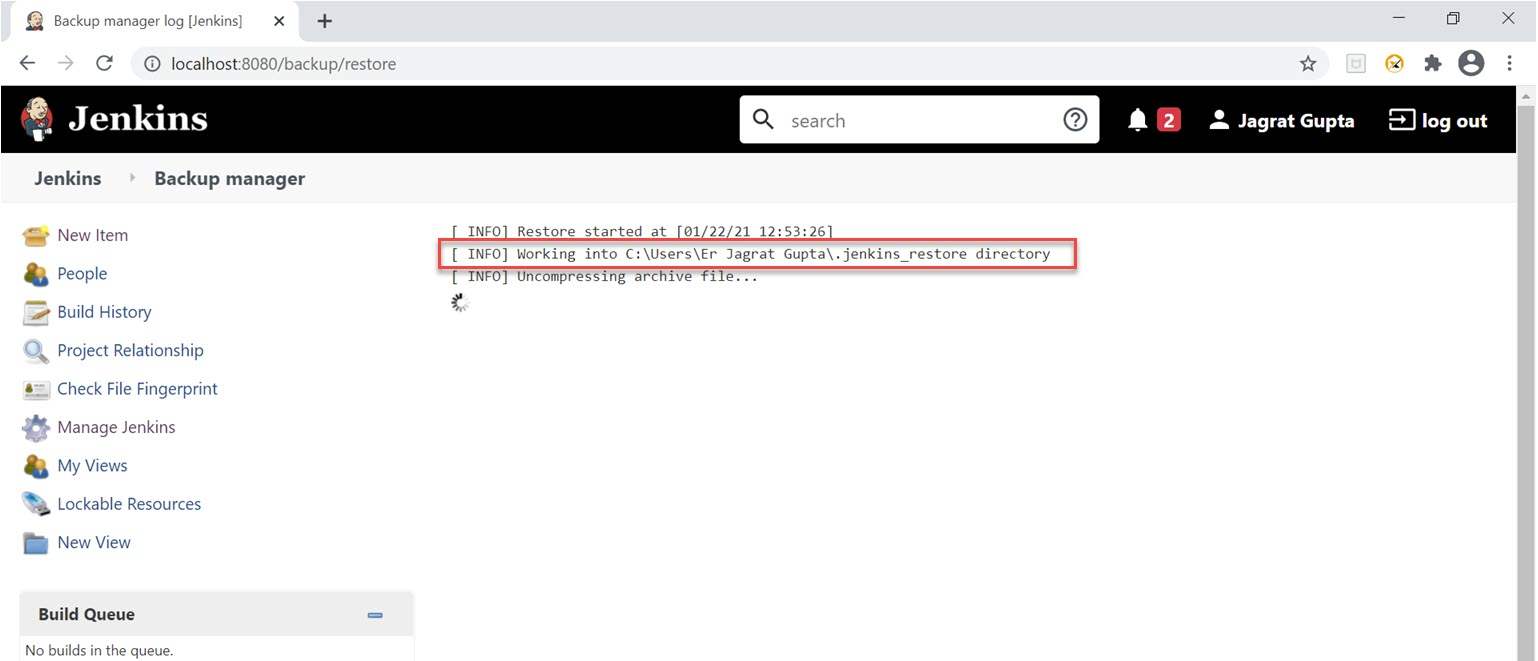
As soon as we click on the launch restore button, the restore process will start.
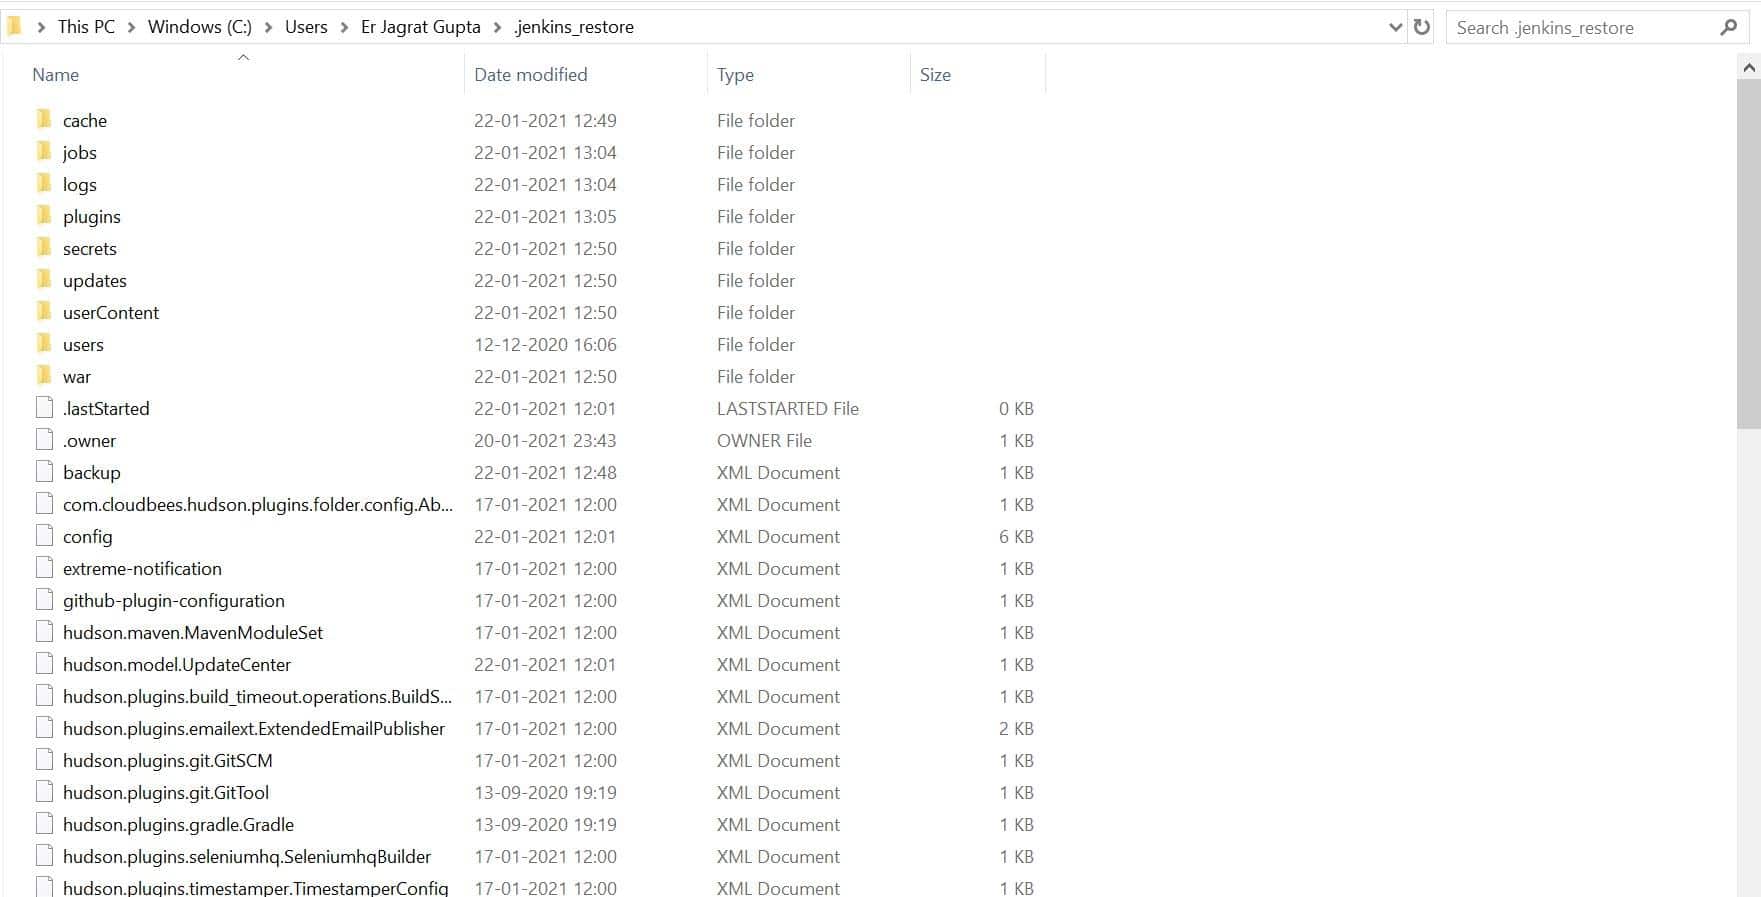
Step 3: After the successful operation, we can see the restore folder in the directory highlighted in the previous step.
So, in this way, we can restore the backup in Jenkins using the backup plugin.
Key Takeaways
- Backup is the process in which any user creates and stores replicas of data so that If data loss or corruption occurs, the user should restore the protected data.
- Jenkins provides different types of plugins to take backup of data. ThinBackup Plugin and Backup Plugin.
- If we want to take backup of the most critical global and job-specific configuration files, we can use the ThinBackup plugin.
- If we want to take a backup of Hudson configuration files, we can use the Backup plugin.