We know that Deployment is one of the significant parts of the software development life cycle, using which the application/component can be made available for testing(by deploying on test servers) and finally to the end-users(by deploying on the production server). However, with the increase in the frequency of the releases, it is becoming very cumbersome to deploy all these releases manually, so it raises a dire need for automated deployment. Being one of the most used tools for the integrations and deployments in the CI/CD pipelines, Jenkins provides the capabilities to automate these frequent deployments based on specific triggers and conditions. Hence, we refer to them as Jenkins Automated Deployment. Let's understand the concept of Jenkins automated deployments in more detail and understand how to achieve the same with the help of Jenkins by covering the details mentioned in the following topics:
- What is automated deployment?
- Why is automated deployment needed?
- How to achieve automated deployment using Jenkins?
- How to install a deployment plugin?
- And, how to add deployment steps to Jenkins jobs?
What is automated deployment?
Automated deployment is a practice that allows us to fully ship the code automatically or semi-automatically across various development stages ranging from initial development through production. Automated deployment makes out deployments more efficient and reliable. This functionality is automated as much as possible to ensure there is no broken functionality in the path that code takes from development to production.
Automated deployment requires something called a "deployment pipeline" - a process of taking code from a version control environment like GIT and making it available to the end-users automatically.
We can classify the Automated Deployment into the following approaches or categories, according to the level of automation coverage across environments:
- Continuous Integration: Using the Continuous Integration approach, we integrate the code changes daily. Each of this integration is to be verified automatically and tested to detect possible errors.
- Continuous Delivery: Continuous Delivery is the practice of keeping the build or code ready to be deployed at any time. We can view Continuous Delivery as an extension of the continuous integration wherein it automates the release to the staging environment. Using Continuous Delivery, we can ensure a "production-ready" version of the build at any time.
- Continuous Deployment: Using the Continuous Deployment approach, we fully automate the entire process of the deployment pipeline. Using this approach, we deploy every small change in the source to the production automatically. Although this approach is the quickest deployment approach, it can also cause downtime because of errors.
Why is Automated Deployment needed?
We discussed the automated deployment. Now, a question arises as to why we want the deployment to be automated? There are various reasons why automated deployments help us. So below, we discuss these reasons:
- Reduced possibility of errors: When we deploy the code manually, it is error-prone. Also, correcting the errors and repetitively deploying the code can harm employee morale. So automating the deployment process can reduce the errors significantly.
- Saving time: Automated deployments can save time. Manual deployment is a very time-consuming process and often uses much of the time of developers and testers, which we can otherwise put to better use. So when we use automated deployment, we schedule the build at a specific time, thus saving time.
- Consistency and repeatability: We need to configure automated deployment only once, and then the process is consistent every time the release initiates. Because of this consistency, we can diagnose errors and reduce failures.
How to achieve automated deployment using Jenkins?
To achieve the automated deployment using Jenkins, we will need to follow the steps as mentioned below:
1. Set up a Continuous Integration server
- Firstly choose an existing server like Jenkins.
- Link to the source code from source control like GIT so that one can build the application. It will set up the first build.
- Make sure every time a check-in happens into the source control, the build fires.
2. Set up test suites
- We need to set up a separate build for each test suit we add. Then we link each test suite to the builds. When the test suite executes after the build, we can see the errors as the problematic code will stop at the first test that has recognized it and does not proceed further.
3. Add a deployment step
- As a deployment step, we set a build that runs the script to deploy the application to a staging or testing environment on Continuous Integration Server. But before this, ensure that the build runs only when all tests have passed.
Regrading Step 1 and Step 2, we have already covered in our previous articles. In this article, we will further cover that once we create the build and a set of test cases execute on the same, we can deploy that build on a particular server. To achieve this task, Jenkins provides various plugins; we will cover the setup and details of one of those plugins and complete the setup to deploy the application on a tomcat server. But, first, let's see how to achieve the automated deployment in Jenkins?
How to install a deployment plugin?
Jenkins provides us with many plugins that we can use to transfer the build files to the respective application or web server after successfully building the application. For example, the "Deploy to container" plugin. This particular plugin takes a war or ear file, and then it deploys to a remote application server(in running state) at the end of a build.
We have to follow the given steps to use this plugin:
Step 1: Go to Manage Jenkins and then Manage Plugins. Select/ choose the Available tab and search for the "Deploy to container" plugin.
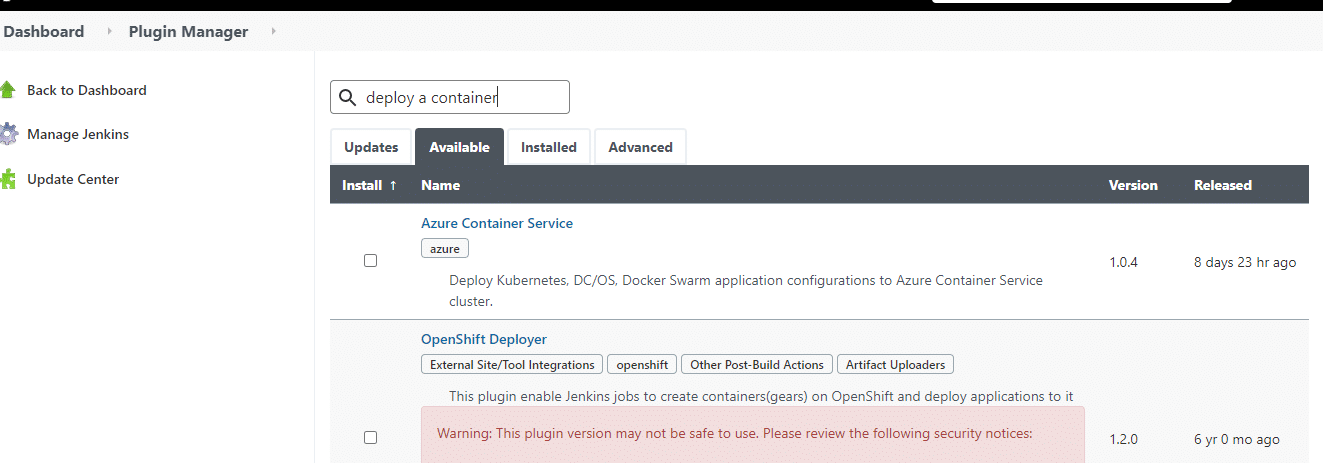
Here we see that the searched plugin is not available. If it was available, then we install it and click on Go back to the top page.
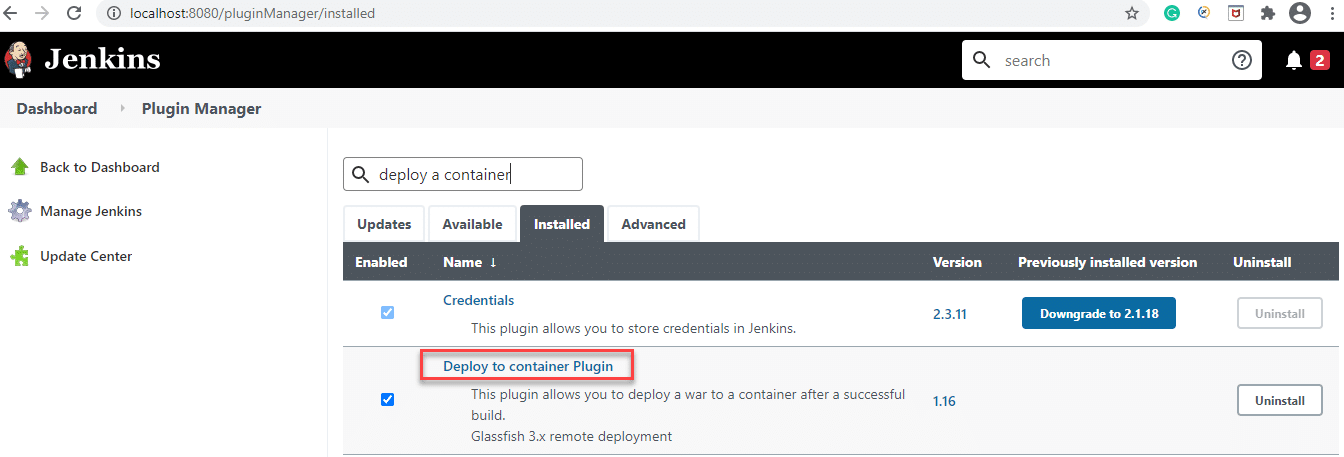
Now that it is not available, we again search it under the "Installed" tab. We can see the listed plugin below:
If the installation of the plugin does not finish, install it by following the on-screen instructions.
How to add deployment steps to Jenkins jobs?
Once the setup/ installation of the plugin completes, we can then run the build by deploying the war/ear file to the container. For this, perform the following steps:
Step 1: Go to your created build project and click on the Configure option from the left side of the panel.
Step 2: The next step is to scroll down on the configuration page and click on Add post-build action button. Select Deploy war/ear to a container option.
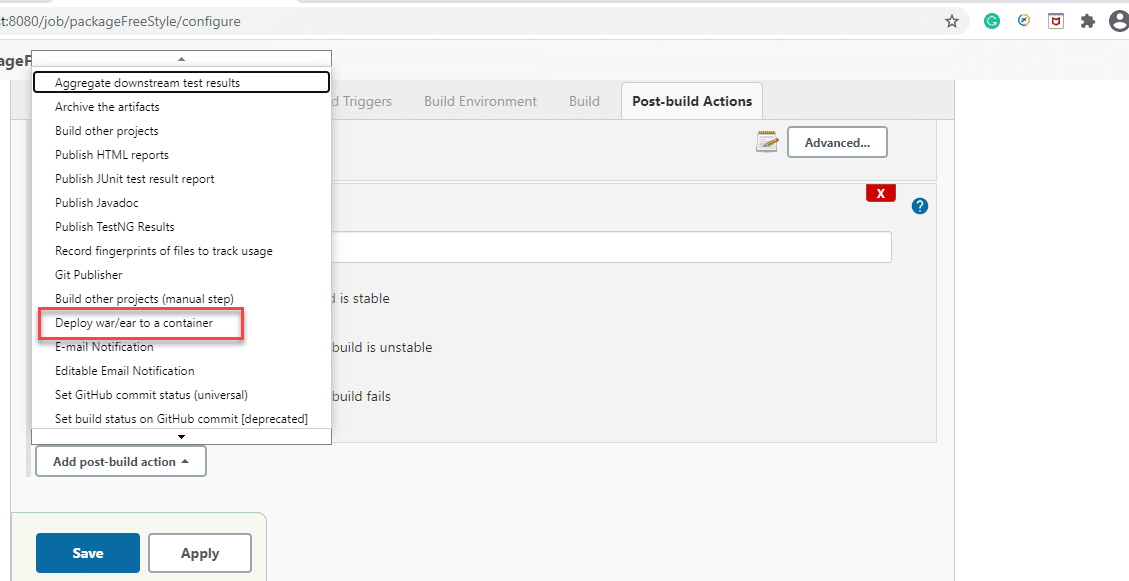
In the above screen, we select the "Deploy war/ear to a container" option and then click on the Save button.
Step 3: In the Deploy war/ear to a container section, we enter the server information on which we need to deploy the files. We can see it on the following screen.
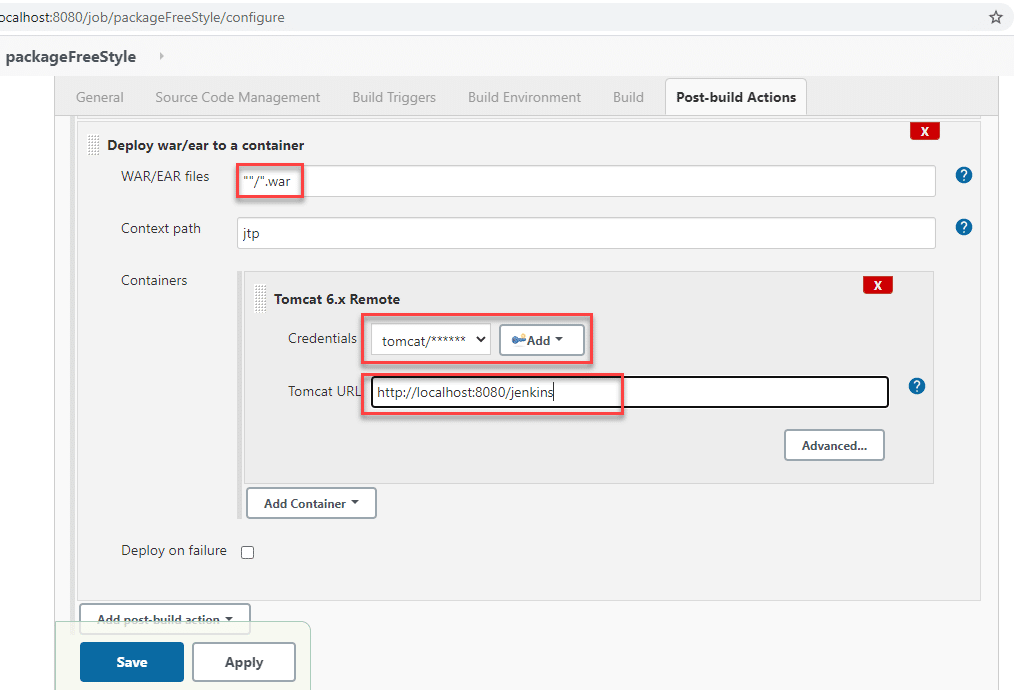
Here along with other details, we select the appropriate container (Tomcat in the above screen) and then provide its credentials and URL.
Step 4: Click on the Save button.
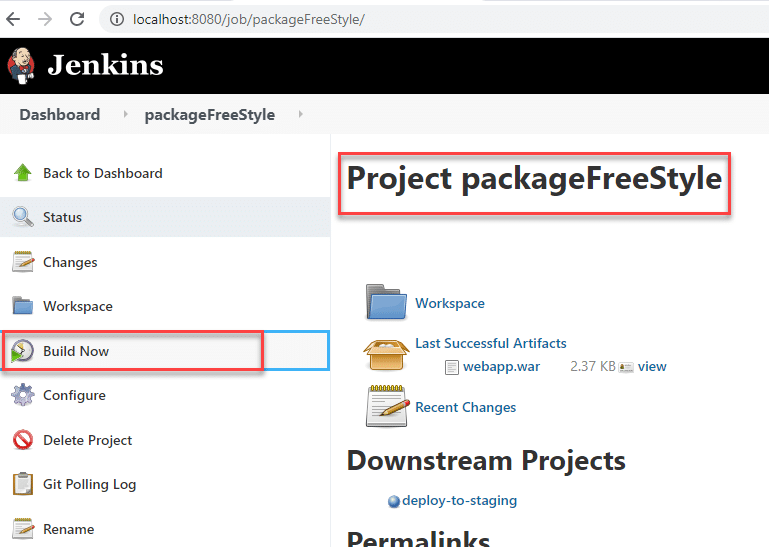
Step 5: Once everything finishes, we go to the first screen of the selected project and select Build Now. It is as below.
The above steps ensure that the container has all the required files after the successful build. So, as we saw, the automated deployment is one of the post-steps that will ensure that the build deploys on a targeted server once all the tasks/steps of the mentioned build will be successful.
Key TakeAways
- We usually install a plugin "Deploy to a container" for the purpose of automated deployment.
- Then we deploy the war/ear file to the container and associate it with our Jenkins master server.
- We then schedule the builds to detect every change in the source code and automated builds fired.