What is Synchronization?
Synchronization is a mechanism that allows multiple threads to work in parallel. In test automation, the application under test (AUT) and the automation tool we employ, should collaborate to progress the test execution. Additionally, to achieve this and avoid execution failures, we need to use synchronization commands. Subsequently, this tutorial shows you how to do just that.
Scenario: Login with valid credentials
- Firstly, launch the application under test URL: https://katalon-demo-cura.herokuapp.com/.
- Secondly, use the Wait For Page Load keyword.
- Thirdly, use Wait For Element Visible keyword for Make Appointment button.
- Fourthly, click on Make Appointment.
- Fifthly, use Wait For Element Visible for the Login button.
- Finally, enter a valid username, password, and click on the Login button.
At runtime recording, we can add/ introduce synchronization commands to wait for page load, wait for element present, wait for element visible, etc.
Step 1: Launch Katalon Studio. After that, click on the New Test Case button from the main toolbar. Enter a name for your test case and click OK. An empty test case will create.
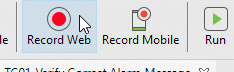
Step 2: Secondly, click on the Record Web from the main toolbar.
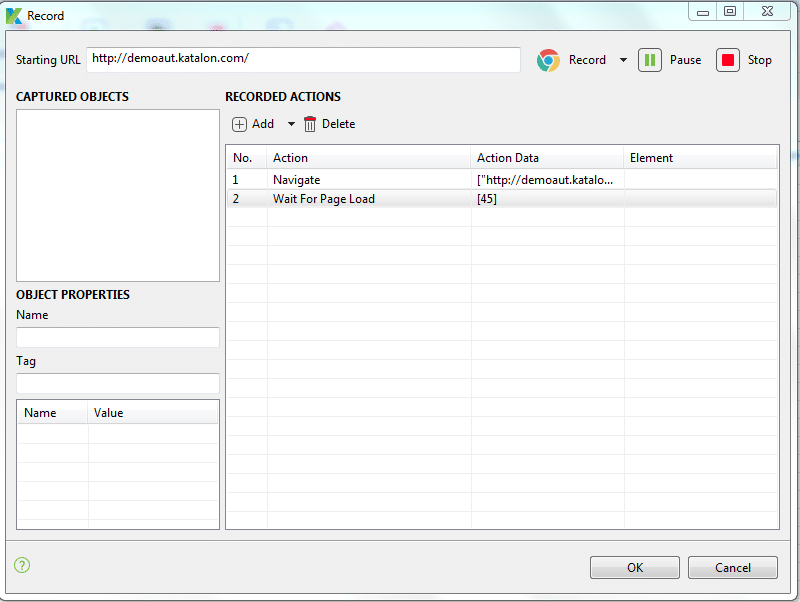
Step 3: Record dialog would be displayed, where recorded actions will show. Provide the URL of the application under test.
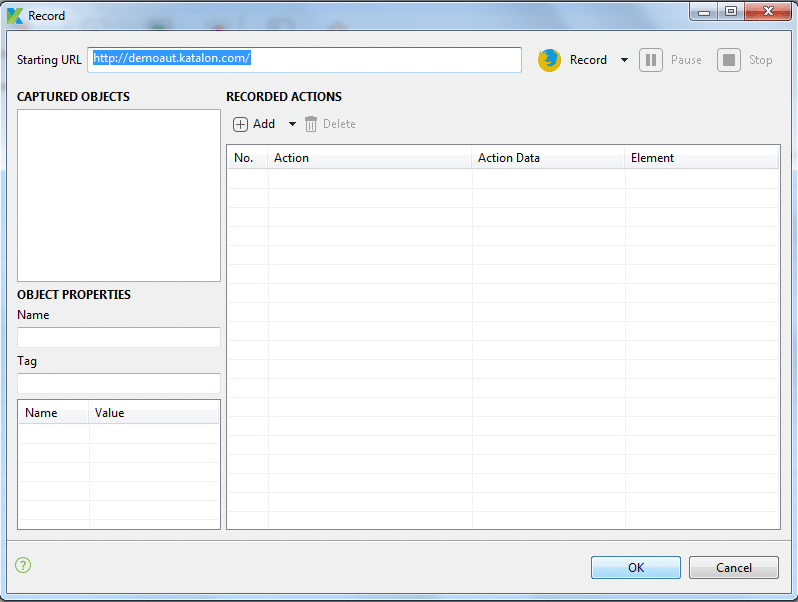
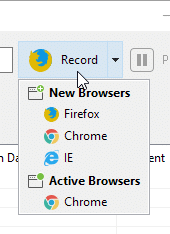
Step 4: Select a browser and click on the Record button to start recording the test case
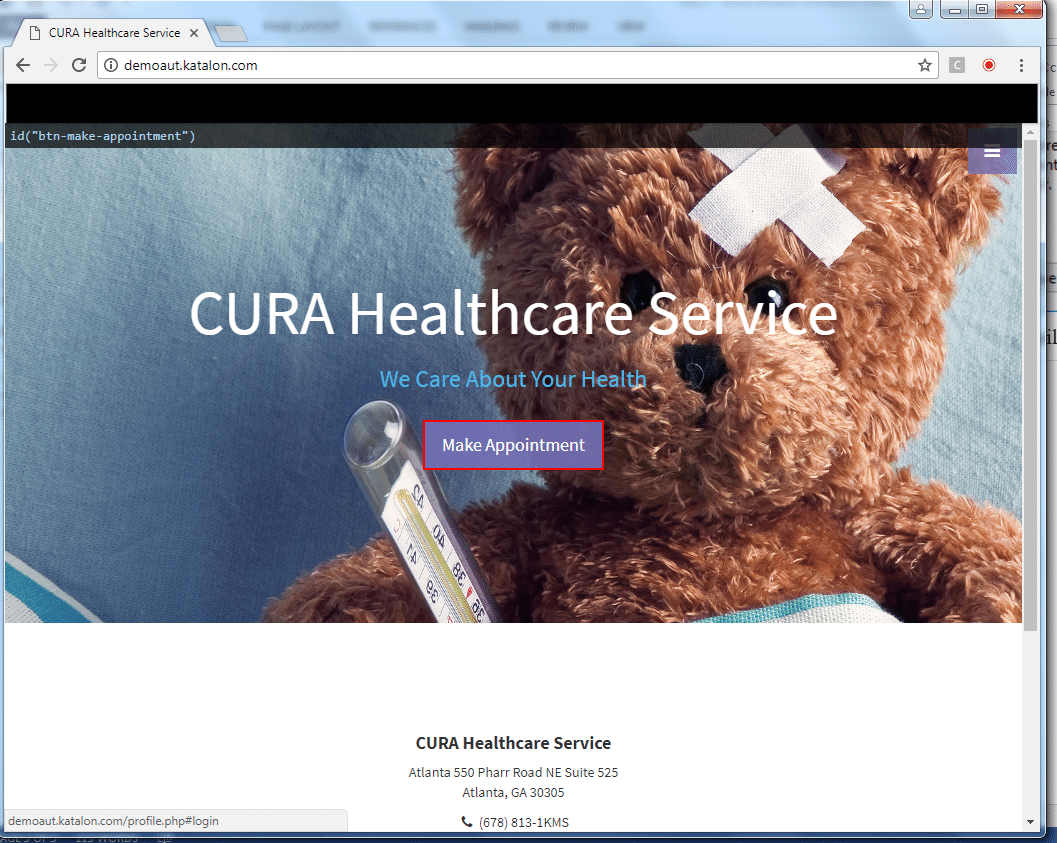
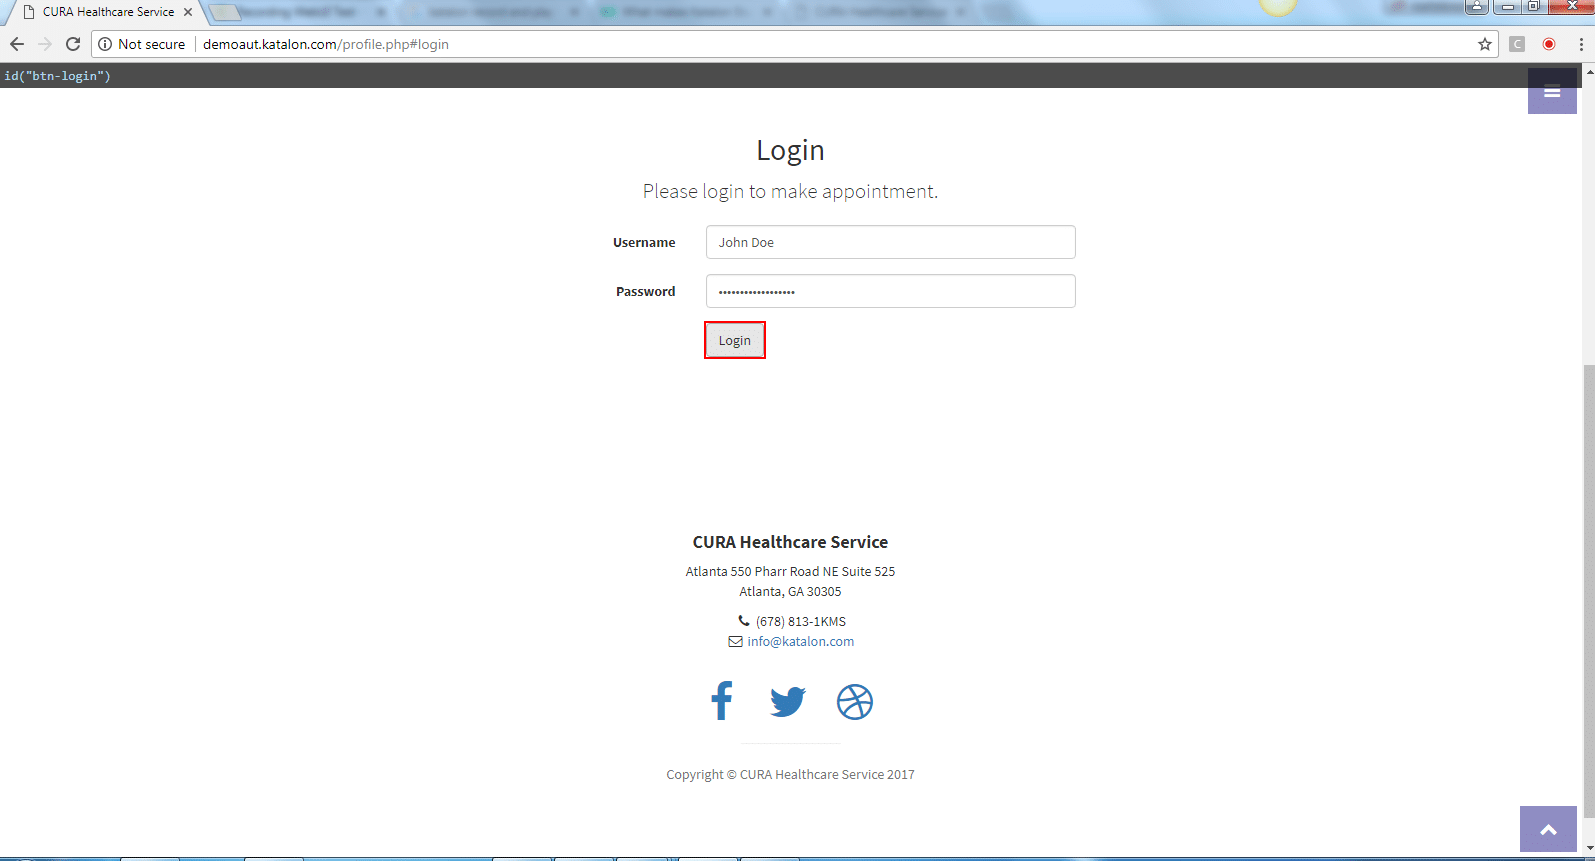
5th Step: Once your application is launched, move the cursor to ‘Make Appointment’ and click on the button (wait for Login page gets loaded).
Step 6: You can add/ include the synchronization commands in runtime recording in the ‘Recorded Actions’ pane. Select a step at which the synchronization commands will add. Click on Add.
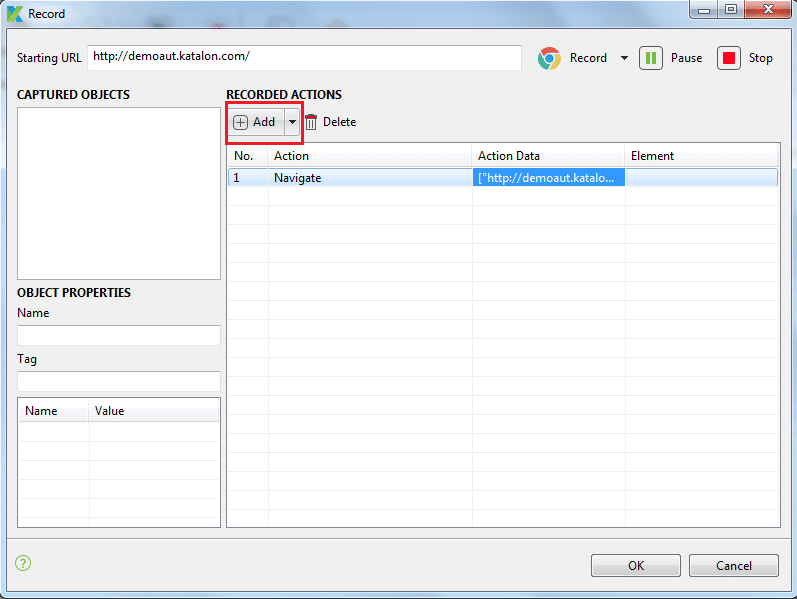
Step 7: Click on Add Synchronization Point
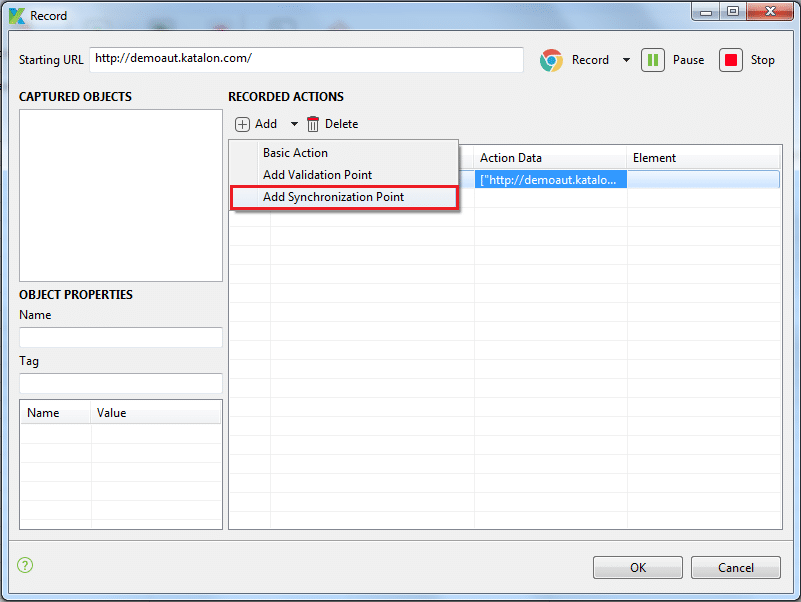
8th Step: The system will add the default command Wait For Element Present
Step 9: Now, we need to modify from Wait For Element Present keyword to Wait For Page Load. Subsequently, double click on Wait For Element Present in Action column to display the drop-down menu. Select Wait For Page Load keyword.
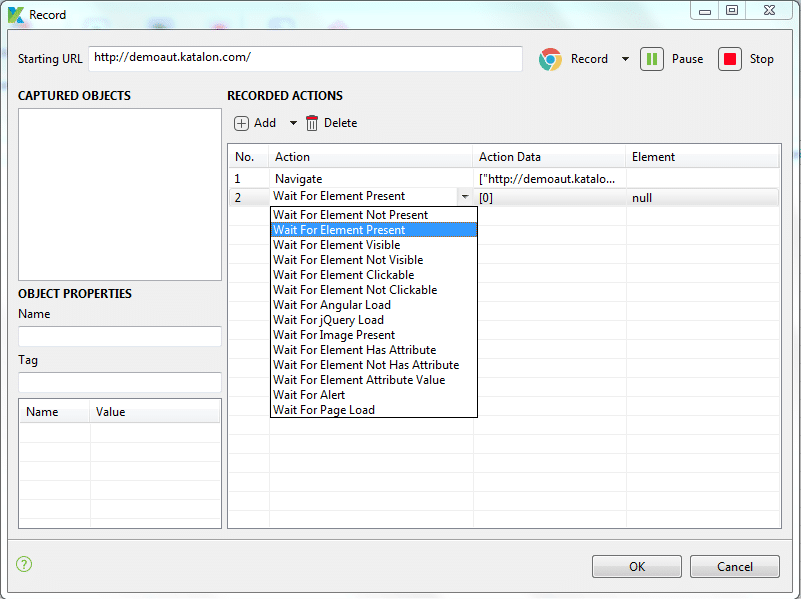
Step 10: Here, we have selected the ‘Wait For Page Load’ keyword
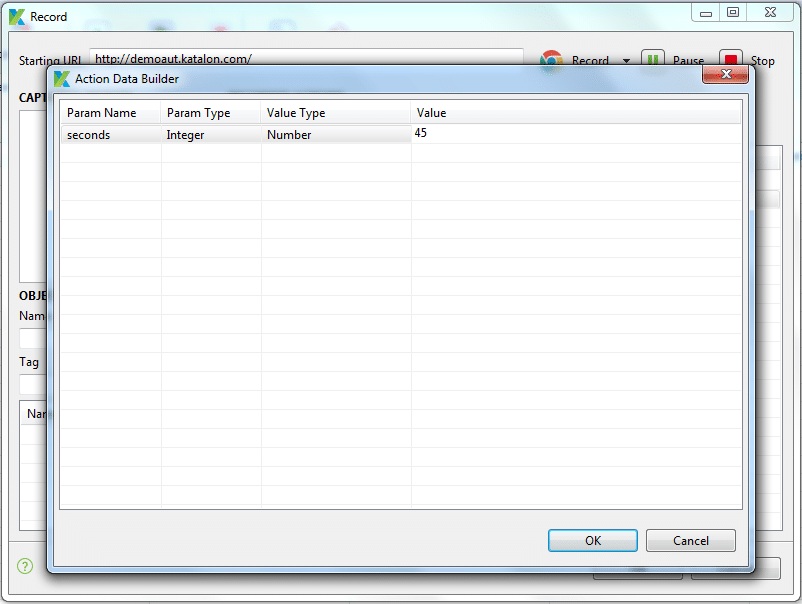
Step 11: We need to provide the expected time as an input for the command [Katalon uses the default time of 30 seconds]. Tap on ‘Action Data’ of Wait For Page Load and give 45 seconds [as you typically need], then click on OK.
Step 12: It should display the Wait For Page Load command with the provided input, as shown below. Now Katalon Studio will wait 45 secs for the page to gets fully loaded to execute the next command. These synchronization commands avoid execution failures.
Step 13: You can pause, resume the recording whenever you need it. Let us continue by recording a few more actions. Switch to the browser in which you’re recording, move to Make Appointment button, and click on the Make Appointment button.
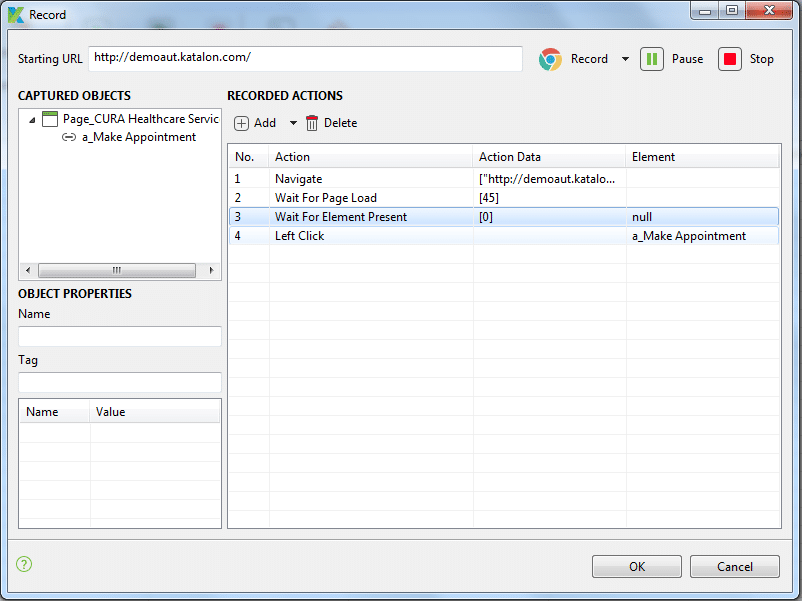
Step 14: Now, to wait for a specific element to be loaded and to perform an action, we need to add ‘Wait for Element Present’ command before click on the ‘Make Appointment’ button. let us wait for the button loaded in the DOM
Step 15: So here, we have added two wait commands, one is to wait till page gets loaded, and the other is wait till element gets displayed as shown below. The reason behind adding two waits is that, though the page loads, sometimes elements won’t be present in the DOM (referring to Ajax-based applications mainly).
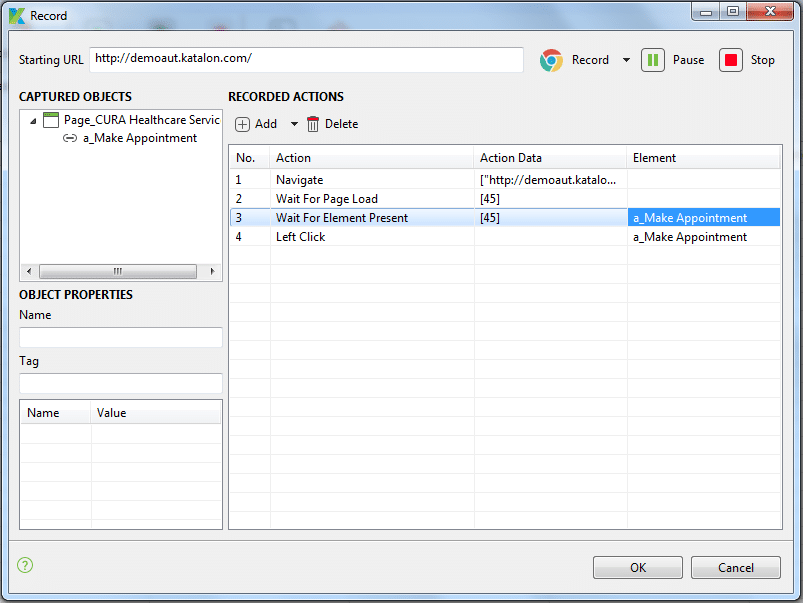
Step 16: Having said that, we need to provide the expected time as an input for all the wait commands. Tap on Action Data of Wait for Element Present and offer 15 seconds as expected time interval and click on the OK button.
Step 17: Recording pane should look like, as shown below. Unlike ‘Wait for Page Load’command, ‘Wait for Element Present’ command need another parameter as web element for which we are waiting.
Step 18: To provide a web element as a parameter, click on the Element column of Wait for Element Present, now it will display Captured Objects dialog box. Choose the object and click on the OK button.
Step 19: The recorded actions with synchronization commands should look like as shown below
Step 20: Let’s continue the recording. In the browser, move the cursor to log in button and click on the Login button.

Step 21: Now add another wait command up above the left click on the login button.
22nd Step: Click on Add button and click on Add synchronization point, it will add default command Wait for Element Present.
Step 23: Then, we need to change Wait for Element Present to Wait for Element Visible. Double click on action method of Wait for Element Present, Then it would display the down arrow, After that click on down arrow button, it shows all the synchronization commands click on wait for Element Visible. It would display the down arrow, then click on down arrow button it displays all the synchronization commands click on wait for Element Visible command [or use others as per you needed].
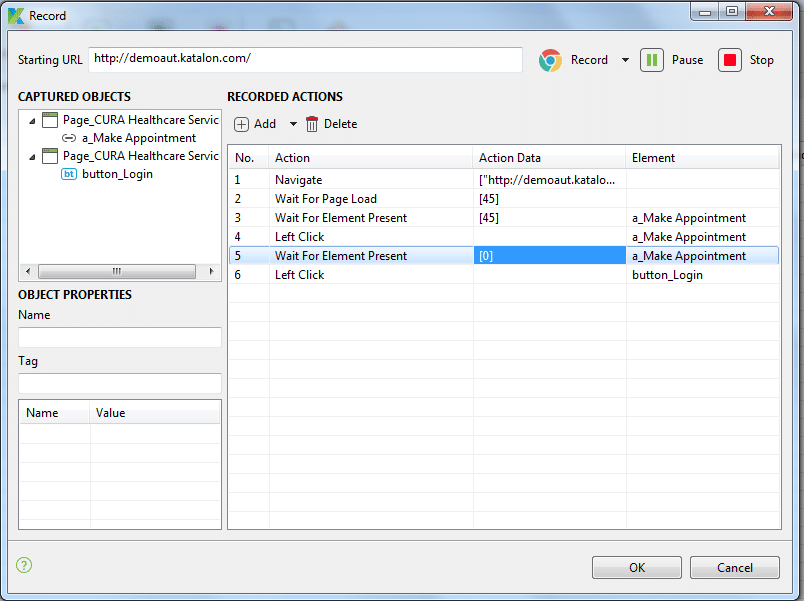
Step 24: Provide expected time as an input for Wait for Element Visible command and click on the OK button.
Step 25: Wait for Element Visible command should be displayed with the expected time. Similar to Wait for Element Present, we need to provide a web element as a parameter for this command.
Step 26: To provide a parameter, click on the element from the Element column. It will display the page object dialog box and choose the object of Login Button and click on the OK button.
Step 27: Your recorded test script should be as shown below
Step 28: You can stop recording anytime by clicking on ‘Stop.’ When you finish the recording, click OK to save recorded actions into Katalon Studio.
Step 29: You will get a prompt to save captured objects into Object Repository, which we can reuse whenever needed. You can also create a folder to maintain page objects in the desired structure. Click OK to continue.
Step 30: Recorded objects and actions are saved in the test case Manual mode, as shown below.
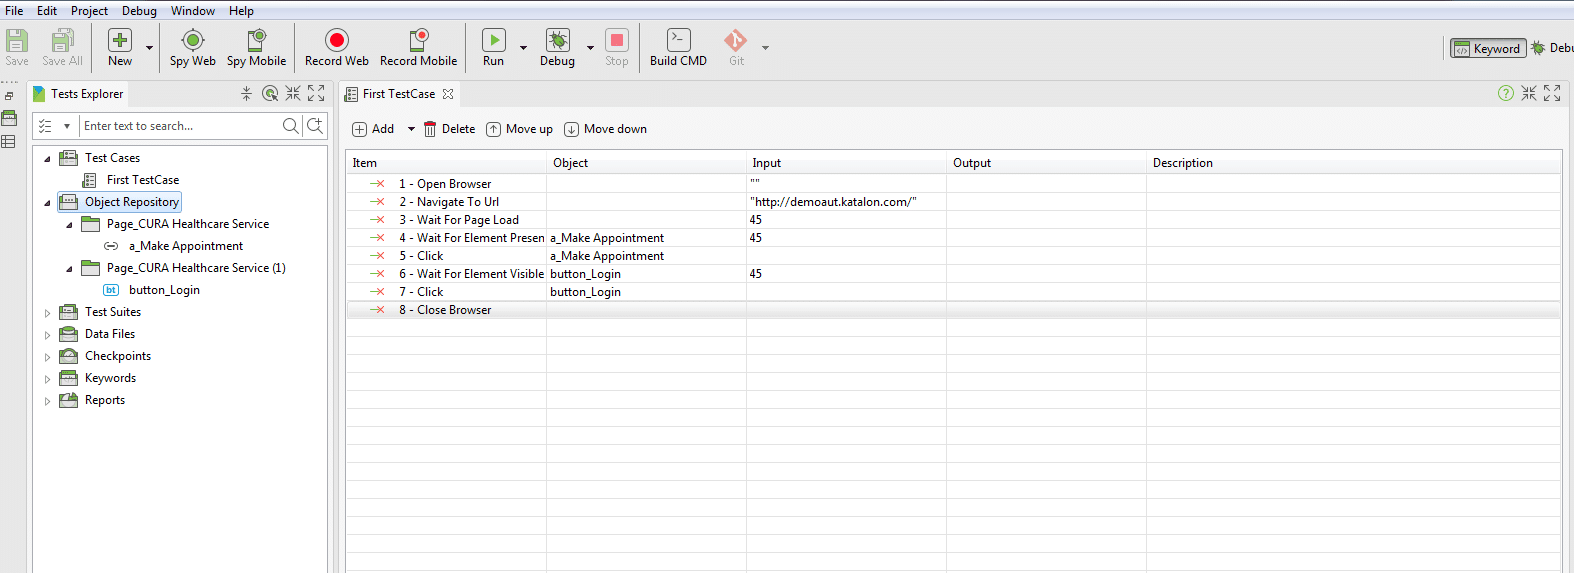
Click on Script Tab to view the generated code. Katalon Studio allows users to modify the script from the script mode as well. All the above-recorded actions can change in the script mode.
Script code :
WebUI.openBrowser('')

WebUI.navigateToUrl('https://demoaut.katalon.com/')

WebUI.waitForPageLoad(45)

WebUI.waitForElementPresent(findTestObject('Page_CURA Healthcare Service/a_Make Appointment'), 45)

WebUI.click(findTestObject('Page_CURA Healthcare Service/a_Make Appointment'))

WebUI.waitForElementVisible(findTestObject('Page_CURA Healthcare Service (1)/button_Login'), 45)

WebUI.click(findTestObject('Page_CURA Healthcare Service (1)/button_Login'))

WebUI.closeBrowser()
The recommendation is to add synchronization while recording automation test cases in the manual mode (https://www.katalon.com/resources-center/tutorials/create-test-case-using-manual-mode/) or script mode (https://www.katalon.com/resources-center/tutorials/create-test-case-using-script-mode/). It is also a good practice to use ‘wait commands’ to avoid execution failures. Download source code here.
For further instructions and help, please refer to the Recording WebUI Test (https://docs.katalon.com/display/KD/Recording+WebUI+Test) tutorial.