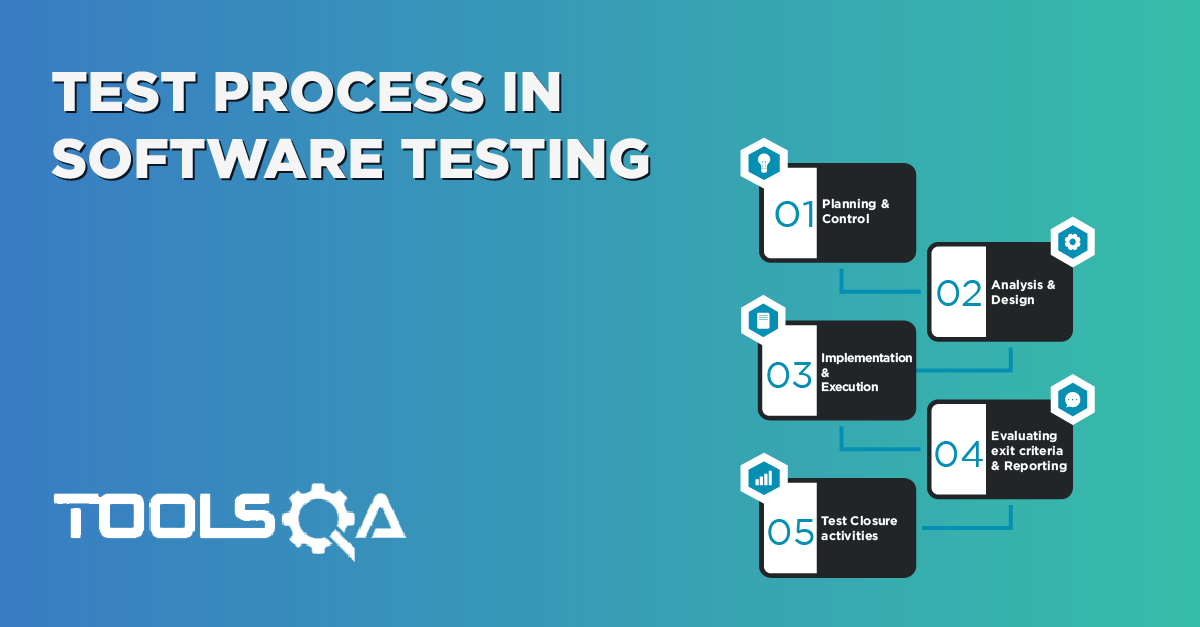
The whole process involved in the testing phase of the Software development is Software Testing Life Cycle - STLC.
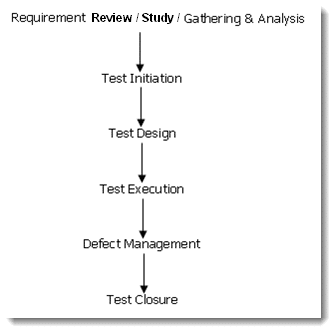
Requirement
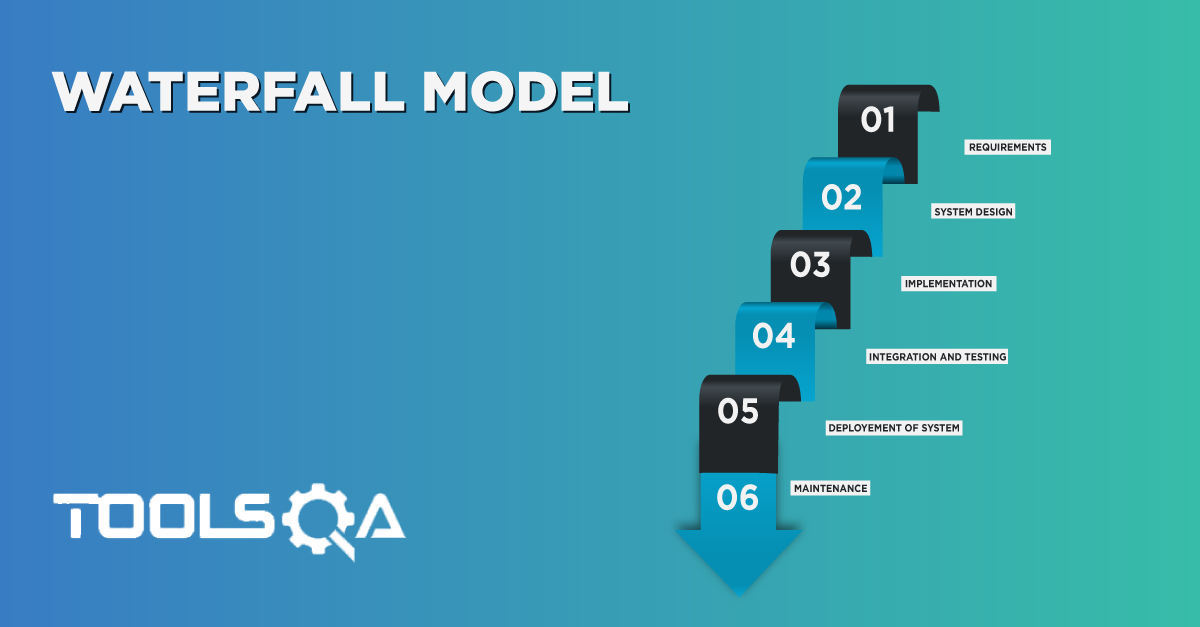
In case of Waterfall Model, after received the requirement documents, the testing team has to study/review the requirements. All the testing team members which include the Test Lead and Test Manager will be a part of requirement study (depends on the team formation). During the requirements study, the ambiguities will be raised by the testing team and the same will be shared to the corresponding person (Business Analyst) for the response. If the BA is not sure on the answers for all those ambiguities, BA will forward the questions to the customer. The testing team will be given the response for all the ambiguities from the respective individuals. This document should be visible & accessible to all the stake holders of the project. Based on the clarification, if there are some changes to be done in the requirement document, BA will update the SRS/BRD and share the same with the entire team.
In case of V Model, the testing team will be working along with other teams from the starting of the project. Testing team would be involved in Requirements Gathering & Analysis unlike waterfall model. Also concurrently the testing would validate the requirements and raise any defects related to the requirements captured in BRD & SRS. Please refer Course # 4 (Analysis) for more details on Requirement Capturing techniques.
Test Initiation
1) Estimation
Based on the requirement analysis/study, Test Manager would split-up the requirements into several pieces to prepare the effort estimation. Based on the requirements, Test Manager or test lead will identify the man hours for Test Case preparation and execution.
After the estimation is done for Test Case preparation & Execution, Test Manager should identify all the tasks which need to be executed throughout the project on a daily basis for all the available resources in the team. Task details, task owners and start & end dates all together we call as Master Testing Schedule. TM will use the Project Plan as a base document to prepare the Master Testing Schedule document. After the MTS document is prepared and sent to the customer for approval, test manager will start preparing the Master Test Plan.
2) Master Test Plan
The Purpose of this Master Test Plan is to gather all the necessary information to plan and control the test efforts related to the project. The following areas will be taken care during the master test plan preparation:
- Purpose of the Master Test Plan
- Scope of the testing
- Background of the application
- Test Motivators
- Target Test Items
- Test Inclusions
- Test Exclusions
- Test Approach (Types of Testing)
- Entry & Exit Criteria of Test Case
- Entry & Exit Criteria of Test Cycle
- Deliverables
- Testing workflow
- Test Environment (Software & Hardware)
- Roles & Responsibilities
- Milestones (Schedule)
- Risk & Risk Mitigation
The Master Test Plan will be approved after multiple review & rework are done by the offshore test manager and the necessary approver.
Test Design
After the Master Test Plan is approved, the testing team will be moving to the next phase. ‘Test design’. During this phase, all the three listed documents will be prepared,
- Test Scenario Identification
- Test Case Preparation
- Test Data Preparation
Test Lead would identify the Test Scenarios based on the requirement document and it can be shared to Test Manager for review and approval. After the test scenario document is approved by the test manager, the Test Lead will be mentoring the testers to write/design the test cases for the identified test scenarios with the help of Test Scenario & requirement specification documents. Test Cases will be prepared, reviewed & approved after multiple reviews done by all the stakeholders. Before start the test execution, test data should be identified for all the prepared test cases. The testing team may get the live data from the production database from the customer in case of any. Else the testing team has to prepare the whole set of test data for test execution.
1) Test Scenario
This is the high-level document that is used to prepare the Test Cases. The major areas of the target test items will be captured here.
### 2) Test Cases
To verify the possible combination of values for the attributes in functionality is called Test Case. The test case document may contain the below details:
| S No| Requirement ID| Test Case ID| Test Case Description| Repro Steps| Expected Value| Actual Value| Result| Defect Identification Number| | --- | --- | --- | --- | --- | --- | --- | --- | --- |
3) Test Data
Test Data will be used to validate the entire application and this can be a live data from production or the one which will be prepared by the testing team. This data can be a combination of positive & negative.
4) Test Coverage
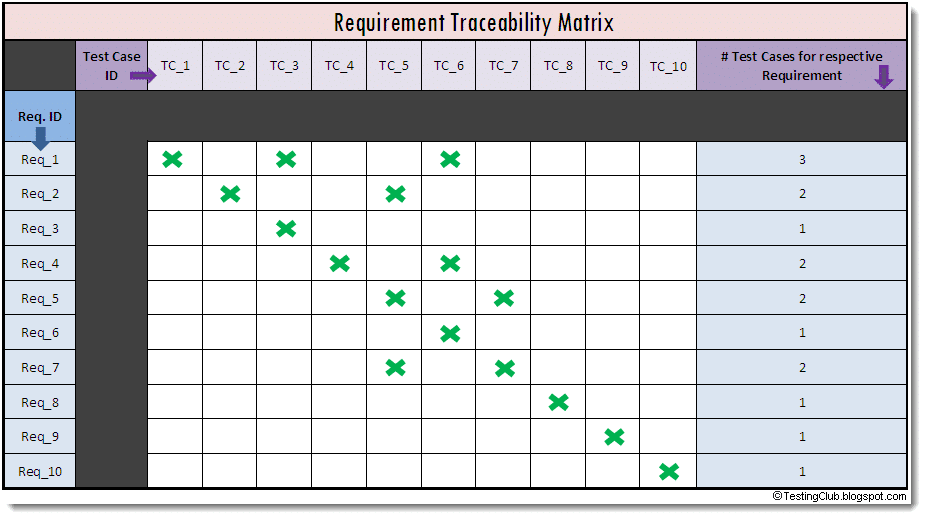
After completing the test case design before start the test case execution, Test Manager will be preparing the Requirement Traceability Matrix. This RTM document is generally used to ensure the Test Coverage. First, all the High-level requirements should be drilled down into several low-level requirements. Then the Test Cases should be mapped for all the low-level requirements. All the requirements should have a minimum of one test case and a maximum of n- test cases. If all the requirements are mapped with the test cases, then we can ensure the Test Coverage. If some of the requirements don’t have the test case(s), testing team will be preparing the test cases for that particular requirement(s) and will be mapping into the requirements before start the test case execution. In this case, the testing team will not miss any functionality during the testing phase from the requirement specification.
Sample requirement Traceability Matrix document:
Test Execution
Before starting the system test case execution, the testing team will identify the Build Verification test cases from the whole set of System test cases. BVT/Smoke testing is the execution of test cases that test high-level features of the application to ensure that the essential features work. These tests are performed anytime a build is released from the development team to the testing team. Failure of any of these test cases will be grounds to discontinue any further testing and to reject the build.
| Head | Head |
|---|---|
| Data | Data |
| Data | Data |
| Data | Data |
Technique Objective: The happy flow of the major functionalities in the application is functioning according to the baseline/ signed-off business requirements (BRD & Wireframes) Technique: Test team will prepare an initial set of tests which can be executed on the major functionalities of the application These tests on a high level, goes through all the pages of the application and test all pages with add/edit options and other navigation features are working Once a new delivery is made into the test environment, the test team will do the smoke tests If the smoke tests failed, the build will be rejected and no further testing will be done Issues noted in the smoke tests should be fixed and a new delivery should be made into the test environment If there are no issues identified, the test team will start the execution of the Integration/System test cases
Success Criteria:
The technique supports the testing of:
all key functionalities ensure test readiness of every new build
After BVT, based on the approved test cases and test data the testers will be doing the test case execution. When executing the test cases the test results will be updated in the same test case document. Based on the test results the testing team can easily identify the defects. Each test case contains the expected value & after executing the test cases, the actual value will be produced. Then testers will compare the actual value with the expected value to find the test results. If the expected value & the actual value are the same, the test case will be considered as PASS, else FAIL.
Test Log
Test Log/Test Execution Log is the high-level document of Test Results. In the Test Results documents, we should have the Test Results for each and every test case. But in the Test Log, we need to map the number of test cases with the major requirements and we will have to make the Results for all the requirements. In case of a huge project which has more number of test cases, it will be difficult for the customer to go through all the test cases one by one to know the test result. In this case, if the testing team can showcase the test results in terms of requirements, it will be easy for the customer to understand and decide the coverage.
Defect Management
Based on the test results, the testing team will identify the defects and those defects will be reported to the development team through the defect tracking tool like Ms-Excel and some vendor tools (Bugzilla, Quality Center, Request Management, Rational Clear Quest...etc.,)
I am briefing the general Defect Workflow here (irrespective of defect tracking tools),
Step 1: Testing Analyst / Test Engineer -> Test Manager => (New)
Note: - Once the test engineer found a defect the tester can raise the defect as a New defect to the Test Manager / Test Lead for validation.
Step 2: Test Manager should validate the defect before assign the defect to Dev Team Lead
Note: - If the Test Manager feels the raised defect is Invalid he/she will Reject the defect to testing team member straight away, who reported the defect.
Step 3: Test Manager -> Dev Team Lead => (Open)
Note: - After validating the defect, if the Test Manager feels that the defect is valid he/she will Open the defect to the Development Team Lead.
Step 4: Dev Team Lead -> Developer => (Assign)
Note: - If the development team lead accepts the defect, he/she will Assign the defect to the corresponding developer for debugging. If the development team lead feels that the raised defect is Invalid, he/she will Reject the defect to the Test Manager / Test Lead.
Step 5: Developer -> Dev Team Lead => (Re-Assign)
Note: - Once the developer fixed the defect he/she will Re-Assign the defect to the development lead with Resolution.
Step 6: Dev Team Lead -> Test Manager => (Ready to Verify)
Note: - After receiving the resolution for the defect from the developer the development team lead will assign the defects to the Test Manager / Test Lead with Resolution after the verification of the defect fixes with the developer. When the dev team lead to assign the defect to the test manager, the status is identified as “Ready to Verify”
Step 7: Test Manager -> Testing Analyst / Test Engineer => (Ready to Verify)
Note: - After receiving the defect from the development team lead, the Test Manager / Test Lead will Re-Assign the defect to testing team members for Re-testing with the same status “Ready to Verify”
Step 8: Test Analyst / Test Engineer will be performing the Retesting on the fixed defects.
Step 9: Test Analyst / Test Engineer -> Test Manager => (Fixed)
Note: - Testing team members will be Re-Assigning the defect to the Test Manager with the status “Fixed” after Re-testing.
Step 10: Test Analyst / Test Engineer -> Test Manager => (Re-Opened)
Note: - Testing team members will be Re-Assigning the defect to the Test Manager with the status “Re-Opened” after Re-testing and found the defect is not fixed properly.
Step 10: Based on the status, if the defect is properly fixed by the development team Test Manager will Close the defect, otherwise, he/she will Re-Open the defect to the development team.
Defect Severity
Severity is based on, how much the application/system is getting affected because of the defect. Defect severity is related to the health of the application. The severity is always classified by the testing team. In general, we can classify the defect severity as follows:
- Critical: Completion of operation attempted is impossible
- High: Major defects make it difficult to complete the operation attempted
- Medium: Defects are annoying, but workarounds are easily available
- Low: Cosmetic/low severity defects
- Informational: Suggestions
Defect Priority
Priority decides which defect should be fixed first. Defect priority is always classified by the development team. In general we can classify the defect priority as follows:
- High
- Medium
- Low
Defect Resolution
Possible solutions can be given by the development team for the reported defects as follows:
- Deferred: The defect will be fixed in the future releases.
- Duplicate: The defect is a duplicate of an existing defect. I.e. Replication.
- Fixed: A fix for this defect is verified in the application and working as expected.
- Not a Defect: The defect described is not a bug.
- Not Reproducible: All attempts at reproducing this defect were not successful, and reading the code produces no clues as to why the described behavior would occur.
- Workaround: Defect, but could proceed with the functionality through alternate means.
Test Closure
After all the defects are closed by the testing team, the Test Evaluation Summary report will be prepared by the Test Manager and shared with the Client for their acceptance. This is the testing closure activity and the test evaluation summary report widely called as Post Mortem Report.
Test Evaluation Summary Report:-
The Test Evaluation Summary intends to gather, organize and present the test results and key measures of test to enable objective quality evaluation and assessment. It describes the results of the tests in terms of test coverage, analysis, severity and concentration of defects.
About Author

I am Sayooj V R and I am a software test engineer. I have a total experience of 1.5 years. I worked in 2 projects as a manual tester and automation tester as well. Please connect me on LinkedIN.
