In the current scenario, companies thrive on the user experience they provide to their users. This includes animations, transitions, newer technologies, and whatnot. In the same field, to further improve this experience, companies implement data consistency mechanisms across multiple devices. This is because they know that over 57% of users use more than one device to work on. So if you add an item to the cart on the mobile, the item should reflect in the cart when opened on a desktop. However, this can happen only when we are within the boundaries of a single website. Things are just quite smooth at this point. But what about when we jump from one website to another? What would happen to our data then?
Obviously, this is a security leak and there hardly are any websites that share their data because it can lead to vulnerabilities and data is very valuable. But when we need to give our data intentionally, generally, we make use of the upload functionality and upload the data in a file. For instance, we upload images of our documents as proof that the data we have entered is authentic. So this becomes a very important functionality for a web app (or mobile app) owner that needs rigorous testing first before releasing it to the users! In this post, we thought to highlight this area of a web application often overlooked but without which, a lot of things may come to a halt for an organization as well as for a user.
Table of contents
- Why do we need to test file upload functionality?
- Common test cases for web page file upload
- How to test a file upload functionality manually?
- How to test file upload using testRigor?
Why do we need to test file upload functionality?
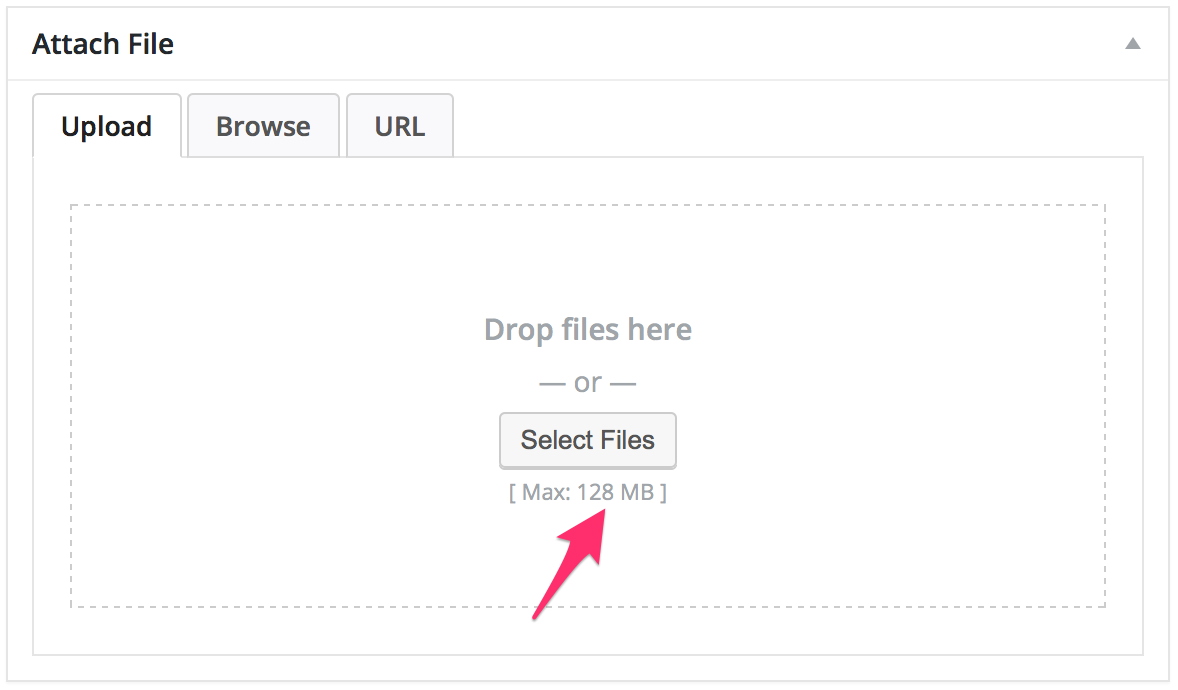
File upload functionality on a web application plays a very important role in getting the required documents and other attachments to the database. While for a user it is just a button to upload a file, for a tester it is something of much more importance because of the variety of errors we can face through it. For instance, a user might just see this message:

And understand that the file he was trying to upload, is bigger than the allowed file size. We finalize this number after a good discussion within the teams to strategize the optimized use of servers, databases and other resources. What if we release the application as it is without testing the file upload functionality and users start to upload files with sizes in multiple GBs? Or what if the server only supported 64 MB size but this functionality was not tested properly and the user uploads a bigger file and navigates to the other pages thinking his file is successfully uploaded? Such situations are very common because file sizes vary in different users' computers. I might have a government document ABC of size 5 MB but the same document could be 100 MB in your system. To always ensure that these situations are never bypassed by the user, we test the file upload functionality rigorously and often on priority. To understand this a bit deeper, let's explore a few practical scenarios a tester should test (and a user can encounter) while uploading a file.
Common test cases for web page file upload
Uploading a file on a web page can give birth to a long list of test cases. We have shortened the list by collecting the most important ones with respect to the user as well as the tester.
-
Malware - When a user uploads a file, it is saved inside a database that belongs to the website owner and has other data stored in it belonging to other users. This is an open hole through which viruses can seep inside if not taken care of. A case study done in a similar interest explored how web applications were not scanning the files being uploaded. This scenario motivated people to develop software that would take advantage of this loophole and inject code to perform remote execution on the servers. Such scenarios are extremely dangerous and should be thoroughly tested in this phase.
-
Restricting file size - Once the file has been uploaded successfully, it is now stored in the database whose storage capacity is purchased by the organization. In most cases, high-quality images or other files are not desired because of the high costs. If a 100 MB image is uploaded by 10 users, it goes close to 1 GB of database space whereas if the same image is reduced to a size of 20 MB, 50 users can be occupied. Hence, we generally put a constraint over the maximum size of the file allowed and the successful working of which can only be confirmed by the testers.
-
Image constraints - The file upload option is found a lot on web pages when we need to deal with images. After all, it is the only option we have to store an image of someone legally. Once the image uploads, it generally goes for further processing using backend algorithms. For instance, if a display picture is required then the image is analyzed and put at that place once uploaded. However, algorithms processing these images need to make sure that they superimpose the applied area. For this, an image resolution constraint is put down. We don't need a super high-quality image and we neither need a pixelated image. Therefore, we place a constraint and analyze it by an algorithm. This functionality is important to have a consistent image and save storage space.
-
Data integrity - This is the most basic assumption out of all to perform testing of file upload functionality. Since data is going to be stored on our database, is there a guarantee that it is actually getting stored correctly? This use case verifies this functionality and is the most important of all. If we are not able to save the file, what use is the upload functionality and going through all this trouble?
-
File validations - Sometimes an organization plans to put down a few validations depending on the scenarios and project requirements. This is not a generalized test case scenario but may vary from project to project. For instance, sometimes a project demands that the file uploaded should not be empty. Such validations needs testing before the web application release to the end users.
-
Valid file extensions - Finally, one of the most important use case scenarios we may find is users trying to upload a file with an invalid extension. This, as experienced by many, can be completely unintentional due to the nature of files present today. For example, the web app may put the upload button in front of "Upload Passport " so that users can upload the passport document through it. But passport documents can be pdf, jpeg, png, jpg, heic, psd, docx, and anything else. While the database that is expecting a file may definitely accept it, it might become invalid for a moderator or people that will open it in the organization. File validations are important and can only be verified when we test upload functionality correctly.

Along with these, there can be many other use cases (general as well as project-specific) that will give you a reason to dedicate some time to testing the upload functionality on the web page. With this, we can jump onto exploring methods required for testing this functionality.
How to test a file upload functionality manually?
The first method to test file upload functionality is the simplest and most straightforward of all. In the manual method, we open the web page and try to cover each test case from our suite, and note our observations down. So for file extension cases, we upload the file with all the different extensions available (all is necessary to never leave a loophole). Then, check whether only the correct extensions are succeeding or not. This is then verified at the backend database.
This method could be the first thing that comes to a tester's mind. It looks extremely simple in the beginning but if we just expand each of our scenarios, we may end up having hundreds of test cases which will eat up most of our testing time. While managing it is easy at first, it will become error-prone when done in every release (which in the case of Agile can shrink to as low as just 15 days). In addition to it, we may also end up increasing project costs and delivering buggy software to the end users. Automation as an alternative method is a better choice in the long run.
How to test file upload using testRigor?
The alternative method we have with us is to replace manual work with test automation. This could shed a significant load off our shoulders especially when the same tests need multiple runs. But test automation isn't a completely smooth solution in the current times. The introduction of codeless testing tools in the market has uncovered a few automation testing problems assumed to be "necessary skills" earlier. Programming, for example, seems a necessary skill to qualify for an automation engineer job. However, codeless testing tools modified this definition by making these skills optional while being a good observer and a good tester necessary.
testRigor is one such tool that works in the codeless testing domain by providing a platform where there are no biases on the basis of languages or frameworks. All you need is the knowledge of the English language to create simple to complex tests within minutes. Our course on testRigor explored various dimensions of this tool. Out of those, this demonstration will leverage global variables and data sets. It will help create a test case to test file upload using testRigor.
Creating a test case to test file upload using testRigor is a list of simple steps.
First, sign up for the platform for free and create a test suite in testRigor.
For this demonstration, we are using the DemoQA website that helps testers practice automation on a live web application. The structure of the upload page on the website looks as follows:

We are concerned with the second button here as it relates to the upload functionality on the webpage. If we click the "Choose File" button and select a file from the system, the output on the screen is:
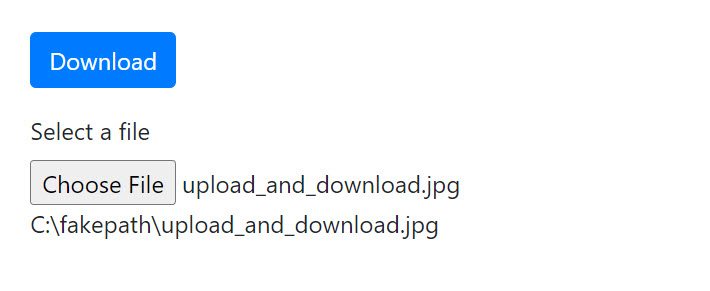
The website hides the original path due to security reasons. This is the process we need to mimic through testRigor and test the file upload functionality using automation.
Let's come back to our dashboard and create a new test case. The process is as follows:
- Click on "Forms" on the home page.
- Select "Elements" in the sidebar when the "Forms" page opens up.
- In the list of options, select "Upload and Download".
- Click on Choose File.
- Upload File.
- Confirm file name.
Now we need to modify these sentences into ones that testRigor can understand. Once done, our test case would look like follows:
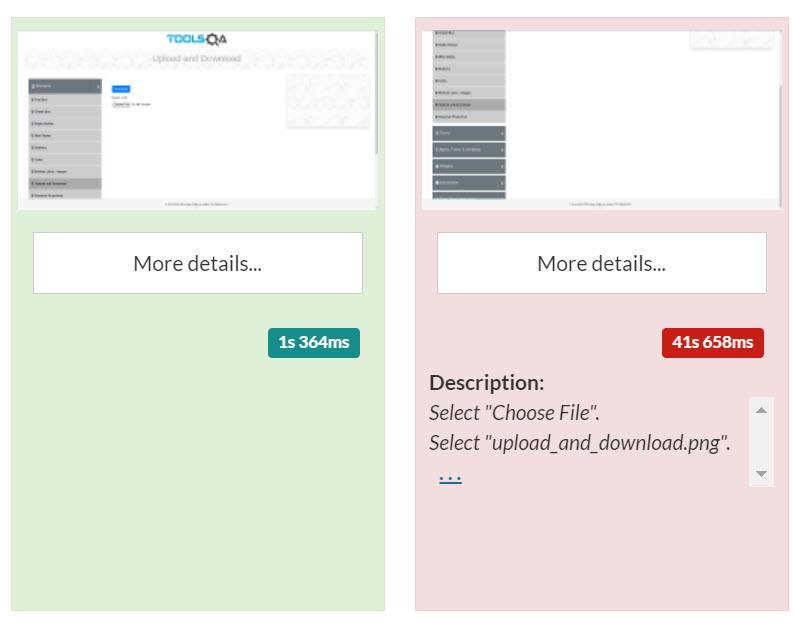
click "Forms"
click "Elements"
scroll down until page contains link exactly "Upload and Download"
click on "Upload and Download"
select "Choose File"
select "upload_and_download.png"
check that page contains "upload_and_download.jpg"
Execute this test and observe the results.

Looks like our test case failed to execute. If we expand this panel and observe the step-wise execution, we see that the file selection panel did not get open as it would when we click the button normally as an end-user.
This is because test scripts cannot leverage system functionalities due to security issues. Sometimes they can but experimenting with it is not worth the time. Our tool testRigor provides a different method to deal with this efficiently and with more than one file if required. Global variables help us to achieve that about which we have already crafted a detailed chapter in this series. In that post, we added a few variables to fill the values in a form. Similarly, we can add one more variable of type "File" and use it directly on the test case.
Navigate to Test Data -> Global Variables and click on Add to add a global variable in the test suite.

Here, we add the variable "File" with the name of our choice. Then, select the file we wish to use from our system.
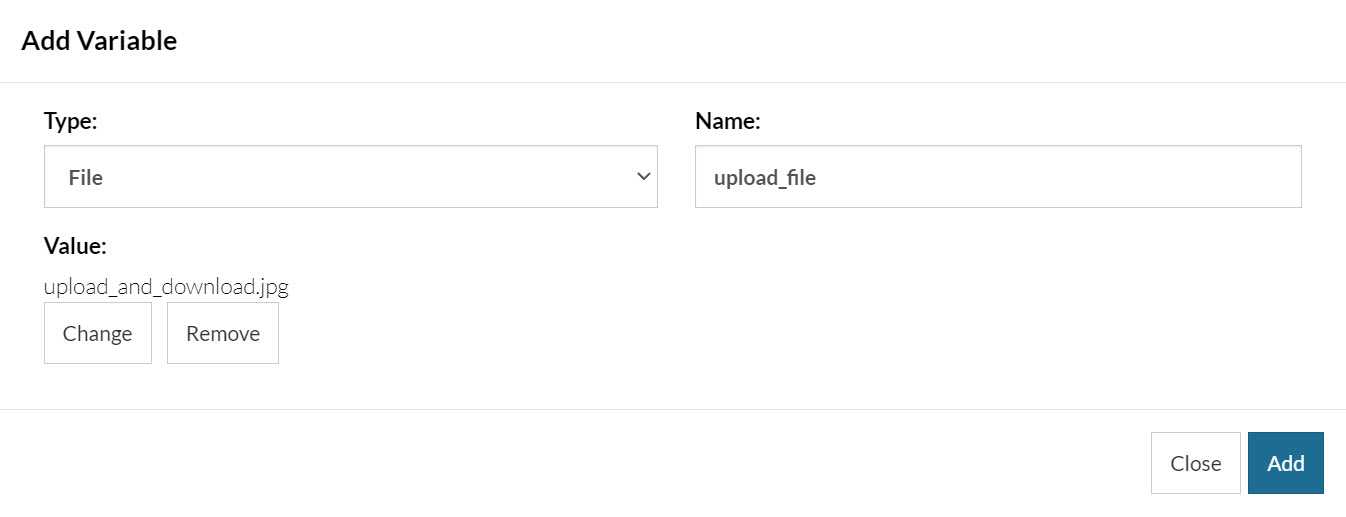
Click on "Add" to add this variable. Now jump back to our test case and modify the test case as follows:
click "Forms"
click "Elements"
scroll down until page contains link exactly "Upload and Download"
click on "Upload and Download"
enter stored value "upload_file" in input file "Choose File"
check that page contains "upload_and_download.jpg"
Execute the test again and this time our test case should execute successfully.

This was the easiest way to write a test case. However, it is a good practice if you twist them and upload files with different commands. For instance, instead of "Choose File", we can also use the input id of that button from inspect element section. The output will remain the same though.
Summary
File upload functionality is one of the most common and most important functionalities found on a web page. It is the only gateway for a user to upload their documents, images, or any requested file on the server. But since this is an open gateway, people can take advantage of it and insert malicious code instead. This code can seep into the database as well as the server and corrupt the data or open a stream to breach it to a third server. This is just one of the many cases that can happen with a button that has the capability to upload a file to a company's database. Therefore, it's better to test these functionalities before it's too late to do anything.
In this post, we figured out two popular methods to test file upload functionality. Out of these, the method to test file upload using testRigor is the most efficient and easiest. This is due to the use of the English language and easy-to-use platform interface. With just six short sentences, we were able to test the upload functionality and observe our results within minutes. I hope this tool helps you in your future testing requirements. Thank you for giving this post your valuable time.