I have been teaching automation for long and I have been asked this question many times that Why do we need to Install Java on the system?. So before we look at the steps of How to Install Java? it is better if we first understand why do we need Java installed on the system, whether it is Windows, Mac or Linux.
Why Java installation is required?
The Java Development Kit (JDK), officially named Java Platform Standard Edition or Java SE, is needed for writing Java programs. The JDK is freely available from Sun Microsystems (Oracle).
Often people get confused with JDK & JRE. JRE which stands for Java Runtime Environment is needed for running Java programs. JDK which stands for Java Development Kit, includes JRE plus the development tools (such as compiler and debugger), which is needed for writing as well as running Java programs. In other words, JRE is a subset of JDK. Since you are supposed to write Java Programs, you should install JDK, which includes JRE.
Not just for running and writing Java programs, but there are many applications which only work when Java is installed on the machine such as Eclipse IDE. If you are not running any Java applications, then you don't need Java on your machine.
In the early days of Java, the installation of applications automatically installed Java at the correct version for the application. If you uninstalled Java, the application you downloaded or licensed would stop working. Today, Oracle owns Java run-time so it is more of a separate upgrade rather than being controlled by the applications that you run and, yes, you could wind up with multiple versions of Java if you run some older software that requires it.
So, how do you know if your applications require Java? If you had the documentation for all of your software items, the system requirements section might specify Java version x.xx.xx is required.
How to Install Java?
It is not difficult to install java on any platform whether it is Windows, Mac, etc. But there are a few steps to follow:
- Download Java
- Install Java
- Set Java Environment Path
- Verify Java Installation
The following are steps to Download & Install Java on Windows and these steps also remain the same for any platform other than windows.
Steps to Download Java Development Kit (JDK)
To install Java, you first need to download the installer program from Oracle. Visit the Download Java page: https://www.oracle.com/technetwork/java/javase/downloads/index.html. Click on Download button.
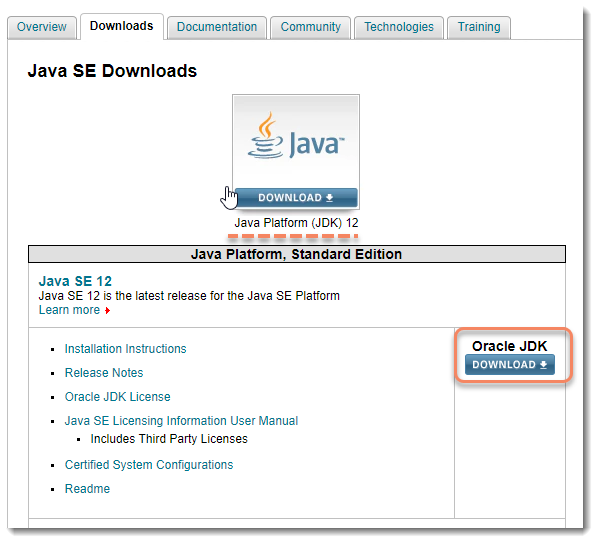
Note: As on date: 15th Apr'19 the latest Java version is 12.
- Accept the License Agreement. Choose the correct OS corresponding to the specific JDK. (Windows, Mac, Linux, etc.)
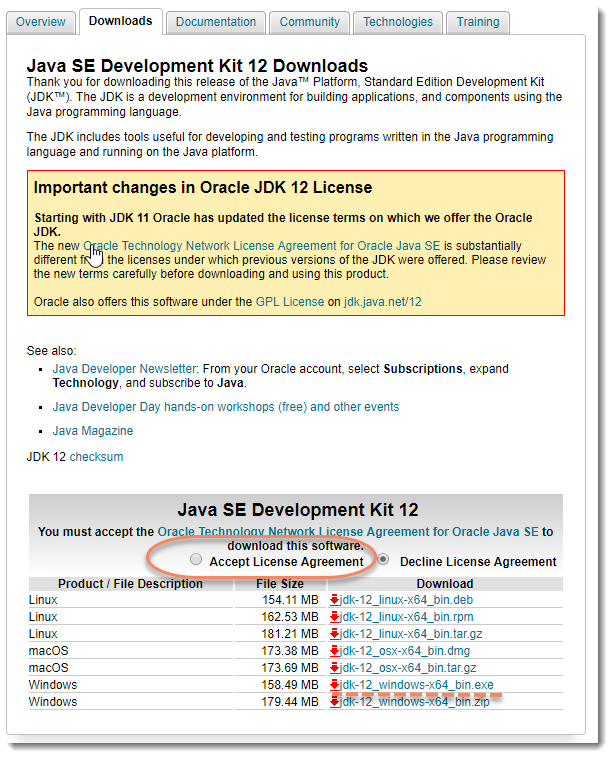
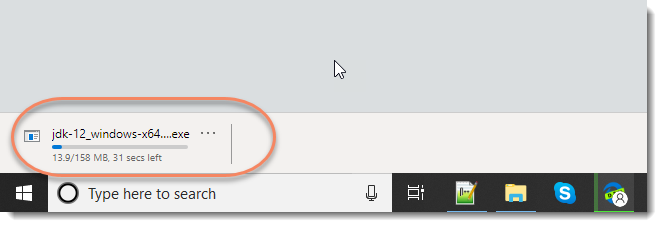
- The above step will start the downloading of the JDK exe automatically. This can be noticed at the left bottom side of the browser window.
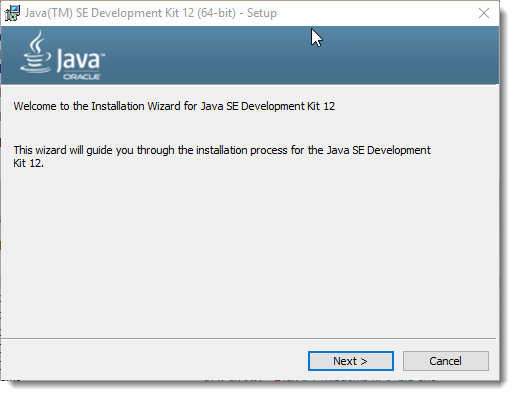
Steps to Install Java
- Once the download is complete, double click the file to begin the installation of JDK. This will start the installation process. The installation process starts. Click the Next button to continue the installation.
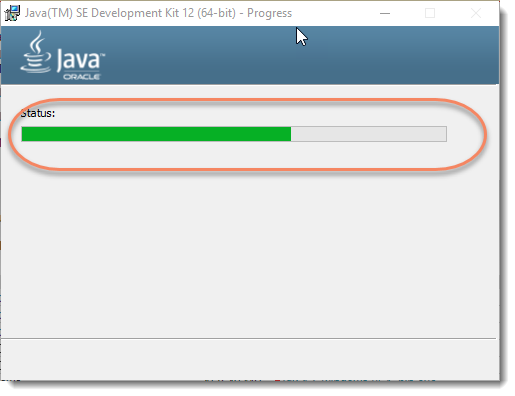
- It starts preparing for the installation and that will take a few minutes to complete.
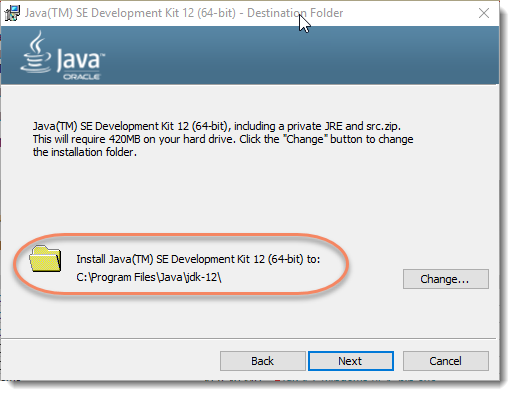
- Next window will ask you where or on which location you would like to install Java on your system. You can choose to change where you want to keep your folder but it’s best to stick with the default options. Click Next to continue.
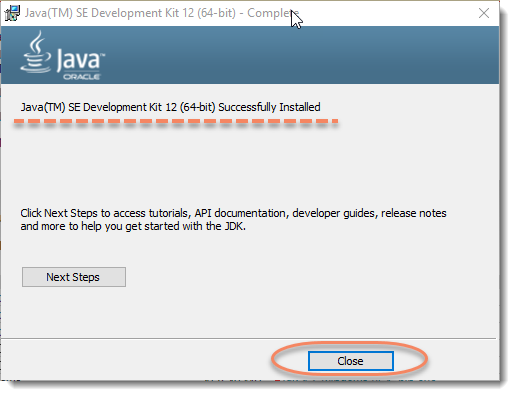
- Let the installation finish. A few brief dialogs confirm the last steps of the installation process; click Close on the last dialog. This will complete the Java installation process.
Steps to set the Java Environment Path
The Path Variable gives the location of executables like javac, java, etc. JDK's programs (such as Java compiler javac.exe and Java runtime java.exe) reside in the sub-directory bin of the JDK installed directory. You need to include JDK's bin in the path to run the JDK programs. Let's see how to do it.
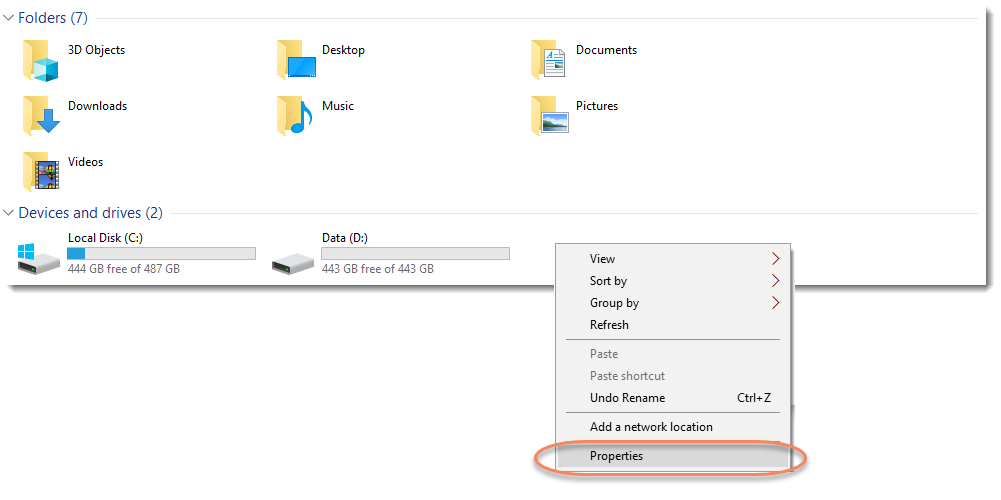
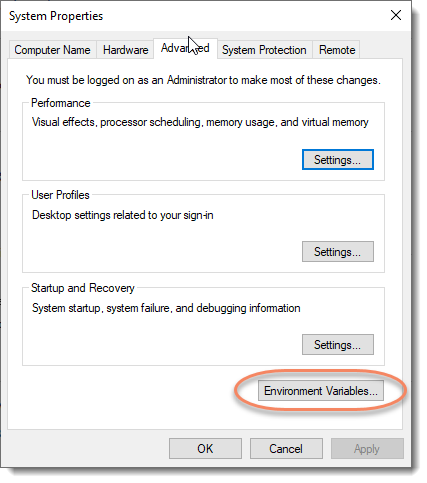
- Right Click on the My Computer and select the Properties.
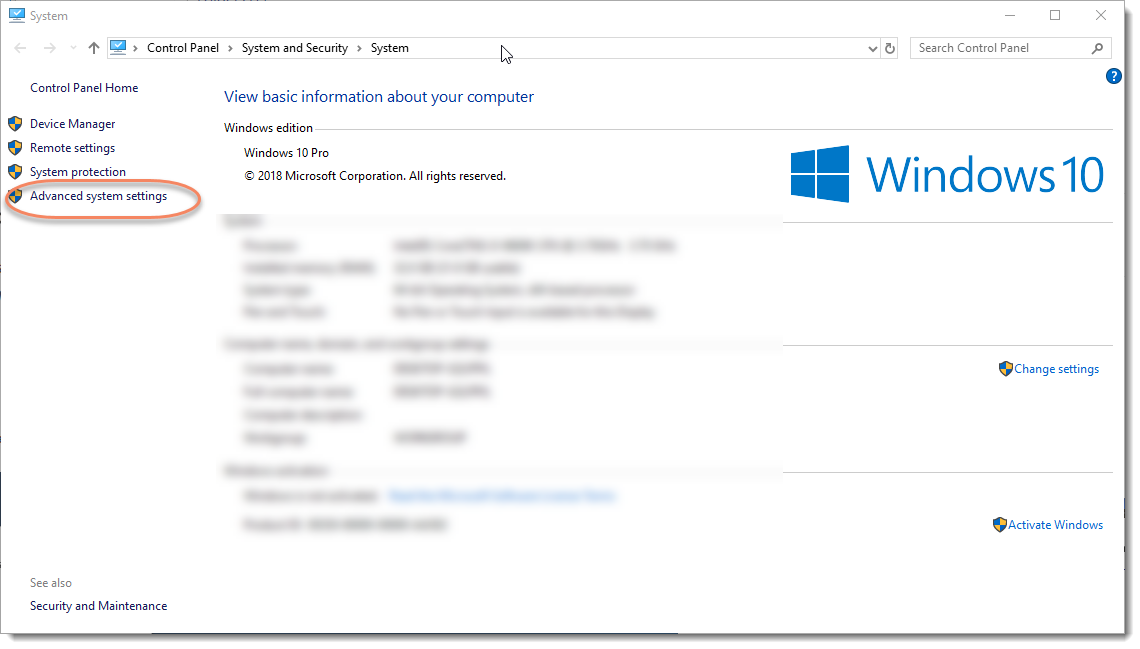
- Click Advanced system settings on the left pane.
- Switch to Advanced tab and click Environment Variables button.
4) Click on the New button of User variables.
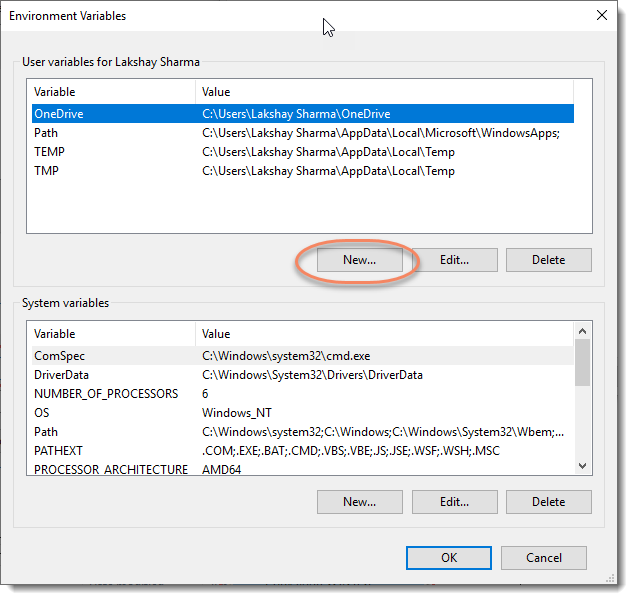
Note: In case the path variable is already there, you can simply edit the same. For Newer Windows 10: You shall see a TABLE listing all the existing PATH entries (if not, go to the next step). Just add the new one for JDK as well. Steps to get the bin path are mentioned below.
- Right-click on the address bar and Copy address as text of bin folder where the JDK is installed.

- Type PATH in the Variable Name. And then paste the path of bin folder in Variable Value. Click on OK button.
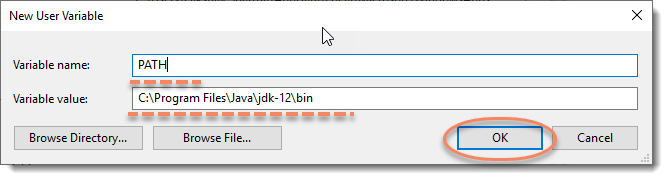
- Click on OK button.
Steps to Verify Java Installation
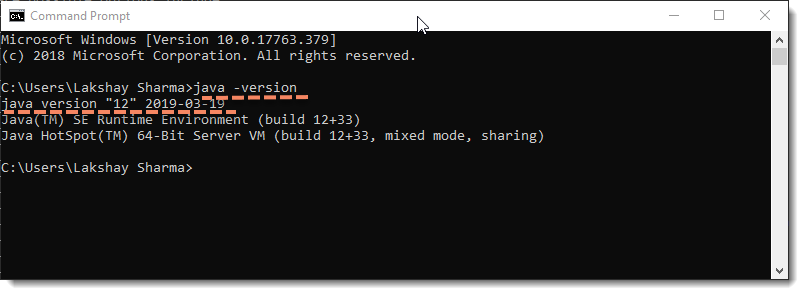
Go to Command Prompt and type java -version If you see a screen like below, Java is installed.