To configure Eclipse with Cucumber, we need to launch the Eclipse IDE, create a Workspace, create a Project and add External libraries to the project.
Step 1: Select WorkSpace on Eclipse start up
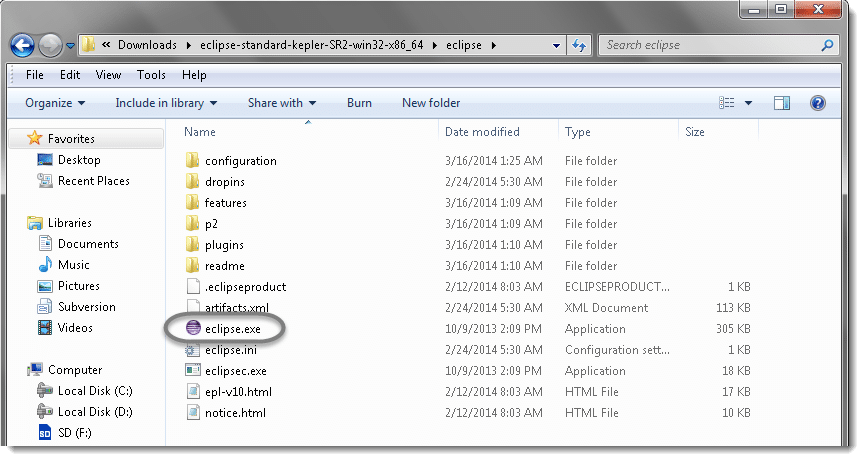
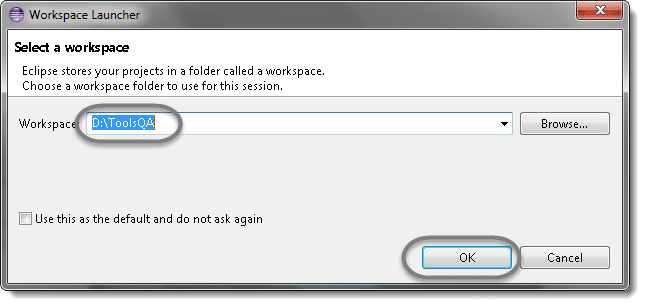
a) Double click on 'eclipse.exe' to start eclipse. First time when you start eclipse, it will ask you to select your workspace where your work will be stored as shown in below image.
b) Create a "working directory" for all of your projects. Think of it like "My Documents" in the Windows operating system. It's a folder that contains a lot of your documents, but there's nothing to prevent you from creating another folder called "My Other Documents" (for instance) to house other documents.
Typically you only need one workspace, and you can think of it as your "My Documents" for Java code. If you wanted to, you could have more than one, but chances are you won't have a use for more. I like to choose my own workplace location and will place all my ToolsQA tutorial projects under it.
You can change it later on from 'Switch Workspace' under 'File' menu of eclipse. After selecting the workspace folder, Eclipse will be open.

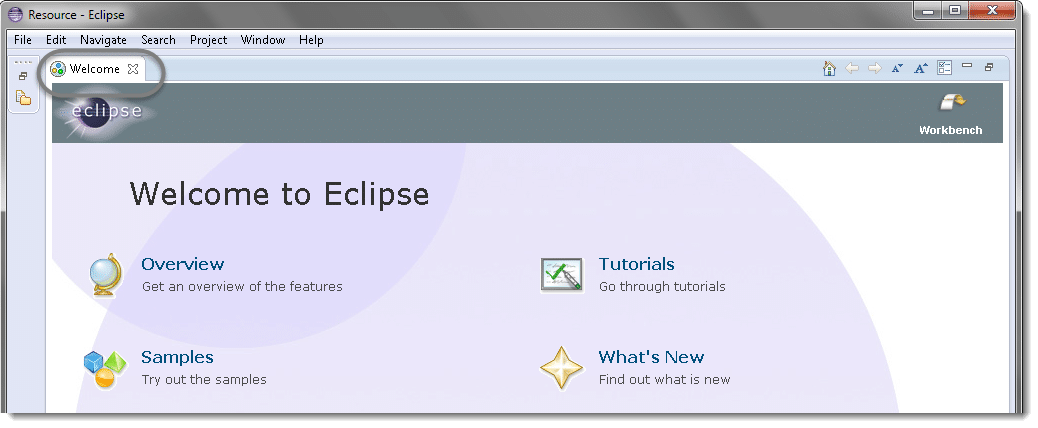
c) You may see the window like this, this is the Welcome window for Eclipse. You may close this window.
Step 2: Create a New Project
Projects: A collection of related code. Generally speaking, each project encompasses one independent program. Each programming assignment you do will typically require its own project.
Once you've established your workspace, you'll want to create a project and begin writing code. In Eclipse, projects are the next-smallest functional unit after workspaces, but where you might have only one workspace, you will usually have several projects inside one workspace.
a) Create new Java Project from File > New > Java Project .
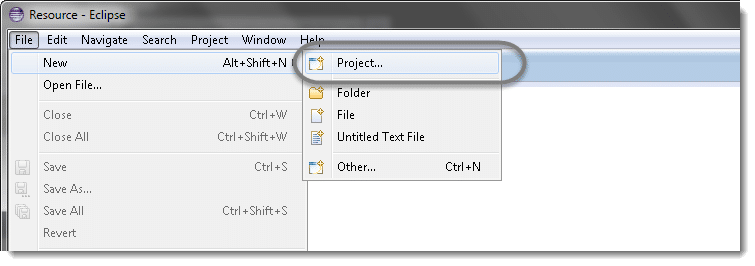
Note: You may see a direct option for Java Project, if you are using the latest version of Eclipse like LUNA.
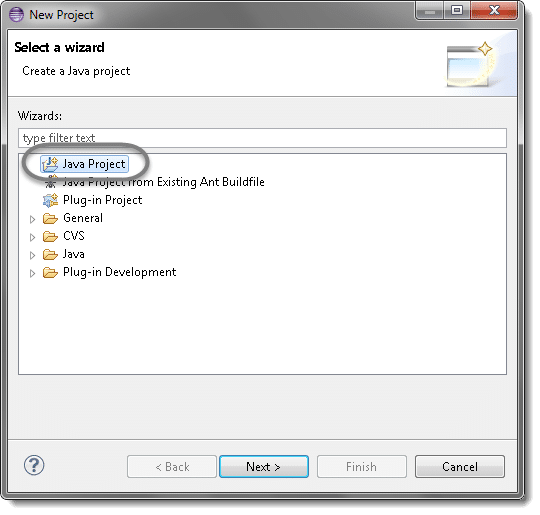
b) Select Java Project and click Next.
c) Give your Project name 'OnlineStore' as shown in below given figures. Click on Finish button.
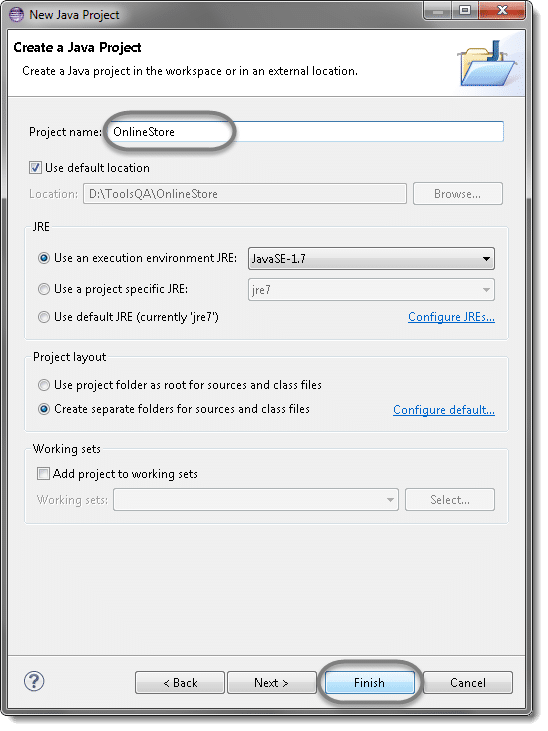
Note: I am naming this as OnlineStore, as Toolsqa.com gives you the opportunity to practice automation on Live demo site. This demo website is a complete ecommerce website where a customer can register and purchase electronic items.
Website : shop.demoqa.com
d) You may or may not see this message but if in case you get any, check 'Remember my decision' and click on Yes.
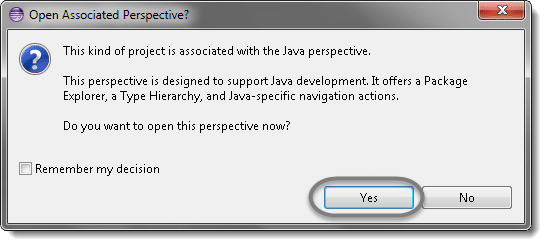
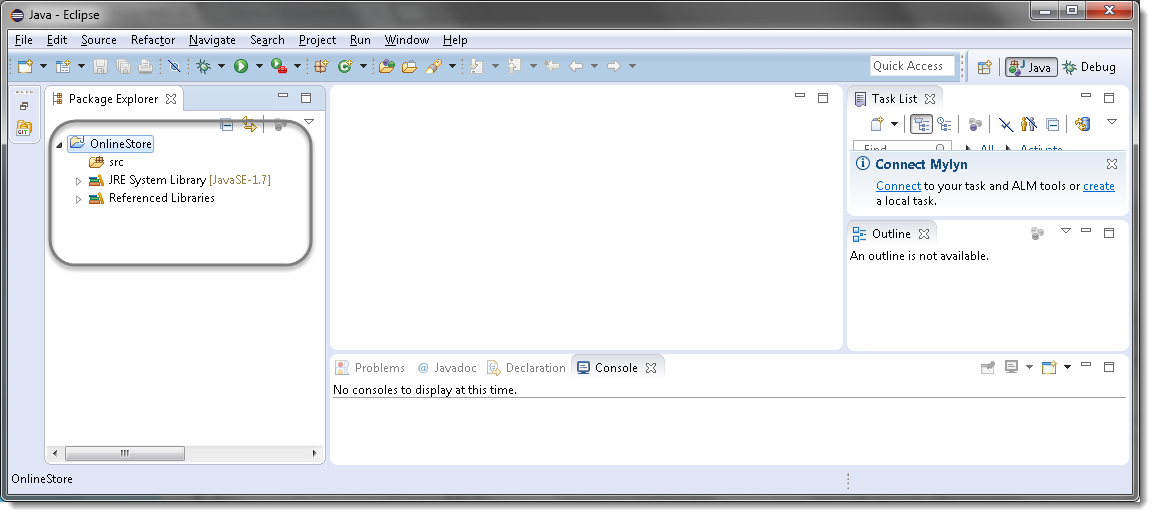
Now your new created project 'OnlineStore' will display in eclipse project explorer.
Step 3: Add External Jars to Java build path
We are almost ready to write the first cucumber selenium test but before that we need to associate all the Selenium & Cucumber jars to the newly created project.
Add Selenium Jars
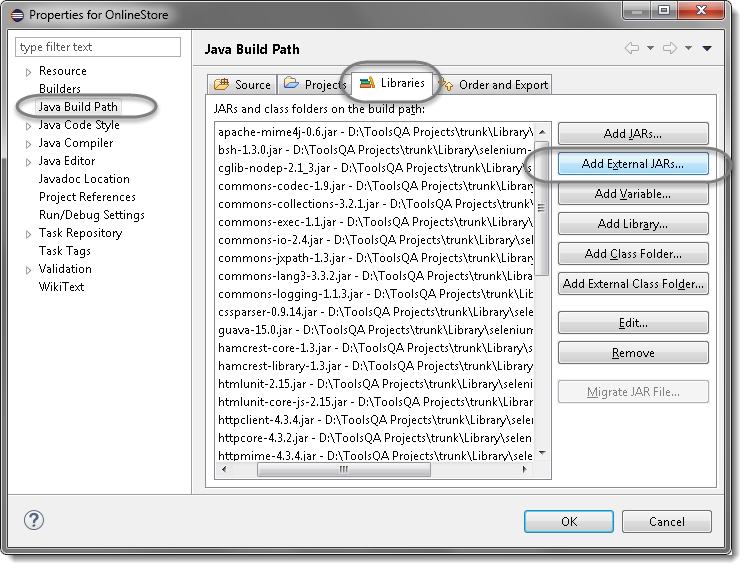
a) Let's first add Selenium Jars. Right click on Project 'OnlineStore' > Select Properties > Java build path. Then navigate to Libraries tab and click Add External JARs.
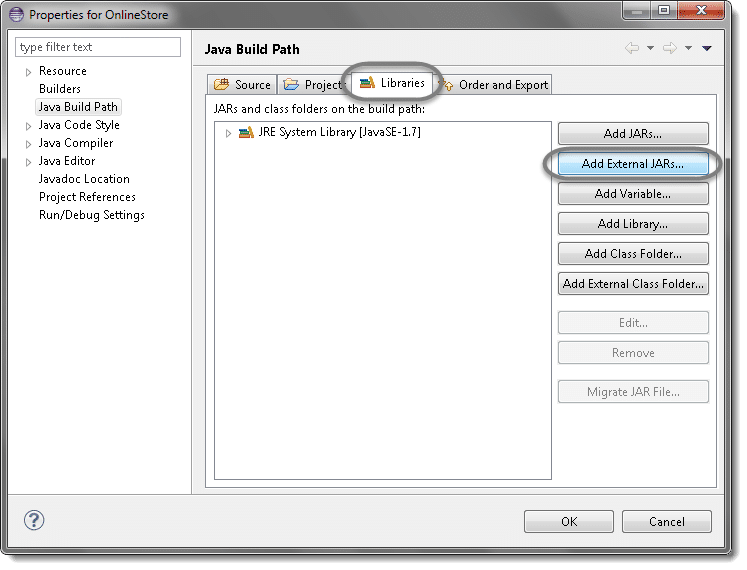
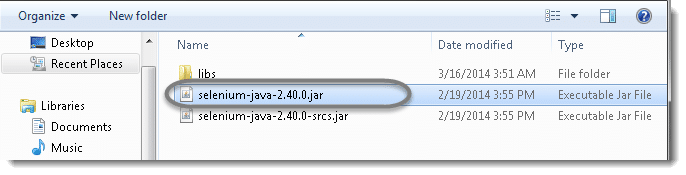
b) Add Selenium Java jar, you may add the source file too.
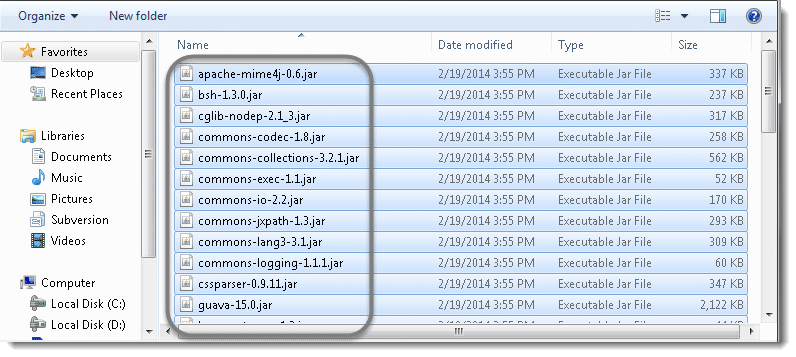
c) Add all the jars from the libs folder as well.
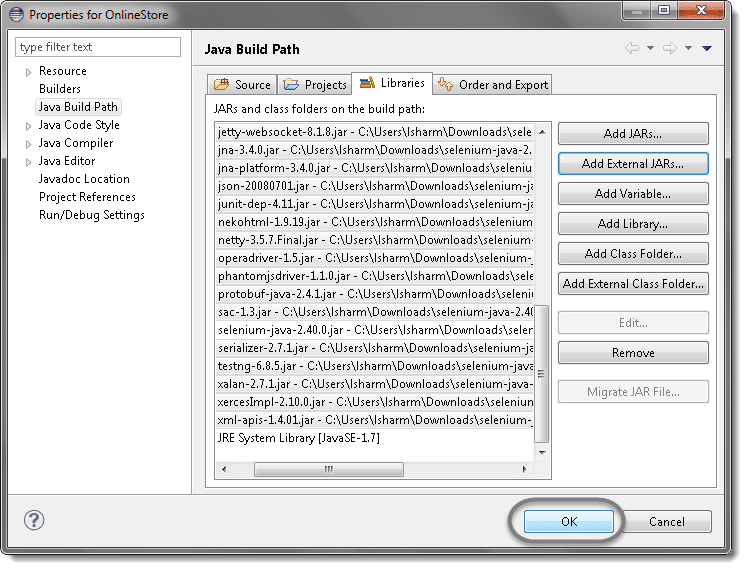
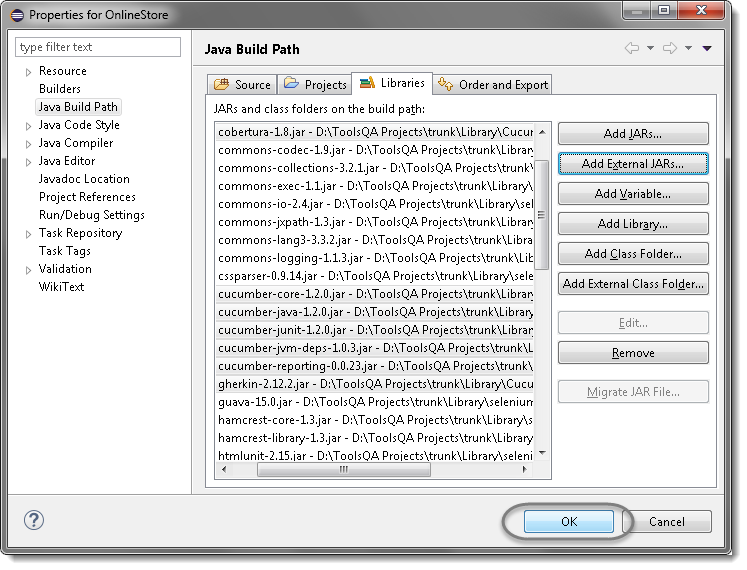
d) Click OK.
Add Cucumber Jars
a) Right click on Project 'OnlineStore' > Select Properties > Java build path**. Then navigate to Libraries tab and click Add External JARs.
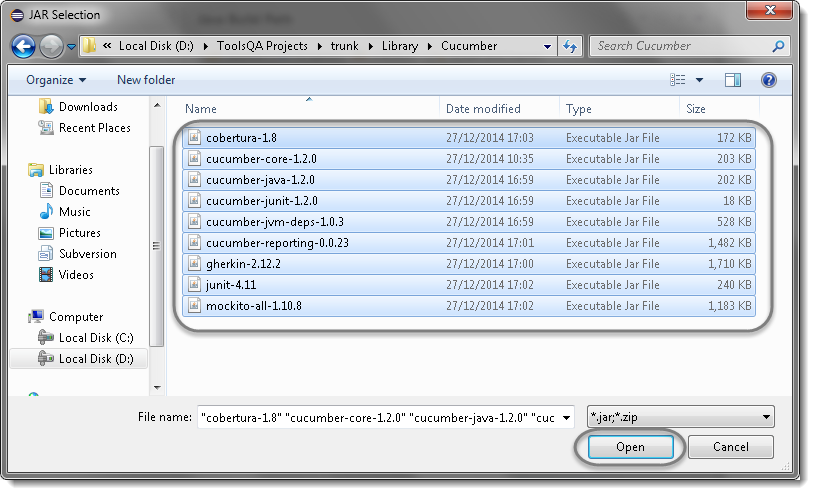
b) Add all the Cucumber's Jars to the project and click Open.
c) Click on Ok.
d) This is how the project looks like in Eclipse as of now.
That's all about configuration of Cucumber & Selenium WebDriver with Eclipse. Now you are ready to write your test script in eclipse.
Conclusion
Configuring Eclipse with Cucumber came down to three steps. First we selected a workspace on start-up — the folder that holds all your Java code, much like My Documents holds your files. Most people need only one, and it can be changed later from File → Switch Workspace. Second we created a Java project, named OnlineStore here because the tutorials that follow practise against the live demo e-commerce site at shop.demoqa.com.
Third, and the step that actually makes the project work, we attached the libraries. Through Right click on project → Properties → Java Build Path → Libraries → Add External JARs, we added the Selenium Java jar along with everything in its libs folder, then repeated the same route for the Cucumber jars downloaded in the previous lesson. Without this, none of the Cucumber or Selenium classes resolve, no matter how correct the feature file is.
That completes the configuration of Cucumber and Selenium WebDriver with Eclipse. The workspace exists, the project exists, and every required jar sits on the build path, so the project is ready for code.
Next, we write the first Cucumber Selenium Java test.