Till now we have understood what Cucumber is and what development model it follows. Now let's try to create first Cucumber Selenium Java test and I assume that you have some basic understanding of Selenium WebDriver and its basic commands.
I hope you have been following the complete tutorial and I expect that by now you have completed the following steps, which are the prerequisite for writing Cucumber Selenium test:
- Download & Install Java
- Download and Install Eclipse
- Install Cucumber Eclipse Plug-in
- Download Cucumber
- Download Selenium WebDriver Client
- Configure Eclipse with Selenium & Cucumber
Create Folder Structure
Before moving head for writing the first script, let's create a nice folder structure of the project.
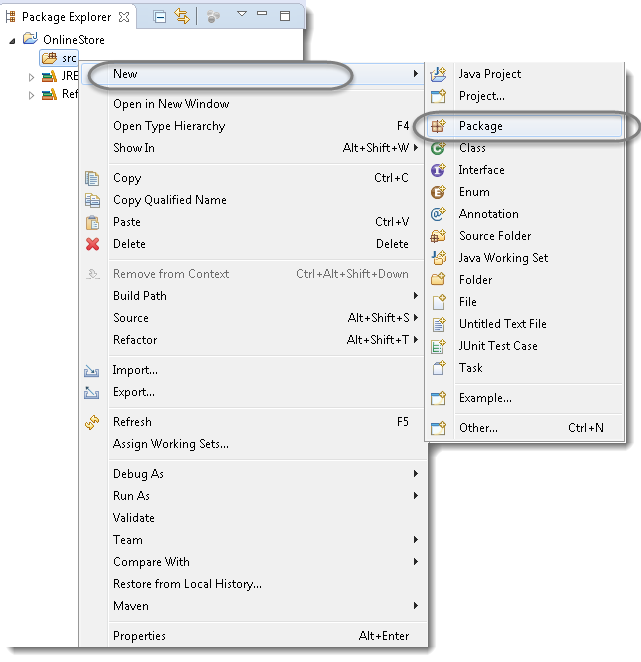
- Create a new Package by right click on the 'src' folder and select New > Package.
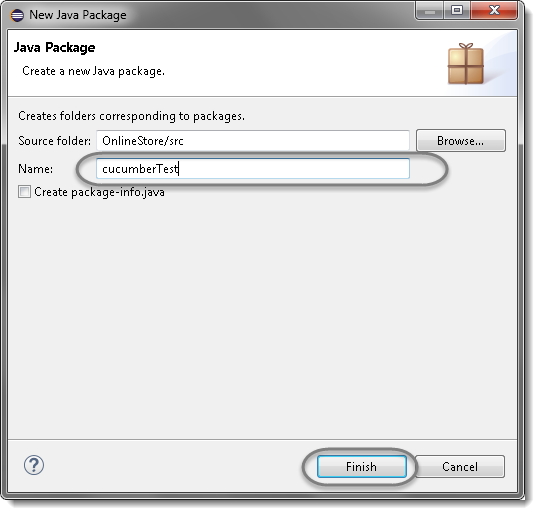
- Name it as ‘cucumberTest’ and click on Finish button.
-
Create another Package and name it as ‘stepDefinition’, by right click on the 'src' folder and select New > Package.
-
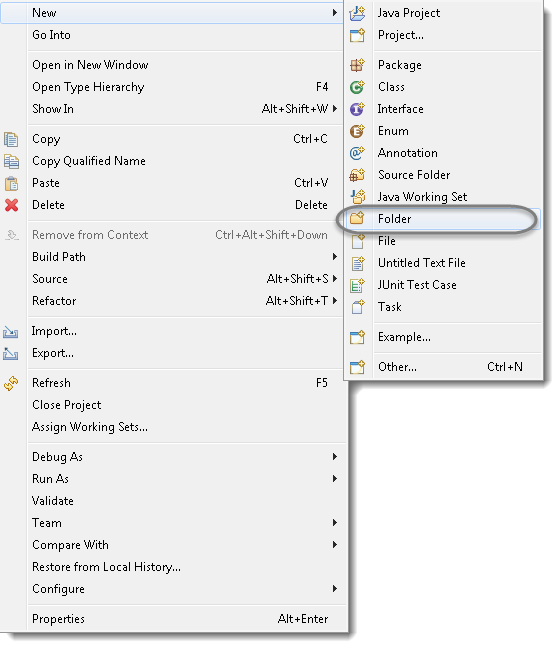
Create a new Folder this time by right click on the project 'OnlineStore' and select New > Folder.
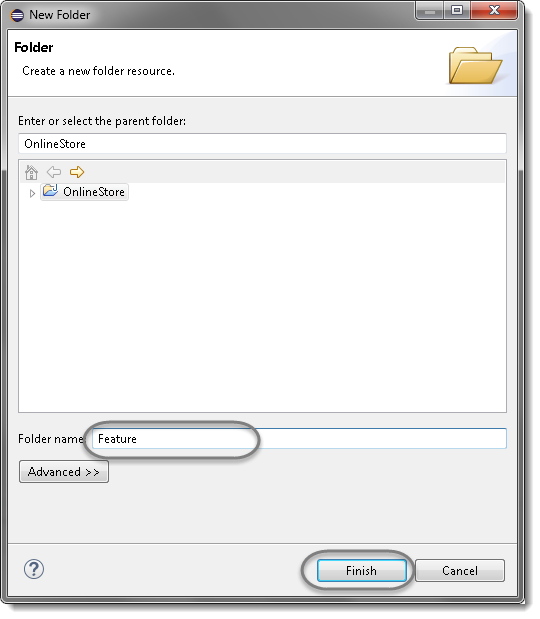
- Name it as ‘Feature’ and click on Finish button.
Selenium Java Test
Lets first write a simple Selenium Test script for LogIn functionality and then convert that script into Cucumber script to understand it better.
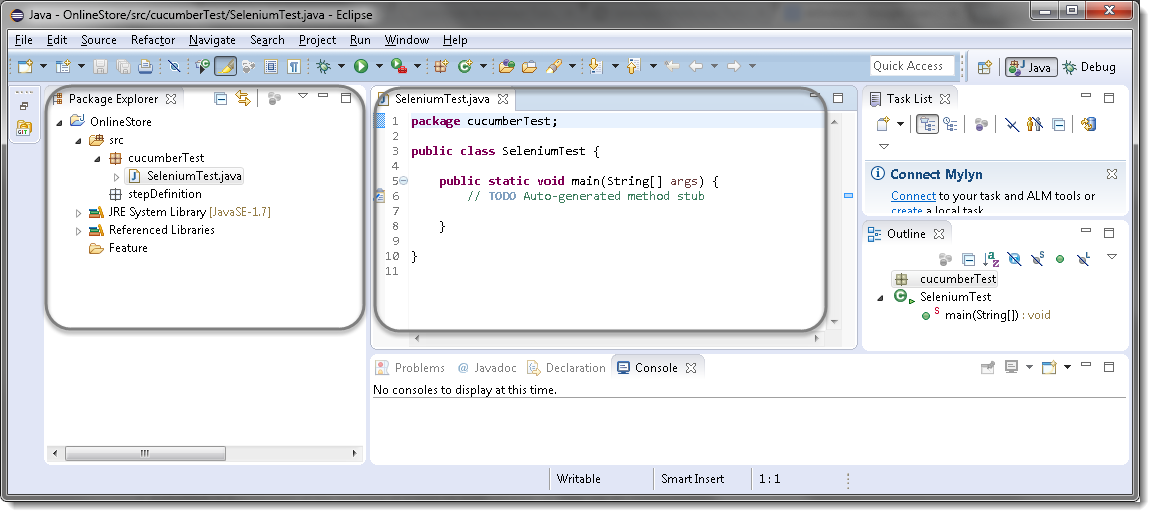
- Create a new Class file in the 'cucumberTest' package and name it as 'SeleniumTest', by right click on the Package and select New > Class. Check the option 'public static void main' and click on Finish button.
Now the Eclipse Window must look like this:
Selenium Test Script
Now write a simple script performing the following steps in Selenium.
- Launch the Browser
- Navigate to Home Page
- Click on the LogIn link
- Enter UserName and Password
- Click on Submit button
- Print a successful message
- LogOut from the application
- Print a successful message
- Close the Browser
Selenium Test Script
package cucumberTest;

import java.util.concurrent.TimeUnit;

import org.openqa.selenium.By;
import org.openqa.selenium.WebDriver;
import org.openqa.selenium.firefox.FirefoxDriver;

public class SeleniumTest {
		private static WebDriver driver = null;
	public static void main(String[] args) {
		// Create a new instance of the Firefox driver

        driver = new FirefoxDriver();

        //Put a Implicit wait, this means that any search for elements on the page could take the time the implicit wait is set for before throwing exception

        driver.manage().timeouts().implicitlyWait(10, TimeUnit.SECONDS);

        //Launch the Online Store Website

        driver.get("https://www.store.demoqa.com");

        // Find the element that's ID attribute is 'account'(My Account)

        driver.findElement(By.xpath(".//*[@id='account']/a")).click();

        // Find the element that's ID attribute is 'log' (Username)

        // Enter Username on the element found by above desc.

        driver.findElement(By.id("log")).sendKeys("testuser_1");

        // Find the element that's ID attribute is 'pwd' (Password)

        // Enter Password on the element found by the above desc.

        driver.findElement(By.id("pwd")).sendKeys("Test@123");

        // Now submit the form. WebDriver will find the form for us from the element

        driver.findElement(By.id("login")).click();

        // Print a Log In message to the screen

        System.out.println("Login Successfully");

        // Find the element that's ID attribute is 'account_logout' (Log Out)

        driver.findElement (By.xpath(".//*[@id='account_logout']/a")).click();

        // Print a Log In message to the screen

        System.out.println("LogOut Successfully");

        // Close the driver

        driver.quit();

	}

}
Note: If the Selenium version is less than 3.0, above test will work for you. If the version is above 3.0, in that case, please look at the chapter How to Use Gecko Driver in Selenium 3
Now, to start the test just select Run > Run As > Java Application Or Right Click on Eclipse code and Click Run As > Java Application. After a few seconds, a Mozilla browser will open and you will see that with the help of your script, Selenium will Launch the Online Store demo application, perform Sign in.
The above Selenium test will be converted into a Cucumber Feature File in the next chapter.
Conclusion
With Java, Eclipse, the Cucumber plugin, the Cucumber jars, and the Selenium WebDriver client all in place, this lesson laid the groundwork for the first Cucumber Selenium Java test. We began with structure: two packages under src, cucumberTest and stepDefinition, plus a Feature folder created directly under the OnlineStore project. Keeping features, step definitions, and test classes separated from the start saves a great deal of rework later.
We then wrote a plain Selenium test rather than jumping straight into Gherkin. The SeleniumTest class launches the browser, applies an implicit wait, opens the Online Store demo application, clicks My Account, enters a username and password, submits the form, prints a success message, logs out, and quits the driver. Running it through Run As → Java Application opens the browser and performs the sign-in.
Starting this way is deliberate. You now have a working script whose behaviour you have seen with your own eyes, which makes the next step far easier to follow: taking exactly these steps and expressing them as readable business language.